Are you tired of not having enough storage space in your home? Have you always wanted a custom cabinet box that perfectly fits your needs and style? Look no further! In this tutorial, we will guide you through the steps on how to make a cabinet box from scratch using simple tools and materials.
Creating a cabinet box is a rewarding woodworking project that allows you to blend functionality with personal craftsmanship. Whether you’re looking to add storage space to your kitchen, bathroom, or any other room, a custom-built cabinet box can be the perfect solution.
This guide will take you through the step-by-step process of making a cabinet box from scratch using basic tools and materials.
What Will You Need?
Before we dive into making a cabinet box, let’s gather all the materials and tools you will need for this project. Here is a list of everything you’ll need:
- Measuring tape
- Pencil
- Table saw or circular saw
- Miter saw
- Jigsaw
- Drill
- Screws
- Wood glue
- Sandpaper
- Plywood sheets (3/4 inch thickness)
- Hardwood boards (1×2 inches)
Once you have gathered all the necessary materials and tools, it’s time to move on to the next step.
10 Easy Steps on How to Make a Cabinet Box
Step 1: Measure and Plan
Accurate measurements are crucial for the success of your cabinet box project. Start by determining the intended location for your cabinet; this will help you decide on the dimensions that best fit the space. For example, measure your height, width, and depth. Once you have these measurements, sketch a simple blueprint that outlines the dimensions of the cabinet box, including the placement of shelves if desired.
It’s also important to consider the type of doors you might want; will they be hinged, sliding, or perhaps something more unique? Develop a clear plan before you proceed to ensure your cabinet box turns out exactly as envisioned. Taking the time to measure and plan diligently will save you from potential mistakes later in the project.
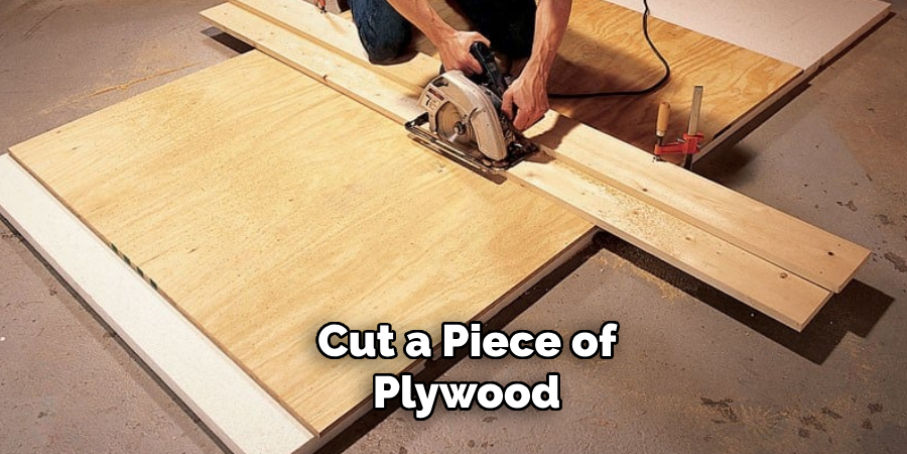
Step 2: Cut the Plywood
With your measurements and blueprint, it’s time to cut the plywood sheets into the necessary pieces for your cabinet box. Using your table saw or circular saw, carefully cut the plywood to match the dimensions you specified in your plan. Depending on your design, you will need a top, bottom, two sides, and potentially a back panel.
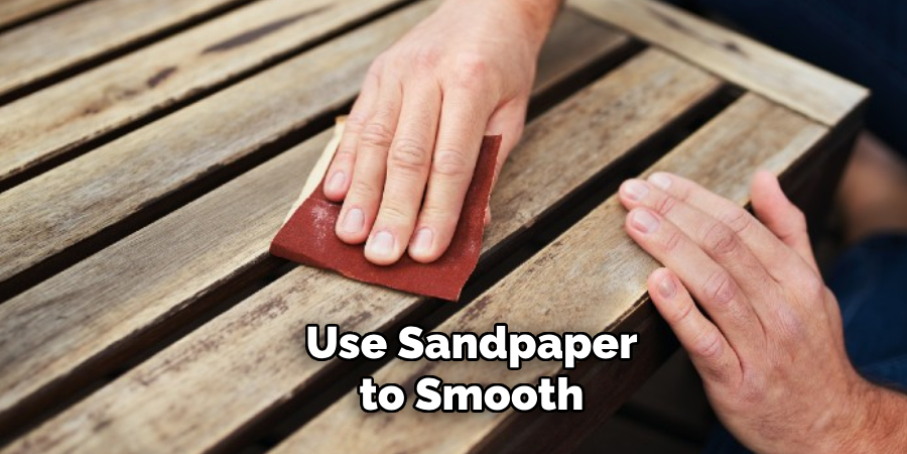
Ensure that each cut is straight and precise, as this will contribute to your cabinet’s overall quality and stability. Once you’ve made all the cuts, use sandpaper to smooth any rough edges, creating a better finish and preventing splinters.
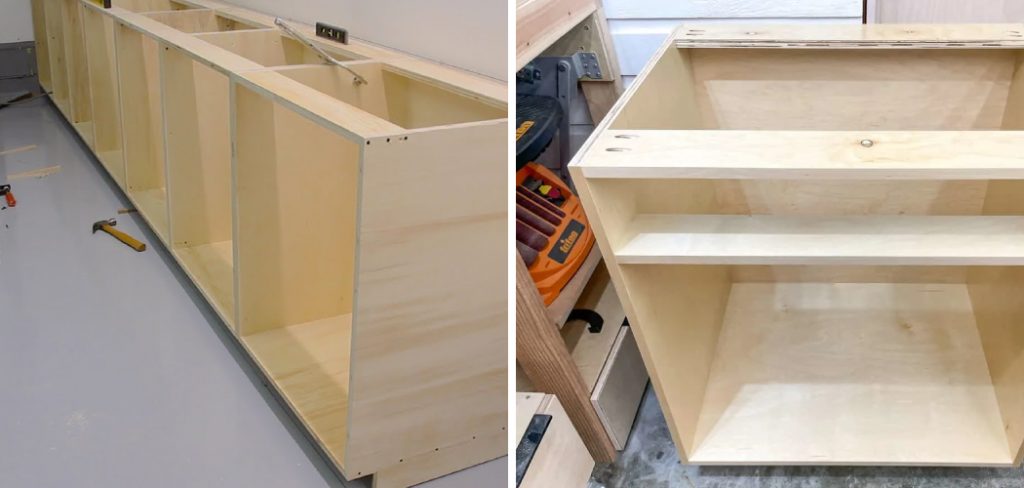
Step 3: Assemble the Cabinet Box
Now that you have all your pieces cut and prepared, it’s time to assemble the cabinet box.
Begin by laying out the top, bottom, and sides to form a rectangular structure. Use wood glue along the edges where the pieces will join, ensuring a solid bond. For additional support, drill screws through the sides into the top and bottom panels. It’s essential to check for squareness by measuring the diagonals of the box; both should be equal.
If everything checks out, allow the glue to dry according to the manufacturer’s instructions before moving on to the next step. This step will establish the basic framework of your cabinet, so take your time to ensure it is sturdy and well-aligned.
Step 4: Add the Back Panel
Once the main structure of your cabinet box is assembled and the glue has dried, it’s time to add the back panel. This step is essential for ensuring the stability and rigidity of your cabinet. If you are using a back panel, measure and cut a piece of plywood that fits snugly into the rear opening of your cabinet box.
Apply wood glue along the edges of the back frame and position the back panel in place. Secure it further by using screws at the corners and along the edges, ensuring it is flush with the sides. This will enhance the overall strength of the cabinet and provide a finished look from the back.
Step 5: Sand and Finish the Cabinet Box
With the back panel securely in place, the next step is to sand the entire cabinet box to achieve a smooth surface.
Begin with a coarser grade of sandpaper to remove any rough spots or imperfections, and gradually move to finer sandpaper for a polished finish. Pay special attention to the corners and edges to ensure they are smooth and even. Once you’re satisfied with the sanding, carefully clean off dust using a tack cloth or damp rag.
After the surface is clean, you can apply your desired finish, paint, stain or a protective varnish. Let the finish dry completely, following the manufacturer’s instructions, as this final touch will enhance the appearance and protect the wood from wear and tear.
Step 6: Install Shelves
Now it’s time to incorporate shelves into your cabinet box if your design includes them. Begin by deciding on the height and spacing for the shelves based on your intended use. Measure and mark the locations for the shelf supports on the inside walls of the cabinet box. Use a level to ensure that your markings are straight.
Cut your hardwood boards to the appropriate length for each shelf and, if desired, pre-drill holes for easy installation. Attach the shelf supports using wood glue and screws, ensuring they are secure. Once the supports are in place, simply slide the shelves in and check for stability. This step adds functionality to your cabinet, allowing you to organize your items effectively.
Step 7: Attach the Doors
With the shelves installed, the next step is to attach the doors to your cabinet box. Start by selecting the type of doors you wish to use—whether hinged or sliding—based on your design. For hinged doors, measure and mark the positions for the hinges on the cabinet frame and the doors themselves. Pre-drill holes to prevent the wood from splitting and then secure the hinges to the cabinet frame.
Once the hinges are attached, hang the doors by aligning them with the hinges and fixing them in place. If you prefer sliding doors, install a track at the top of the cabinet and attach rollers to the doors for smooth movement. Ensure that the doors open and close quickly, and make any necessary adjustments for alignment or fit.
Step 8: Install Hardware
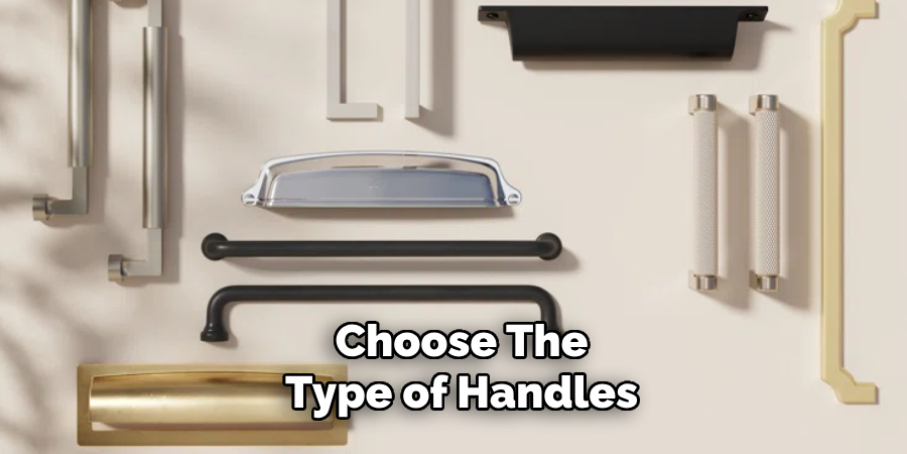
With your doors securely attached, it’s time to add the final touches by installing the hardware. Choose the type of handles or knobs that complement your cabinet’s design and style. To begin, measure and mark the desired locations for each handle or knob, ensuring they are drilled at a consistent height across all doors for a polished look.
Use a drill to create holes for the hardware, being careful to maintain accuracy. Once the holes are prepared, attach the handles or knobs securely using the provided screws.
Step 9: Final Inspection and Touch-Ups
With the hardware installed, conducting a thorough final inspection of your cabinet is crucial. Carefully examine all joints, edges, and surfaces for imperfections or unfinished areas. Check that doors are adequately aligned and open smoothly without obstruction. If you notice any rough spots, utilize sandpaper to smooth them out, then apply touch-up paint or stain as necessary to ensure a cohesive finish.
Take the time to clean any fingerprints or dust from the cabinet’s surface, leaving it looking pristine. Once you are satisfied with the final appearance and function, your DIY cabinet project is complete and ready for use!
Step 10: Place the Cabinet in Position
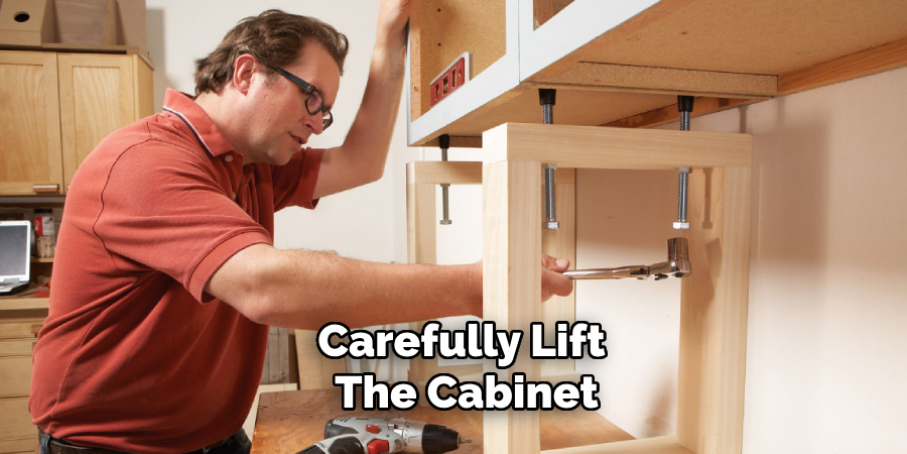
Now that your cabinet is fully assembled and finished, it’s time to move it into its designated location. Carefully lift the cabinet, ensuring that it is adequately supported to avoid any damage. If it is particularly heavy or bulky, consider using furniture sliders or enlist the help of another person to make the task easier and safer.
Once in place, ensure that the cabinet is level. If necessary, adjust its position or use shims under the base until it sits evenly on the floor. Securing the cabinet to the wall with brackets or straps is also advisable, especially if it is tall or subject to tipping.
By following these steps, you can create a customized cabinet that is both functional and visually appealing.
Conclusion
In conclusion, how to make a cabinet box involves a series of methodical steps that ensure both functionality and aesthetics.
Each stage is vital for achieving a durable and attractive finish, from selecting quality materials and assembling the structure to adding essential components like shelves, doors, and hardware. Whether you paint or stain your cabinet, the finishing touches enhance its appearance and protect the wood from daily wear.
By following these detailed instructions, you can take pride in crafting a custom cabinet that effectively meets your storage needs while complementing your home décor.
Enjoy the satisfaction of completing your DIY project, and embrace the newfound functionality your cabinet brings to your space.
About the Author
Adrian Green, a lifelong woodworking enthusiast, shares his passion for the craft through The Woodenify Blog. With a foundation built on years of hands-on experience in his father’s woodworking shop, Adrian is dedicated to helping others learn and grow in the world of DIY woodworking. His approach to woodworking combines creativity, practicality, and a deep appreciation for the art of building with your own hands. Through his blog, he inspires individuals of all skill levels to embark on their own woodworking journeys, creating beautiful, functional pieces of furniture and décor.
Professional Focus
- Specializes in DIY woodworking projects, from furniture to home décor.
- Provides step-by-step guides and practical tutorials for woodworkers of all skill levels.
- Dedicated to helping readers build confidence and skill through easy-to-follow instructions and tips.
- Passionate about fostering a community of makers who can share, learn, and grow together.
Education History
- University of Craft and Design – Bachelor of Fine Arts (BFA) in Woodworking and Furniture Design
- Woodworking Apprenticeships – Extensive hands-on training with skilled craftsmen to refine carpentry and furniture making techniques.
- Online Courses & Masterclasses – Continued education in advanced woodworking techniques, design principles, and specialized tools
Expertise:
- DIY woodworking, carpentry, furniture making, and home décor projects.
- Creating accessible tutorials and guides for beginner to advanced woodworkers.
- Sharing the joys and satisfaction of woodworking, from raw materials to finished products.