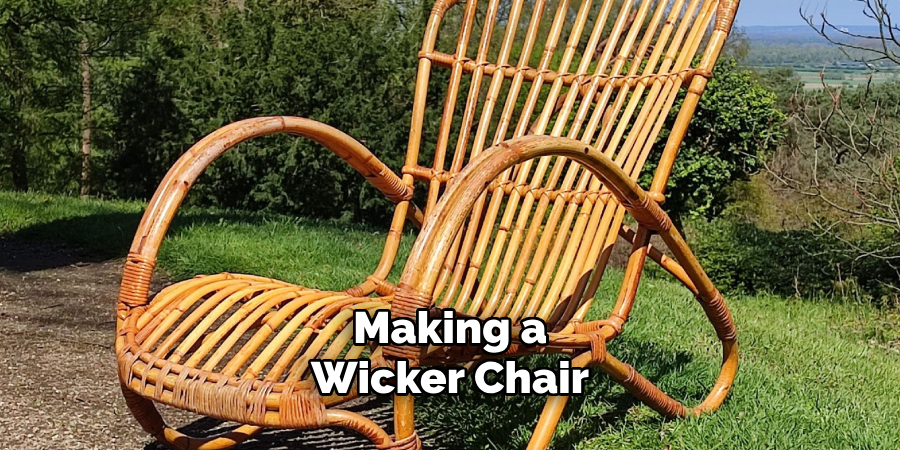
Making a wicker chair is a rewarding project that combines craftsmanship and creativity. Whether you’re an experienced artisan or a beginner looking for a new hobby, crafting a wicker chair allows you to create a durable and elegant piece of furniture.
This guide on how to make a wicker chair will take you step-by-step through the process, from gathering materials to weaving the final details, ensuring you end up with a chair that is both functional and beautiful.
Why Choose Wicker?
Wicker is a material that has been used for centuries to create furniture and household items. It is made from weaving natural materials such as bamboo, rattan, or willow together to form a sturdy and flexible structure. The resulting furniture pieces are lightweight, durable, and have a timeless aesthetic.
In addition to its practical benefits, wicker also offers endless design possibilities. With different weaving techniques and a variety of materials available, you can create unique designs that reflect your personal style.
Needed Materials
Before you can start making your wicker chair, you will need to gather some materials. These may vary depending on the design and size of the chair, but here are some basic items you will need:
Wicker Material (Bamboo, Rattan, or Willow):
- These are the primary materials used for wicker furniture. Bamboo is a sturdy and lightweight option, while rattan offers flexibility and willow has a natural rustic look.
Wood for Frame:
- The frame of your chair can be made from different types of wood such as pine, oak, or cedar. Choose a strong and durable wood that will support the weight of the person sitting on it.
Saw:
- You will need a saw to cut the wood pieces to the appropriate size for your chair’s frame.

Drill:
- A drill with various-sized bits will be necessary to make holes in the wooden frame to attach the wicker material.
Measuring Tape:
- You will need this to measure and cut the wood to the correct sizes for your chair.
Wicker Cutter:
- This tool is used to cut the wicker material into smaller strips for weaving.
Clamps:
- These will be helpful in holding the wooden frame together during assembly.
8 Step-by-step Guides on How to Make a Wicker Chair
Step 1: Design Your Chair
Before you begin building your wicker chair, it’s important to plan out its design. Consider the style, size, and intended use of the chair. Will it be a simple chair for indoor use or a larger, more decorative piece for your patio? Sketch out a design, taking note of details like the height of the backrest, the size of the seat, and the placement of armrests, if any.
This is also the stage to determine the pattern you want to use for the wicker weaving. Having a detailed plan will guide you through the process and ensure your chair meets your needs and aesthetic preferences.
Step 2: Prepare the Wooden Frame
Once you have finalized the design of your wicker chair, the next step is to prepare the wooden frame. Start by measuring and cutting the wood according to the dimensions outlined in your plan. Use the saw to make precise cuts, ensuring all the pieces fit together properly. Smooth the edges with sandpaper to remove splinters and achieve a clean finish.

Next, assemble the frame by connecting the wood pieces using screws or nails. A drill will come in handy for pre-drilling holes to avoid splitting the wood. Use clamps to hold the pieces in place as you join them together, ensuring the frame remains stable during the process. Double-check all joints for sturdiness, as the frame will serve as the foundation for the wicker weaving. Once the frame is secure, you are ready to move on to the weaving stage.
Step 3: Soak the Wicker Material
Before you can start weaving, the wicker material needs to be soaked in water to make it more pliable. This will prevent the material from breaking while being woven into the frame. Depending on the material used, soaking may take anywhere from a few minutes to a couple of hours. Follow the instructions for your specific material and avoid over-soaking, as this can cause mold or mildew growth.
You can also use a steamer to soften the wicker material, but soaking is typically the most common method.
Step 4: Begin Weaving on the Seat
With the wicker material softened and ready to use, it’s time to start weaving the seat of your chair. Begin by attaching one end of the wicker strip to the frame of the seat using small nail staples or by threading it through pre-drilled holes, depending on your design. Make sure the strip is securely fastened to prevent it from coming loose during the weaving process.

Start weaving horizontally or vertically, pulling the wicker material tightly as you go to maintain a firm and even weave. Alternate the strips by going over and under the frame, creating a crisscross pattern. This classic pattern is not only sturdy but also visually appealing. Continue adding strips in the same manner, making sure the weave remains consistent across the entire seat surface. Once you reach the end of a strip, simply overlap it with the next one and continue weaving.
Step 5: Add Backrest Support
To provide support for the backrest, attach two vertical strips of wicker on both sides of the chair frame using the same technique as in step 4. These will serve as the vertical support for your backrest weaving.
Next, weave horizontal strips between these two vertical supports, creating a lattice pattern. Be sure to keep each strip tight and evenly spaced for a smooth finish. You can also add extra strips or weave a different pattern for extra support or aesthetic appeal.
Step 6: Weave Armrests (Optional)
If your chair design includes armrests, follow the same process as in step 4 to weave them onto the frame. You can choose to use a different pattern or material for the armrests to add visual interest and contrast to your wicker chair.
It’s also a good idea to add support underneath the armrests for extra stability, especially if they will be frequently used.
Step 7: Finishing Touches
Once you have completed weaving all the desired parts of your wicker chair, take a step back and assess its overall appearance. Trim any excess wicker material that may be sticking out or unevenly woven strips to achieve a clean and polished look.
You can also add decorative elements like cushions or pillows to enhance the comfort and style of your chair. Consider adding a clear sealant to protect the wood and wicker from damage caused by moisture or sun exposure if using your chair outdoors.
Step 8: Enjoy Your Handmade Wicker Chair!
Congratulations, you have successfully made your own wicker chair! Sit back and relax in your new creation, knowing that you handcrafted it. With the right tools and techniques, making a wicker chair can be a fun and rewarding DIY project for any skill level.
Get creative with different patterns, materials, and designs to make a unique piece that reflects your personal style. Don’t forget to share your masterpiece with family and friends – they will surely be impressed by your skills! Keep on exploring more DIY projects and honing your crafting abilities. Thanks for reading this article on how to make a wicker chair.
Frequently Asked Questions
Q1: Is it Difficult to Make a Wicker Chair?
A: Making a wicker chair requires some basic woodworking skills and patience, but it is not overly difficult. With the right tools and step-by-step instructions, anyone can create their own wicker chair.
Q2: What Material is Best for Wicker Weaving?
A: The most common materials used for wicker weaving are rattan, cane, and bamboo. Each material has its own unique characteristics and can be chosen based on personal preference or availability. However, it’s important to ensure that the material is strong and pliable enough to withstand the weaving process.
Q3: Can I Use Any Type of Wood for the Frame of My Wicker Chair?
A: It is recommended to use a sturdy wood like oak or maple for the frame of your wicker chair. Softer woods may not provide enough support for the weight and tension of the woven material. Additionally, make sure to use untreated wood or seal it properly if using your chair outdoors to prevent damage from moisture.
Q4: How Long Does It Take to Make a Wicker Chair?
A: The time it takes to make a wicker chair will vary depending on the complexity of the design and the weaver’s skill level. On average, it can take anywhere from a few hours to multiple days to complete a wicker chair. Patience and attention to detail are key in creating a well-made piece. Remember, enjoy the process and have fun with it!
Conclusion
In conclusion, creating your own wicker chair DIY project is a rewarding and creative way to add a personalized touch to your home while embracing the art of craftsmanship. Crafting a wicker chair is a fulfilling and creative endeavor that combines functionality with artistry. By following the step-by-step guide on how to make a wicker chair, you can transform raw materials into a beautiful and durable piece of furniture. Whether you’re a beginner or an experienced DIY enthusiast, making a wicker chair allows you to explore your craftsmanship while creating something truly unique.
With practice, you can experiment with new designs, patterns, and materials to elevate your skills. Most importantly, enjoy the process and take pride in the result—a handmade chair that is both practical and a testament to your creativity!
About the Author
Adrian Green, a lifelong woodworking enthusiast, shares his passion for the craft through The Woodenify Blog. With a foundation built on years of hands-on experience in his father’s woodworking shop, Adrian is dedicated to helping others learn and grow in the world of DIY woodworking. His approach to woodworking combines creativity, practicality, and a deep appreciation for the art of building with your own hands. Through his blog, he inspires individuals of all skill levels to embark on their own woodworking journeys, creating beautiful, functional pieces of furniture and décor.
Professional Focus
- Specializes in DIY woodworking projects, from furniture to home décor.
- Provides step-by-step guides and practical tutorials for woodworkers of all skill levels.
- Dedicated to helping readers build confidence and skill through easy-to-follow instructions and tips.
- Passionate about fostering a community of makers who can share, learn, and grow together.
Education History
- University of Craft and Design – Bachelor of Fine Arts (BFA) in Woodworking and Furniture Design
- Woodworking Apprenticeships – Extensive hands-on training with skilled craftsmen to refine carpentry and furniture making techniques.
- Online Courses & Masterclasses – Continued education in advanced woodworking techniques, design principles, and specialized tools
Expertise:
- DIY woodworking, carpentry, furniture making, and home décor projects.
- Creating accessible tutorials and guides for beginner to advanced woodworkers.
- Sharing the joys and satisfaction of woodworking, from raw materials to finished products.