Are you looking to give your home a rustic, natural feel? One way to achieve this is by installing a wood wall. It can add warmth and character to any room in your house.

How to make a wood wall can transform a room by adding warmth, texture, and a touch of nature to your interior space. This DIY project is not only a way to enhance the aesthetic appeal of your home, but it’s also an opportunity to engage in a fulfilling and creative activity. Whether you want to install a wood accent wall in your living room, bedroom, or office, the process involves selecting the right type of wood, preparing the surface, and carefully attaching the wood panels to your wall.
With some basic tools, a bit of planning, and a creative mindset, you can create a stunning wood wall that reflects your personal style in your home.
What are the Benefits of a Wood Wall?
Aside from the aesthetic appeal, there are numerous benefits to installing a wood wall in your home. One major advantage is its durability. Wood is a strong and long-lasting material that can withstand wear and tear, making it an ideal choice for high-traffic areas such as living rooms or hallways.
Another benefit is its versatility. With various types of wood, colors, and finishes available, you can easily find the perfect fit for your home’s style.
Moreover, wood walls are also great for insulation. They provide natural insulation that can help regulate a room’s temperature and reduce energy costs.
Lastly, wood walls are environmentally friendly. Unlike other building materials, wood is renewable and sustainable, making it an eco-friendly choice for your home.
What Will You Need?
Before you start, gather all the materials and tools that you will need for this project. Depending on the type of wood wall design you choose, your list may vary. However, here are some general items that most wood wall projects require:
- Wood panels or planks (reclaimed or new)
- Measuring tape
- Pencil
- Level
- Saw (circular saw, table saw, miter saw)
- Nails or screws
- Hammer or drill
- Stud finder
- Wood glue
- Sandpaper
- Paint or stain (optional)
It’s also important to have appropriate safety gear, such as gloves and eye protection. Additionally, if you plan to install a large wood wall, having a partner to assist you with the project may be helpful.
10 Easy Steps on How to Make a Wood Wall
Step 1. Choose Your Wood:
The first step in creating a wood wall is selecting the type of wood you want to use. Consider the color, texture, and grain pattern that will best fit your room’s decor. Reclaimed wood can provide a rustic look, while new wood may offer a more polished finish. Measure the area of the wall to determine how much wood you will need.

Step 2. Prepare the Wall:
Before attaching any wood to the wall, it’s essential to prepare the surface. Start by cleaning the wall thoroughly to remove any dirt and debris. If you’re working with a painted wall, lightly sanding the surface can help the wood adhesive bond more effectively. Additionally, a stud finder can be used to locate the studs in the wall. Marking the studs will guide you where to secure the wood panels or planks, ensuring they are firmly attached to the wall.
Step 3. Measure and Cut the Wood:
Once your wall is prepared, the next step is to measure and cut your wood panels or planks to the appropriate lengths. Using your measuring tape, determine the height and width you want each piece of wood to be, keeping in mind the overall design you’re aiming for. If you’re planning a horizontal wood wall, you’ll be cutting your wood to fit the width of the wall. For a vertical installation, you’ll need to cut pieces that match the height of your space.
With your dimensions in hand, use a pencil to mark where each cut will be made on the wood. When cutting, a saw is your best tool for the job. A miter saw is excellent for making precise cuts, a circular saw is suitable for straight lines across longer pieces, and a table saw can be useful for ripping boards down to the right width.
Always wear safety glasses and follow proper safety procedures when handling saws and cutting wood. After cutting, you might find that some edges are rough or splintered; use sandpaper to smooth these out. This step not only ensures a cleaner look but also prevents splinters and makes the wood safer to handle and install.
Step 4. Arrange Your Wood:
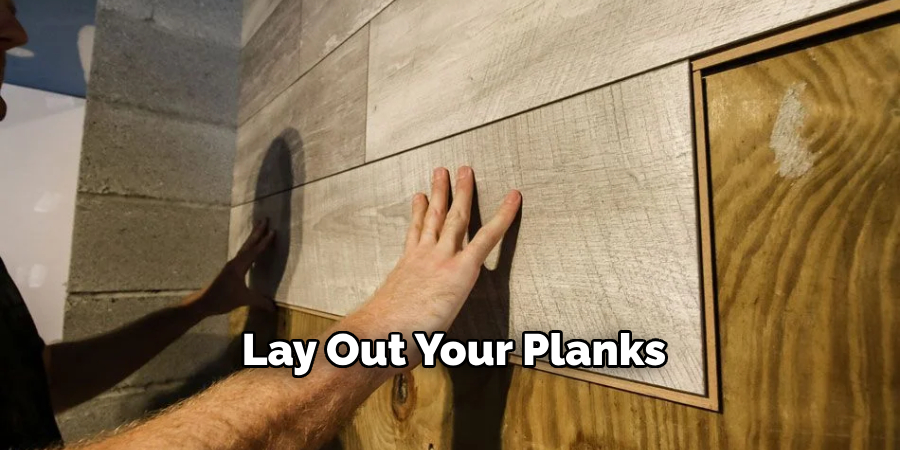
Before attaching the wood to the wall, it’s advisable to lay out your planks or panels on the floor. This arrangement allows you to visualize how the patterns, colors, and textures will come together on the wall. During this step, you can decide on the placement of each piece, ensuring the variation in wood grain and color is distributed evenly.
If your design is more random, this step helps to prevent repetitive patterns that might detract from the overall aesthetic. Taking the time to arrange your wood also gives you the opportunity to make any necessary adjustments before the pieces are permanently affixed to the wall.
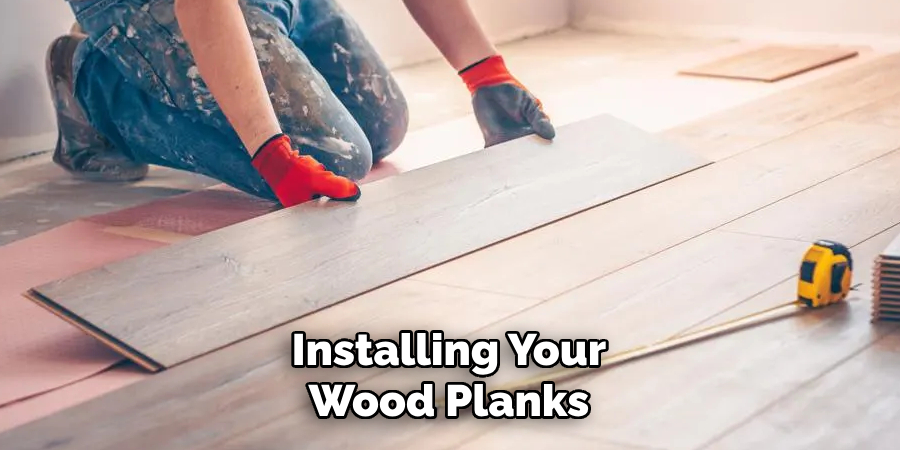
Step 5. Apply Adhesive and Attach Wood to the Wall:
After finalizing your layout, start by applying a strong wood adhesive to the back of your first plank or panel. If you’re using nails or screws, this is the time to drill pilot holes to prevent the wood from splitting. Align the wood with your marked lines on the wall or with the edge of the wall to ensure it’s straight. If you’re working from the bottom up or side to side, use a level to check that each piece is even before firmly pressing it into place.
Secure the wood to the wall with nails or screws, making sure to drill into the studs for added stability. Continue this process, piece by piece, checking the alignment as you go to create a seamless and attractive wood wall. Remember, the adhesive needs time to cure, so avoid applying too much pressure on the newly attached pieces for a few hours.
Step 6. Fill in Nail or Screw Holes:
After all the wood pieces are securely attached to the wall, the next step is to address any visible nail or screw holes. Using wood filler that matches the color of your wood, fill in the holes and allow it to dry according to the product’s instructions. Once dry, sand over the filled areas until smooth. This step is critical for achieving a polished look, as it helps to camouflage the means of attachment, making the wood wall appear seamless.
Step 7. Sand the Entire Wall:

Once all the panels or planks are in place and the filler has dried, it’s time to sand the entire wall lightly. This process not only smooths out the filled holes but also ensures that the entire surface is even and ready for finishing. Use fine-grit sandpaper to avoid damaging the wood’s surface. Pay special attention to edges and seams, smoothing out any rough areas. This step is crucial for preparing the wood wall for staining or painting, as it helps the finish adhere better and results in a smoother, more professional appearance.
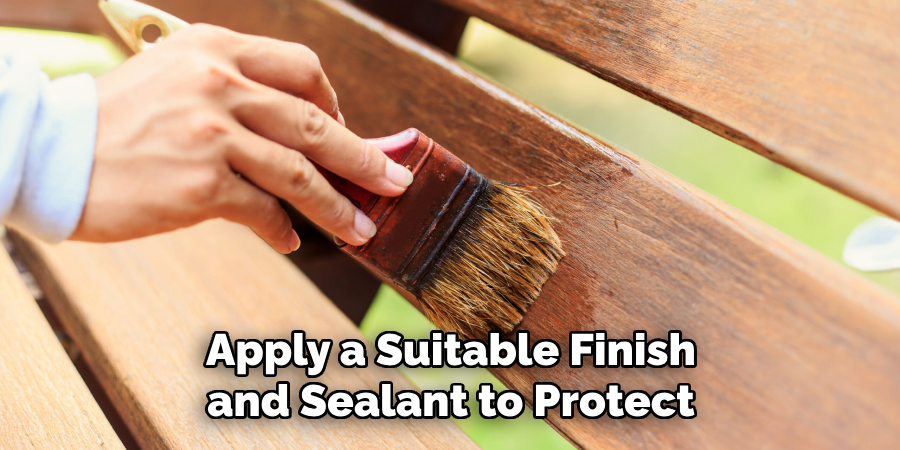
Step 8. Apply Finish:
After the sanding is complete, the next step is to apply a finish to your wood wall. This could be a stain, sealant, or paint, depending on the look you desire. Staining can enhance the natural beauty of the wood, bringing out its grain and texture. At the same time, painting allows for a more uniform or bold coloration that can dramatically alter the room’s appearance.
When selecting a finish, consider the room’s lighting and how it will affect the color and sheen of the wood. Apply the finish according to the manufacturer’s instructions, using a brush or roller for an even coat. It’s often beneficial to apply multiple thin coats, allowing sufficient drying time between each, to achieve the best results. After the final coat has dried completely, inspect the wall for any missed spots or uneven areas, touching up as necessary to ensure a consistent and professional look.
Step 9. Install Trim and Finishing Touches:
The final step in your wood wall project involves installing trim and adding any finishing touches that will complete the look. Start by measuring and cutting trim pieces for the top, bottom, and sides of your wall. This trim can help frame your wood wall and give it a polished, professional appearance.
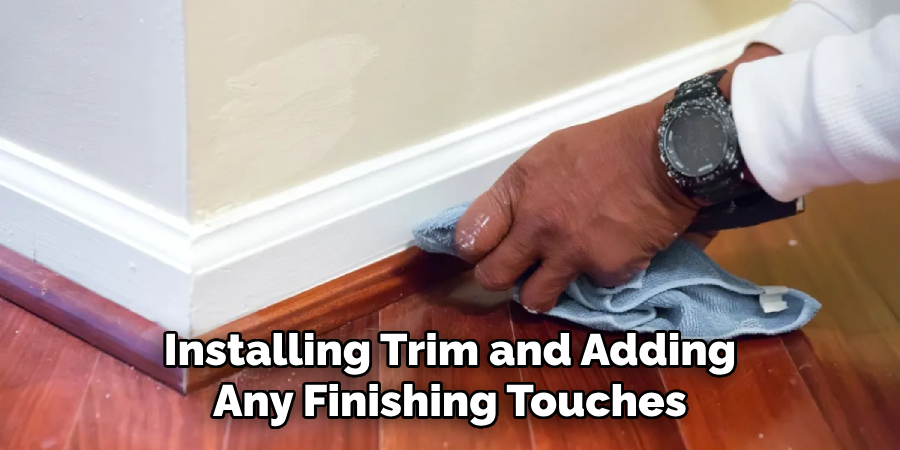
When cutting trim, be sure to account for mitered corners so that each piece fits together perfectly. Use wood adhesive and nails to secure the trim in place, filling in any nail holes with wood filler and sanding them smooth once dry.
If desired, you can also apply the same finish used on your wood wall to the trim for a cohesive look. Lastly, inspect your wall and trim, touching up any paint or stain as necessary. With the trim installed and all details completed, your wood wall is now a striking feature of your space, bringing warmth, texture, and a custom aesthetic to the room.
Step 10. Maintenance and Care:
Maintaining your newly installed wood wall will ensure its beauty and longevity for years to come. Regular dusting with a soft, dry cloth can prevent dust build-up that might dull the wood’s appearance.
For more thorough cleaning, use a damp cloth with a mild wood cleaner, avoiding harsh chemicals or abrasive materials that could damage the finish. Inspect your wood wall periodically for signs of wear or damage, such as chipping, cracking, or warping. If the wood is sealed, consider reapplying a coat of sealant every few years to protect against moisture and wear.
By following these steps, you can successfully install a wood wall in your home or space. With careful planning, proper materials and tools, and attention to detail, you can create a unique and stunning feature that will enhance the overall look of the room.
5 Additional Tips and Tricks
- Choose the Right Wood: Not all wood is created equal, especially when it comes to installing a wood wall. Consider the wood’s durability, grain pattern, and color. Softwoods like pine are affordable and easy to work with, while hardwoods like oak offer a more robust and distinctive grain. Reclaimed wood can add character and history to your wall but requires more preparation.
- Consider the Room’s Humidity: Wood expands and contracts with changes in moisture. In high-humidity areas, leave small gaps between the planks during installation to accommodate this expansion. This will prevent warping and maintain the integrity of your wood wall over time.
- Use a Staggered Pattern for Visual Interest: When installing your wood planks, vary the lengths and avoid aligning the seams across the wall. This staggered pattern not only adds to the wall’s aesthetic appeal but also strengthens the overall structure.
- Test Stain and Paint Colors: Before applying your chosen finish to the entire wall, test it on a small section or a spare piece of wood. This allows you to see how the color interacts with the wood’s natural grain and the room’s lighting, ensuring you achieve the desired result.
- Incorporate LED Lighting: Adding LED strip lighting behind or along the edges of your wood wall can create a modern and warm ambiance. This is particularly effective in highlighting the texture and depth of the wood, transforming your wall into a dynamic feature of the room.
With these additional tips and tricks, you can take your wood wall installation to the next level, creating a stunning and unique focal point in any space.
5 Things You Should Avoid
- Ignoring the Quality of Wood: Selecting low-quality or inappropriate wood types for your project can lead to issues like warping, rotting, and an overall disappointing finish. Ensure you choose durable, high-quality wood suited to your climate and the wall’s purpose.
- Skipping Proper Wall Preparation: Failing to properly prepare the wall behind your wood planks can cause problems down the line. Ensure the wall is clean, dry, and free of any damage. Skipping this step can result in uneven installation and potential damage to both your wall and the wood.
- Neglecting to Acclimate the Wood: The wood needs to adjust to the humidity and temperature of its new environment to prevent expansion or contraction post-installation. Not allowing your wood to acclimate can lead to gaps and misalignments in your wall.
- Inadequate Sealing or Finishing: Without proper sealing or finishing, wood walls are vulnerable to moisture, staining, and wear. Ensure you apply a suitable finish and sealant to protect the wood and keep it looking beautiful for years to come.
- Lack of Planning for Expansion: Wood naturally expands and contracts with temperature and humidity changes. Failing to plan for this movement by not leaving small gaps for expansion can cause your wall to warp or crack over time.
By avoiding these common mistakes, you can ensure a successful and long-lasting wood wall installation.
5 Different Ways to Use a Wood Wall
- Create a Focal Point in a Living Room: A wood wall can add warmth and texture to your living room, turning it into a cozy and inviting space. Install the wall behind your couch or TV unit for maximum impact.
- Add Depth and Character to a Bedroom: Incorporate a wood wall into your bedroom design to create a rustic and natural ambiance. Use weathered or reclaimed wood for added character and a sense of history.
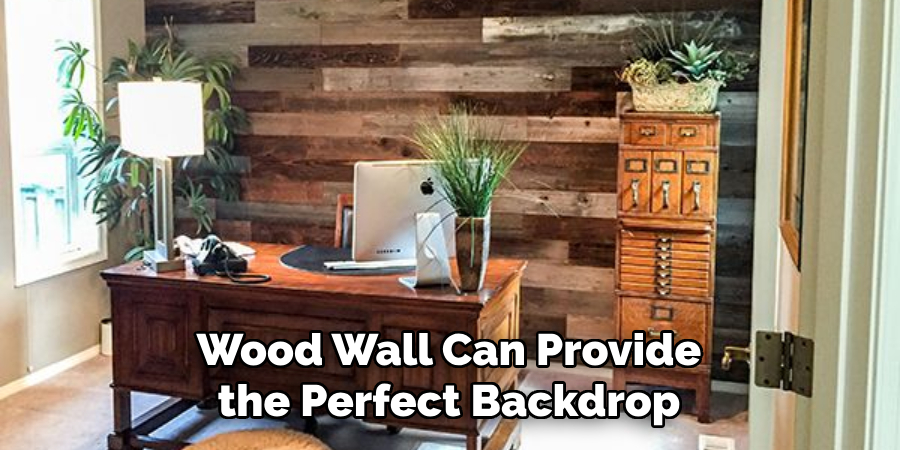
- Enhance a Dining Room’s Charm: A wood wall can provide the perfect backdrop for your dining area, adding warmth and depth to any mealtime gathering. Consider installing shelves or artwork on the wall to further enhance its impact.
- Make a Statement in an Office or Workspace: Whether you work from home or have a designated office space, a wood wall can add character and sophistication to the room. Use a darker wood for a more masculine feel or lighter tones for a clean and modern look.
- Add Interest to Hallways and Entryways: Often overlooked, hallways and entryways are ideal spaces to incorporate a wood wall. It can provide a warm and welcoming entrance to your home, or add interest and dimension to an otherwise plain hallway.
By thinking outside the box and using a wood wall in different ways, you can create a unique and versatile feature that adds value to any room.
Conclusion
How to make a wood wall is an enriching project that not only enhances the aesthetic appeal of a space but also adds warmth and character to any room. From selecting the right type of wood to considering the room’s humidity and ensuring proper preparation and finishing, each step is crucial for a successful installation.
By following the detailed guidance provided, including tips and tricks and common pitfalls to avoid, anyone can embark on this DIY endeavor with confidence. Whether it’s making a living room cozy, adding depth to a bedroom, or transforming an office space, a wood wall serves as a versatile and striking feature.
Remember, the key to a beautiful and lasting wood wall lies in meticulous planning, quality materials, and thoughtful execution. With patience and creativity, you can create a stunning wood wall that reflects your personal style and enhances the beauty of your home for years to come.
About the Author
Adrian Green, a lifelong woodworking enthusiast, shares his passion for the craft through The Woodenify Blog. With a foundation built on years of hands-on experience in his father’s woodworking shop, Adrian is dedicated to helping others learn and grow in the world of DIY woodworking. His approach to woodworking combines creativity, practicality, and a deep appreciation for the art of building with your own hands. Through his blog, he inspires individuals of all skill levels to embark on their own woodworking journeys, creating beautiful, functional pieces of furniture and décor.
Professional Focus
- Specializes in DIY woodworking projects, from furniture to home décor.
- Provides step-by-step guides and practical tutorials for woodworkers of all skill levels.
- Dedicated to helping readers build confidence and skill through easy-to-follow instructions and tips.
- Passionate about fostering a community of makers who can share, learn, and grow together.
Education History
- University of Craft and Design – Bachelor of Fine Arts (BFA) in Woodworking and Furniture Design
- Woodworking Apprenticeships – Extensive hands-on training with skilled craftsmen to refine carpentry and furniture making techniques.
- Online Courses & Masterclasses – Continued education in advanced woodworking techniques, design principles, and specialized tools
Expertise:
- DIY woodworking, carpentry, furniture making, and home décor projects.
- Creating accessible tutorials and guides for beginner to advanced woodworkers.
- Sharing the joys and satisfaction of woodworking, from raw materials to finished products.