Are you an avid reader and love collecting books? Do you find it challenging to keep your books organized and easily accessible? A wooden book stand is the perfect solution for you! It adds a touch of elegance to your room and helps keep your books in place.
How to make a wooden book stand is a rewarding project that combines functionality with craftsmanship. Whether you’re looking for a practical way to hold your favorite books or a decorative piece for your home, a handmade wooden book stand can be both stylish and durable. This project is perfect for beginners and seasoned woodworkers, requiring only a few basic tools and materials.
By following simple steps and adding your personal touches, you can craft a unique and valuable accessory that reflects your creativity and woodworking skills.

What Are the Benefits of Making a Wooden Book Stand?
As mentioned earlier, a wooden book stand offers both practical and aesthetic benefits. Let’s take a closer look at some of the advantages of making your own book stand:
- Customizability: When you make something by hand, you can customize it according to your preferences. From choosing the type of wood to adding personal touches like engravings or paint, you can create a one-of-a-kind book stand that suits your style.
- Durability: Wooden book stands are sturdy and long-lasting, ideal for holding heavy books without worrying about wear and tear. By using quality materials and proper construction techniques, you can ensure that your book stand will withstand the test of time.
- Versatility: A wooden book stand can serve multiple purposes, from holding books to displaying artwork or acting as a tablet or cookbook holder. Its versatility makes it a practical addition to any room in your house.
- Cost-effective: Making your own wooden book stand is more cost-effective than buying one from a store. You can save money by using materials you already have at home or choosing affordable wood options.
What Will You Need?
To make a wooden book stand, you will need the following materials:
- Wood: The type of wood you choose will depend on your budget and personal preferences. Some popular options include pine, oak, and maple.
- Saw: A saw will be used to cut the wood to the desired size for your book stand. Depending on the thickness of the wood, you can use a handsaw or a power saw.
- Sandpaper: Sandpaper is essential for smoothing rough edges and creating a polished finish on your book stand.
- Wood Glue: You will need wood glue to hold the pieces of wood together securely.
- Clamps: Clamps are necessary for holding the glued pieces of wood in place while they dry.
- Finishing Materials: You can paint, stain, or varnish your book stand depending on your preference. If you opt for a natural wood finish, you will need wood oil or wax to protect and enhance the beauty of the wood.
- Measuring Tools: A ruler or measuring tape will help you accurately measure and cut the wood pieces to the desired size.
Once you have gathered all the materials, you can begin making your wooden book stand!

8 Easy Steps on How to Make a Wooden Book Stand
Step 1: Measure and Cut the Wood
Using your measuring tools, measure the dimensions for the base, backrest, and any additional parts of your book stand. Typically, the backrest should be slightly taller than the base to support books properly. Once measured, carefully cut the wood pieces to the desired sizes using a handsaw or power saw. Ensure that all the pieces are uniform to maintain stability and alignment.
Step 2: Sand the Wood Pieces
After cutting the wood to the desired sizes, use sandpaper to smooth all the edges and surfaces. This will help remove any splinters and prepare the wood for a clean finish.
Start with coarse-grit sandpaper to shape and level the edges, then switch to fine-grit sandpaper for a smoother surface. Proper sanding ensures that the book stand will have a polished appearance and prevents rough edges from causing any damage to books.
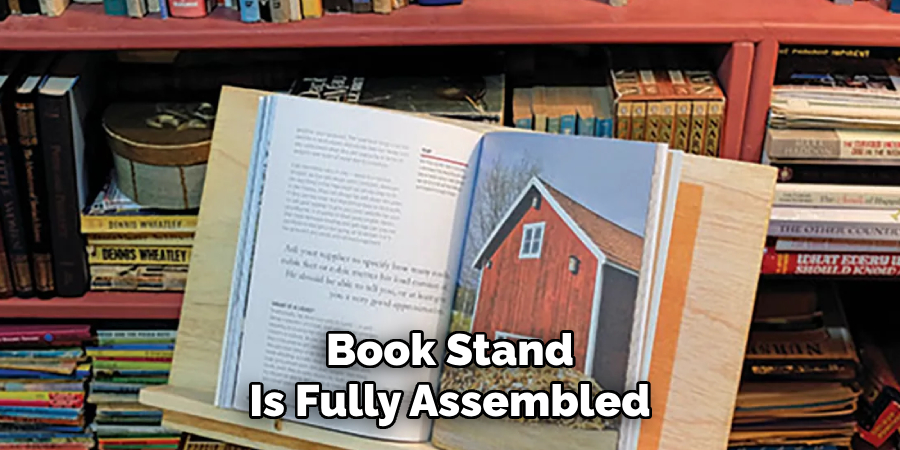
Step 3: Assemble the Book Stand
Begin assembling the book stand by attaching the backrest to the base. Use wood glue to secure the pieces, ensuring they are appropriately aligned. Hold the pieces in place tightly while the glue dries, or use clamps for added stability.
For a more durable structure, drill pilot holes and fasten the pieces with wood screws once the glue has set. If your design includes additional parts, such as side supports, attach them carefully, following the same method. Double-check all connections for sturdiness before proceeding to the next step.
Step 4: Apply the Finish
Once the book stand is fully assembled and the glue has dried, it’s time to apply the finish. Choose a stain, paint, or clear coat depending on your desired aesthetic and the type of wood used. If staining, use a brush or cloth to apply an even coat, allowing the natural grain to show through.
Apply a primer first for a smooth surface, then follow with at least two coats of paint. A clear coat or wood sealant can protect the surface from wear and tear, ensuring the book stand remains durable and beautiful. Allow the finish to dry thoroughly before using the book stand.
Step 5: Final Assembly and Inspection
After the finish has completely dried, inspect the book stand for any uneven surfaces or areas needing touch-ups. Assemble any remaining detachable parts, ensuring that everything aligns correctly and fits securely. Tighten all screws and fastenings one final time to guarantee stability. Test the book stand by placing a few books on it to confirm it can hold weight properly and performs as intended. With all steps complete, your custom book stand is ready for use!
Step 6: Troubleshooting Common Issues
If you encounter issues with your book stand, there are simple solutions to address them. For wobbling or instability, check that all screws and fastenings are securely tightened, and consider adding adhesive felt pads to the bottom for added stability. If the book stand leans or tilts, verify that all parts are correctly aligned and adjust as needed.
If the finish becomes uneven, sand the surface gently and reapply the desired stain, paint, or sealant. For weight-related concerns, avoid overloading the book stand and distribute books evenly to prevent strain on the structure. By addressing these issues promptly, you can ensure your book stand remains functional and reliable.
Step 7: Maintaining Your Book Stand
Proper maintenance will extend the life of your book stand and keep it looking its best. Regularly dust the surface with a soft cloth to prevent the buildup of dirt and debris. Periodically inspect the stand for any signs of wear or loose components, tightening screws and reapplying finishes as necessary.

If your book stand is made of treated wood, consider applying a protective wax or polish to enhance its durability and appearance. Always store your book stand in a stable, indoor environment to avoid damage from temperature fluctuations or humidity. Routine care will ensure your book stand remains a dependable and attractive piece in your space.
Step 8: Keep Your Book Stand Safe
When using your book stand, keeping it safe and secure to avoid accidents is essential. Place the stand on a flat, stable surface away from potential hazards or heavy foot traffic. Avoid placing books too close to the edge of the backrest to prevent them from falling off. If children are present, ensure they are supervised when using or around the book stand to avoid injury.
Following these 8 easy steps, you can create a beautiful and functional book stand that adds character to any space and makes your reading experience even more enjoyable.
5 Things You Should Avoid
- Using Low-Quality Wood: Opting for cheap or low-quality wood can lead to a weak and unstable book stand. Always choose durable and sturdy wood, such as oak or pine, to ensure longevity.
- Ignoring Accurate Measurements: Skipping precise measurements can result in uneven or ill-fitting components. Take your time to measure and mark your materials carefully before cutting.
- Rushing Through Cutting: Cutting wood hastily can cause splintering and uneven edges. Use appropriate tools and work slowly to achieve clean, accurate cuts.
- Overlooking Sanding and Finishing: Neglecting to sand and finish the wood will leave the stand rough to the touch and more prone to damage. Sand down all surfaces and apply a protective finish for a polished look.
- Forgetting to Test Stability: Building a stand without checking its stability can lead to a wobbly or unusable design. Test the structure as you assemble it to ensure it can securely hold books without tipping over.

Conclusion
How to make a wooden book stand requires careful planning, attention to detail, and patience.
You can build a durable and functional stand by selecting high-quality materials, taking accurate measurements, and using the right tools. Avoid common mistakes such as rushing through cuts or neglecting finishing touches, as these can impact your project’s overall quality and longevity.
With proper effort and care, your handmade book stand can become a practical tool and a beautiful addition to your space.
About the Author
Adrian Green, a lifelong woodworking enthusiast, shares his passion for the craft through The Woodenify Blog. With a foundation built on years of hands-on experience in his father’s woodworking shop, Adrian is dedicated to helping others learn and grow in the world of DIY woodworking. His approach to woodworking combines creativity, practicality, and a deep appreciation for the art of building with your own hands. Through his blog, he inspires individuals of all skill levels to embark on their own woodworking journeys, creating beautiful, functional pieces of furniture and décor.
Professional Focus
- Specializes in DIY woodworking projects, from furniture to home décor.
- Provides step-by-step guides and practical tutorials for woodworkers of all skill levels.
- Dedicated to helping readers build confidence and skill through easy-to-follow instructions and tips.
- Passionate about fostering a community of makers who can share, learn, and grow together.
Education History
- University of Craft and Design – Bachelor of Fine Arts (BFA) in Woodworking and Furniture Design
- Woodworking Apprenticeships – Extensive hands-on training with skilled craftsmen to refine carpentry and furniture making techniques.
- Online Courses & Masterclasses – Continued education in advanced woodworking techniques, design principles, and specialized tools
Expertise:
- DIY woodworking, carpentry, furniture making, and home décor projects.
- Creating accessible tutorials and guides for beginner to advanced woodworkers.
- Sharing the joys and satisfaction of woodworking, from raw materials to finished products.