Creating a handcrafted wooden urn is a meaningful project designed to honor the memory of a loved one.
This guide provides a comprehensive “how to make a wooden urn” tutorial, covering every aspect from initial design to the final touches.
These instructions will lead you through selecting materials, cutting and assembling the urn, and adding personalized details to ensure a unique and cherished memorial.
In this guide, you will learn how to make a wooden urn by following step-by-step instructions. The guide outlines key considerations for the design, the appropriate materials to use, and detailed instructions for each stage of the project. By the end, you will be equipped with the knowledge and skills to create a beautiful and lasting tribute.
The creation of a wooden urn goes beyond craftsmanship; it is an act of love and remembrance. This project allows you to invest your time and effort into crafting a personalized and heartfelt memorial, making the urn a unique symbol of your loved one’s life and legacy.
Gather Materials and Tools
Materials:
- Quality hardwood (such as oak, cherry, or walnut)
- Wood glue
- Sandpaper (various grits)
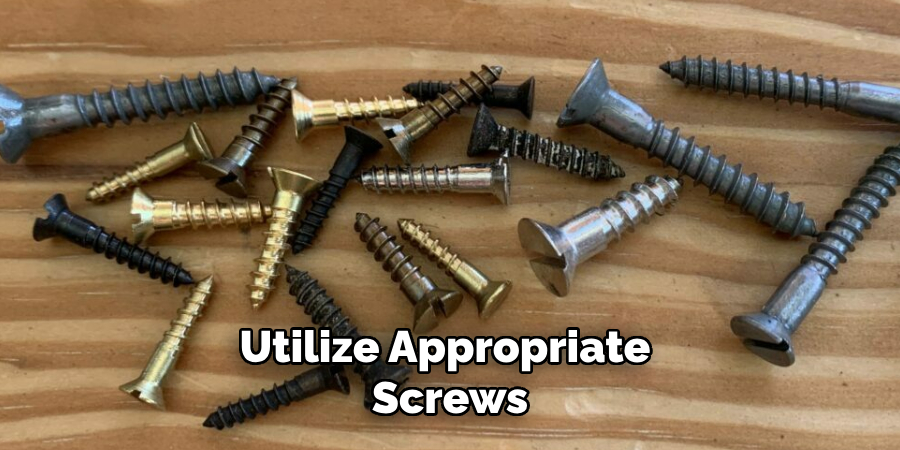
- Hinges and screws (if making a hinged lid)
- Wood finish (such as oil, lacquer, or varnish)
- Optional: Engraving materials for personalization
Tools:
- Table saw or circular saw
- Miter saw or hand saw
- Router or chisel
- Clamps
- Drill and drill bits
- Measuring tape
- Pencil
- Safety equipment (gloves, goggles, dust mask)
Gathering the right materials and tools is a critical step in creating a beautiful and durable wooden urn. Quality hardwood such as oak, cherry, or walnut will ensure the urn is elegant and strong. Wood glue and sandpaper of various grits will help in assembling and smoothing the surfaces to perfection. If you are opting for a hinged lid, you will need hinges and screws. To add the final protective and aesthetic touch, choose a suitable wood finish like oil, lacquer, or varnish. For personalization, consider engraving materials.
In terms of tools, a table saw or circular saw and a miter saw or hand saw will be essential for cutting the wood panels accurately. A router or chisel will help in creating grooves or detailed work. Secure the pieces with clamps and use a drill and drill bits for making precise holes. Measurement is key, so have a measuring tape and pencil on hand. Finally, ensure safety with appropriate safety equipment including gloves, goggles, and a dust mask.
Design Considerations
Size and Dimensions:
- Standard Urn Size: The standard urn size is typically 200 cubic inches, calculated at 1 cubic inch per pound of body weight. This accommodates the remains appropriately and provides a general guideline for determining the urn’s volume.
- Example Dimensions: For practical purposes, a standard-sized urn could be 10 inches tall, 7 inches wide, and 7 inches deep. However, these measurements can be adjusted according to personal preference or specific requirements.
Style and Shape:
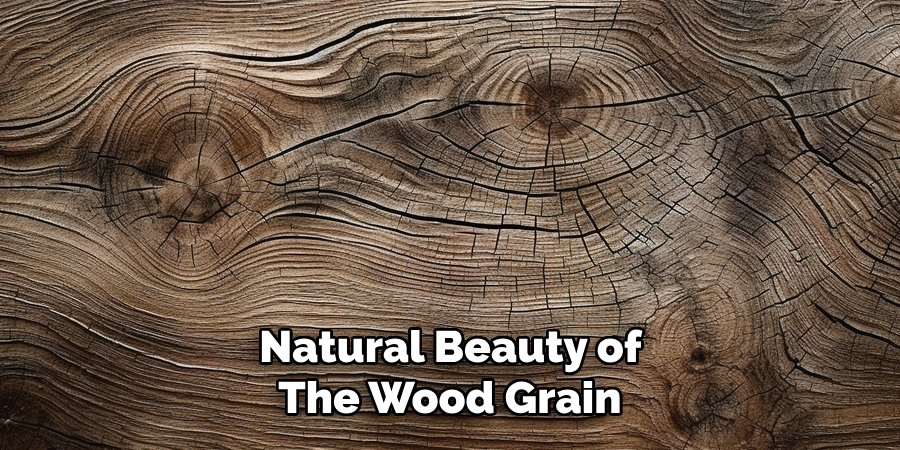
- Traditional Rectangular Box: This classic design is straightforward to construct and is ideal for showcasing the natural beauty of the wood grain. It provides a timeless look that suits various preferences.
- Cylindrical or More Intricate Shapes: If you wish to craft a more unique urn, consider experimenting with cylindrical shapes or other intricate designs. These can highlight your woodworking skills and make the urn even more distinctive.
- Consider the Aesthetic and the Wood Grain Pattern: The aesthetic appeal of the urn greatly depends on the wood grain pattern and the overall finish. Selecting wood with attractive grain and ensuring a smooth finish will enhance the urn’s visual appeal.
Lid Options:
- Removable Lid: A detachable lid is a simple choice that allows easy access to the contents. It can be securely fitted to ensure that it stays in place.
- Hinged Lid: Opting for a hinged lid adds a functional element to the urn and allows for easy opening and closing. Ensure that the hinges are sturdy and complement the overall design.
- Sliding Lid: A sliding lid can offer a unique and modern touch to the urn’s design. This type of lid requires precise woodworking to ensure smooth operation and a secure fit.
Personalization:
- Engraving Names, Dates, and Messages: Personalizing the urn with engravings is a heartfelt way to honor a loved one. Use a wood-burning tool or engraver to add names, dates, and meaningful messages.
- Adding Decorative Elements Like Inlays or Carvings: Enhance the urn’s design with inlays made of contrasting woods or other materials. Carvings can also be added to create intricate patterns or symbols, making the urn a unique memorial piece.
How to Make a Wooden Urn: Cutting the Wood
Measure and Mark:
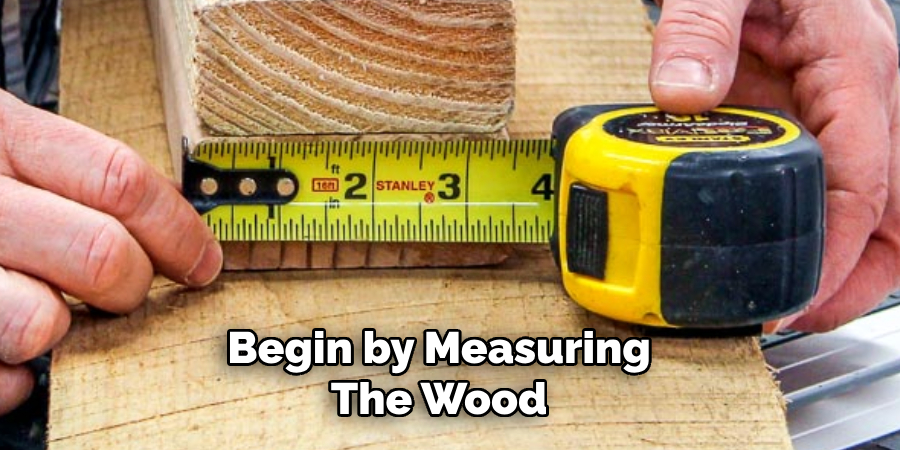
- Measure and Mark the Wood Pieces According to the Chosen Dimensions: Begin by measuring the wood carefully based on the dimensions you selected during the design phase. Precision is crucial to ensure that the panels fit together perfectly.
- Include Panels for the Front, Back, Sides, Bottom, and Lid: Make sure to account for each component of the urn. Typically, you will need a front panel, a back panel, two side panels, a bottom panel, and a lid.
Cut the Panels:
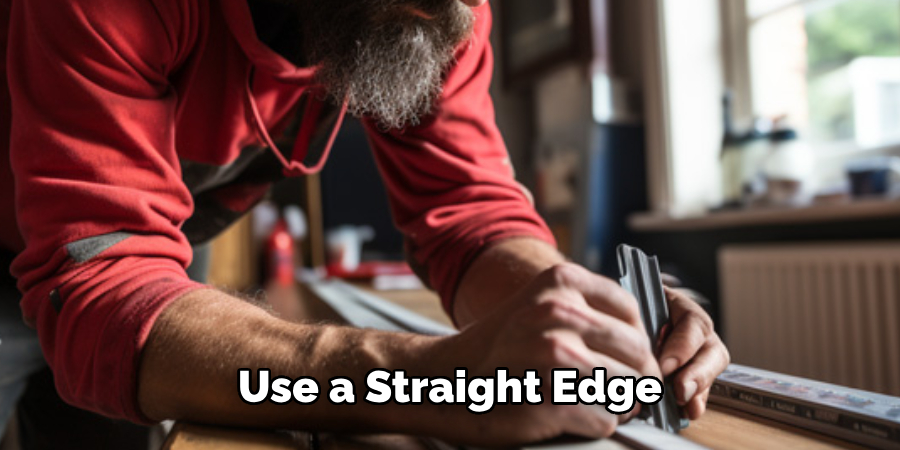
- Use a Table Saw or Circular Saw to Cut the Wood Panels to Size: Once the wood is marked correctly, proceed to cut the pieces. A table saw is ideal for long, straight cuts and ensures consistency, but a circular saw can also achieve precise results with careful handling.
- Ensure All Cuts Are Straight and Clean: Accuracy in cutting can’t be overstated. Use a straight edge or guide to maintain straight lines, and check each cut to verify its correctness. Clean cuts will make assembly easier and the final product more aesthetically pleasing.
Mitered Edges (Optional):
- For a Seamless Look, Miter the Edges of the Panels at 45 Degrees Using a Miter Saw: If you aim for a professional finish, consider mitering the edges of your wood panels. This involves cutting the edges at a 45-degree angle to fit together seamlessly in the corners.
- This Technique is Optional but Adds a Professional Touch: While not necessary, mitered edges significantly enhance the urn’s appearance by creating clean, sharp corners. This method requires precision but results in a more refined final product.
By meticulously measuring, marking, and cutting the wood, you lay a solid foundation for your handcrafted urn. Whether you opt for straight or mitered edges, the care you invest in this stage will reflect in the quality and elegance of the finished piece.
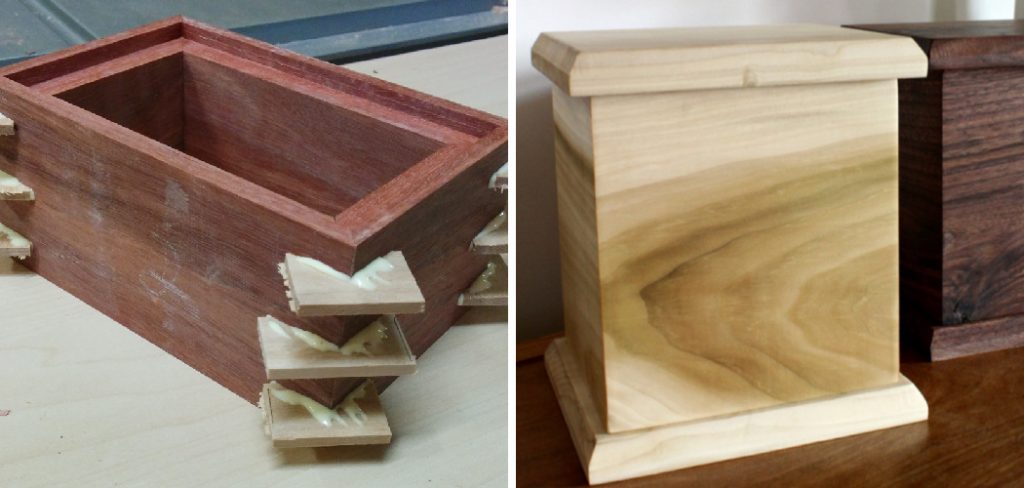
How to Make a Wooden Urn: Assembling the Urn
Dry Fit:

- Arrange the Panels Together Without Glue to Ensure They Fit Properly:
- Start by arranging all the panels you have cut – front, back, sides, bottom, and lid. Place them together as they will be in the final piece without using any glue. This step is essential to confirm that all the pieces align correctly.
- Make Adjustments as Necessary for a Perfect Fit:
- If you find any mismatched edges or gaps during the dry fit process, use sandpaper or a file to make slight adjustments to the panels. Ensuring a precise fit now will lead to a sturdier and more aesthetically pleasing urn.
- Apply Wood Glue:
- Apply Wood Glue to the Edges of the Panels:
- Once you are satisfied with the fit, start applying wood glue to the edges of the panels that will join together. Be generous but controlled in your application to ensure strong joints.
- Spread the Glue Evenly for Strong Adhesion:
- Use a brush or a small piece of wood to spread the glue evenly along the edges. Uneven glue application can lead to weak spots in the adhesive joints, compromising the integrity of the urn.
- Clamp and Secure:
- Use Clamps to Hold the Panels Together While the Glue Dries:
- After applying the glue, position the panels together and use clamps to hold everything in place securely. Ensure that the clamps apply even pressure across the surfaces.
- Ensure the Urn is Square and Aligned Correctly:
- Double-check that each corner is squared and that the panels are perfectly aligned. Use a carpenter’s square to confirm right angles.
- Wipe Off Any Excess Glue With a Damp Cloth:
- Before the glue dries, wipe off any excess that has squeezed out from the joints with a damp cloth. This will prevent unsightly glue stains on the finished product.
- Reinforce with Screws or Nails (Optional):
- For Added Strength, Drill Pilot Holes and Insert Screws or Nails at the Joints:
- To further secure the panels, consider drilling pilot holes at the joints and inserting screws or nails. This step is optional but recommended for more robust construction.
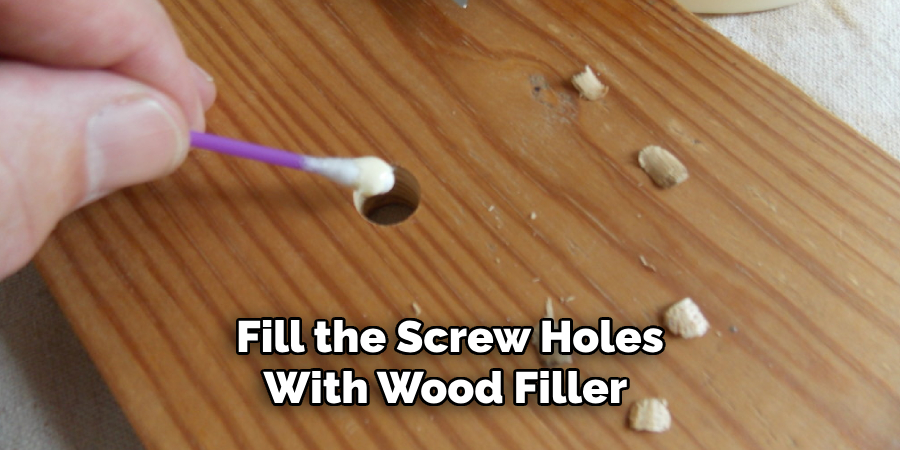
- Countersink the Screws and Fill the Holes With Wood Filler for a Clean Finish:
- If you decide to use screws, countersink them below the surface of the wood. Fill the screw holes with wood filler and sand them smoothly for a polished appearance.
- Adding the Lid:
- If Using a Removable Lid, Ensure It Fits Snugly on the Top of the Urn:
- For a removable lid, make sure it fits perfectly on the opening of the urn. It should sit snugly without being too tight, allowing easy access while staying secure.
- For a Hinged Lid, Attach the Hinges to the Back Panel and Lid Using a Drill and Screws:
- If you have opted for a hinged lid, place the hinges on the back panel and the lid. Use a drill to attach them with screws, ensuring they are positioned symmetrically for smooth operation.
- For a Sliding Lid, Create Grooves Using a Router or Chisel for the Lid to Slide Into Place:
- If you prefer a sliding lid, use a router or chisel to create grooves in the sides of the urn where the lid will slide. The grooves should be precise to allow easy movement while keeping the lid secure.
- By following these steps for assembling the urn, you will create a sturdy and beautifully crafted memorial piece. Patience and attention to detail during this phase will ensure a high-quality final product.
Sanding and Smoothing
Initial Sanding:
- Start With Medium-grit Sandpaper (120-150 Grit) to Smooth Rough Edges and Surfaces:
- Begin the sanding process with medium-grit sandpaper, ideally within the 120-150 grit range. This step is crucial for removing rough edges and initial imperfections in the wood panels.
- Sand All Panels Evenly to Remove Any Saw Marks:
- Be sure to sand each panel evenly, focusing on eliminating saw marks and any inconsistencies from the cutting process. Holding the sandpaper or sanding block flat against the wood ensures uniform results.
- Fine Sanding:
- Progress to Fine-grit Sandpaper (220-320 Grit) for a Smooth Finish:
- Once the initial smoothing is complete, move on to using fine-grit sandpaper in the 220-320 grit range. This finer grade will help achieve a more polished and refined surface, preparing the wood for finishing.
- Use a Sanding Blosand in the Direction of the Wood Grain to Avoid Scratches:
- Ensure that you sand in the direction of the wood grain. This technique reduces the risk of scratches and enhances the natural appearance of the wood.
- Detail Sanding:
- Use a Sanding Block or Folded Sandpaper for Detailed Areas and Corners:
- For intricate areas and corners that are hard to reach with larger sandpaper, use a sanding block or folded sandpaper. This will help you achieve a consistent and smooth finish across all surfaces.
- Ensure All Surfaces Are Smooth to the Touch:
- After completing the fine sanding, run your hands over the wood to check for any rough spots. Every surface should feel smooth to the touch, indicating that it is adequately prepared for the next steps in the finishing process.
- Sanding is an integral part of crafting a high-quality wooden urn. Thorough sanding not only enhances the aesthetic appeal but also ensures a comfortable and tactile experience for anyone handling the piece. Attention to detail during this stage sets the foundation for a beautifully finished product.
Finishing the Urn
Choosing a Finish:
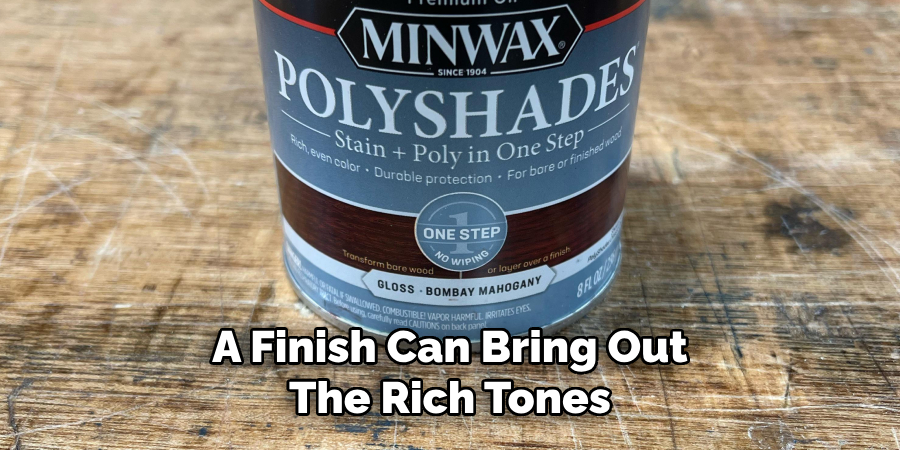
- Select a Wood Finish That Enhances the Wood’s Natural Beauty and Provides Protection:
- The finish you choose plays a crucial role in both protecting the wood and highlighting its inherent beauty. A finish can bring out the rich tones and grains of the wood while providing a durable protective layer.
- Options Include Oil (E.g., Danish Oil, Tung Oil), Lacquer, or Varnish:
- Each type of wood finish offers distinct benefits. Oils like Danish oil and tung oil penetrate deeply into the wood, enhancing its natural appearance and providing a warm, rich finish. Lacquers and varnishes, on the other hand, form a hard protective surface that is resistant to scratches and wear.
- Applying the Finish:
- Apply the Finish With a Clean Cloth or Brush, Following the Product Instructions:
- Begin applying the selected finish using a clean cloth for oils or a brush for lacquers and varnishes. Always follow the manufacturer’s instructions for the best results.
- Work in Thin, Even Coats to Avoid Drips and Streaks:
- Thin, even coats are essential to prevent drips and streaks. Apply the finish methodically, ensuring an even distribution. Overlapping strokes help to maintain consistency and coverage.
- Drying and Recoating:
- Allow the First Coat to Dry Completely Before Applying Additional Coats:
- Patience is key when finishing wood. Let the initial coat dry thoroughly before starting on subsequent coats. Drying times will vary depending on the type of finish and environmental conditions.
- Lightly Sand Between Coats With Fine-grit Sandpaper for a Smooth Finish:
- To achieve a smooth, professional finish, lightly sand the surface between coats using fine-grit sandpaper. This process helps to remove any tiny imperfections and prepares the surface for the next layer of finish.
- Apply Two to Three Coats for Optimal Protection and Shine:
- For the best balance of protection and aesthetics, apply at least two to three coats of your chosen finish. Multiple layers build up a resilient protective barrier and enhance the subtle glow of the wood.
- Final Inspection:
- Finishing the urn is the final step in creating a beautiful and durable memorial piece. By choosing the right finish and applying it with care, you ensure that the urn looks stunning and stands the test of time. The effort put into this stage will pay off in the form of a visually appealing and robust product.
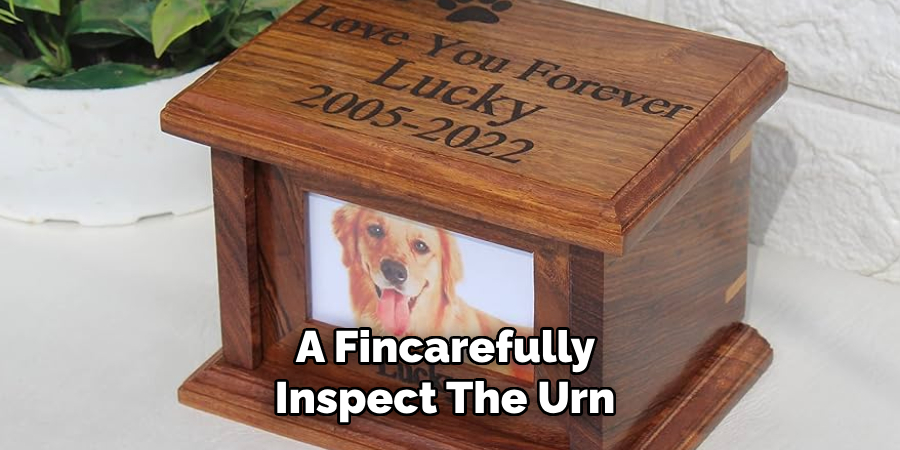
- Inspect the Urn for Any Imperfections or Missed Spots:
- Carefully inspect the urn once the final coat has dried completely. Look for any areas that might have been missed or any imperfections that need addressing.
- Touch Up as Necessary to Ensure a Flawless Finish:
- If any flaws are found, touch them up carefully. Reapply a small amount of finish to missed spots or lightly sand and recoat areas with minor imperfections. The goal is to ensure a beautiful and flawless finish that honors the craftsmanship of the urn.
Personalization and Decoration
Engraving:
- Use a Wood Burning Tool or Engraver to Add Names, Dates, and Messages:
- Personalizing an urn with engraving imparts a unique and meaningful touch. Utilize a wood-burning tool or an electric engraver to etch names, dates, or special messages onto the wood. This can transform the urn into a cherished artifact that memorializes a loved one in a heartfelt way.
- Practice on a Scrap Piece of Wood Before Engraving the Urn:
- Before you begin engraving the urn itself, practice on a scrap piece of wood. This allows you to get comfortable with the tool and perfect your technique, ensuring clean and precise engravings on the actual urn.
- Inlays and Carvings:
- Add Decorative Inlays Using Contrasting Wood or Materials:
- Decorative inlays can significantly enhance the aesthetic appeal of the urn. Use contrasting wood or materials like metal, stone, or even mother-of-pearl to create intricate patterns or designs. Carefully cut and fit these inlays into the wooden surface, securing them with a strong adhesive.
- Carve Designs or Patterns Into the Wood for a Unique Touch:
- Carving offers another avenue for personalization. Use chisels, knives, or rotary tools to carve designs, patterns, or images into the wood. These carvings can range from simple and elegant to highly detailed and complex, depending on your skill level and the overall design vision for the urn.
- Attaching Decorative Elements:
- Attach Metal Handles, Plaques, or Other Decorative Elements:
- Adding metallic elements such as handles, name plaques, or other decorative features can elevate the urn’s design. Choose elements that complement the wood’s tone and finish, enhancing the overall visual impact.
- Ensure They Are Securely Fastened and Enhance the Overall Design:
- When attaching these decorative elements, ensure they are securely fastened to withstand handling and movement. Utilize appropriate screws, nails, or adhesives to ensure durability. The placement should be carefully considered so that these elements enhance rather than overpower the urn’s design.
Conclusion
Creating a wooden urn involves several essential steps, starting with meticulous design and cutting, moving through precise assembly, and culminating in a flawless finish. Engraving, inlays, carvings, and carefully attached decorative elements add personal touches that elevate the urn’s aesthetic and emotional value.
Final assembly and rigorous quality control ensure a durable and visually stunning product.
Embarking on the journey of how to make a wooden urn is more than a craft; it’s a heartfelt endeavor to honor a loved one. Take pride in the process, knowing the final piece will serve as a lasting tribute.
For a professional-looking result, maintain attention to detail at every stage, from initial sketches to final touch-ups. Use high-quality materials and tools, and don’t rush the process. This dedication will ensure your wooden urn is both beautiful and enduring.
About the Author
Adrian Green, a lifelong woodworking enthusiast, shares his passion for the craft through The Woodenify Blog. With a foundation built on years of hands-on experience in his father’s woodworking shop, Adrian is dedicated to helping others learn and grow in the world of DIY woodworking. His approach to woodworking combines creativity, practicality, and a deep appreciation for the art of building with your own hands. Through his blog, he inspires individuals of all skill levels to embark on their own woodworking journeys, creating beautiful, functional pieces of furniture and décor.
Professional Focus
- Specializes in DIY woodworking projects, from furniture to home décor.
- Provides step-by-step guides and practical tutorials for woodworkers of all skill levels.
- Dedicated to helping readers build confidence and skill through easy-to-follow instructions and tips.
- Passionate about fostering a community of makers who can share, learn, and grow together.
Education History
- University of Craft and Design – Bachelor of Fine Arts (BFA) in Woodworking and Furniture Design
- Woodworking Apprenticeships – Extensive hands-on training with skilled craftsmen to refine carpentry and furniture making techniques.
- Online Courses & Masterclasses – Continued education in advanced woodworking techniques, design principles, and specialized tools
Expertise:
- DIY woodworking, carpentry, furniture making, and home décor projects.
- Creating accessible tutorials and guides for beginner to advanced woodworkers.
- Sharing the joys and satisfaction of woodworking, from raw materials to finished products.