Matching old hardwood floors during renovations or repairs presents a unique set of challenges, yet it rewards homeowners with a seamlessly unified and aesthetically pleasing interior. The quest on how to match old hardwood floors requires meticulous attention to detail, from identifying the wood species and finish to adopting precise installation techniques.

A successful match not only preserves the historical integrity of a home but also enhances its overall beauty and coherence. Although daunting, this endeavor plays a crucial role in maintaining the continuity and visual flow of living spaces, elevating the property’s value and appeal. In this guide, we unlock the secrets to matching old hardwood floors, ensuring homeowners can achieve a harmonious and inviting environment.
Understanding Your Existing Floor
Identifying the species of wood used in your existing floor is a critical first step toward ensuring a successful match. Different types of wood, such as oak, maple, or cherry, have unique characteristics and react differently to stains and finishes. Knowing the specific species helps in selecting new planks that will aesthetically align with your current flooring.
Consulting with a professional floor installer or utilizing online resources can aid in accurately identifying the wood type. This knowledge is crucial not only for selecting matching planks but also for understanding how your floors will age over time and respond to refinishing processes.
A. Assessing the Finish
The existing finish on your flooring—be it stain, polyurethane, or oil—plays a significant role in its overall appearance, particularly its color and sheen. Recognizing the type of finish is essential for choosing products that will blend well with your current floors when refinishing or touching up.
B. Analyzing Plank Width and Grain Pattern
Taking note of your existing hardwood floors‘ plank width and grain pattern is crucial for a precise match. Floors vary not only in wood type but also in the size of planks and the pattern of the wood grain. Matching these elements will ensure a seamless integration of new with old, maintaining the uniformity and harmony of your flooring.
How to Match Old Hardwood Floors: Sourcing Matching Hardwood
A. Lumberyards and Flooring Stores
Seeking out local lumberyards and specialty flooring stores can be an invaluable first step in finding new hardwood that closely matches your existing floors. These establishments often have a wide variety of wood species, stains, and finishes, allowing for a hands-on approach to matching.
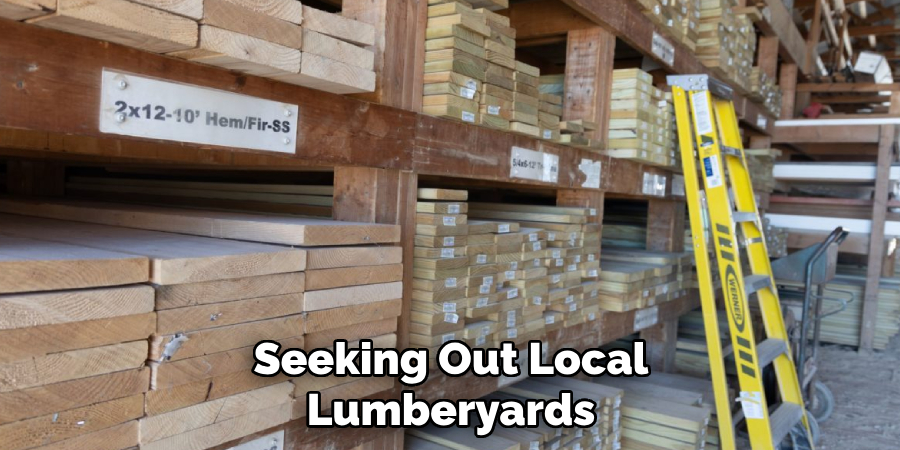
Particularly for those aiming for an authentic, antique look, reclaimed wood options available at these locations can provide a solution that not only matches in terms of color and texture but also carries historical significance and character. Additionally, staff at these locations can offer expert advice and insights into the best matches for your flooring.
B. Online Retailers
Online retailers present a convenient alternative for sourcing matching hardwood flooring, offering an expansive selection that might not be available locally. The advantages of shopping online include the ability to compare prices, styles, and wood types from the comfort of your home.
Many online stores also provide detailed photographs and specifications for their products, aiding in the selection process. It’s critical, however, to order samples before making a final purchase to ensure the wood matches your existing floors in color, grain, and texture. Additionally, familiarizing yourself with the retailer’s return policy is crucial in case the delivered product does not meet expectations.
C. Matching Techniques for Discontinued Wood
When dealing with discontinued or rare wood species, finding an exact match for your existing hardwood floors can present a challenge. In these cases, exploring similar wood species that mimic the grain patterns and natural coloration of your current floors can be a practical strategy.
Custom staining is another technique that can be employed to fine-tune the color match as closely as possible. This approach often involves a bit of trial and error with different stains and finishes, but with patience and attention to detail, achieving a harmonious blend between new and old flooring is possible. Consulting with a flooring expert or a skilled craftsman can provide additional insights and strategies for these unique situations.
Matching the Color and Finish
A. Color Matching Techniques
Achieving the perfect color match is paramount in blending new hardwood with the existing flooring seamlessly. Professionals at lumberyards have the expertise and resources to create custom stain matches, a process that begins with identifying your current floor’s base color and undertones. This often involves applying various pre-mixed stain samples to scrap pieces of the new wood that is similar to your flooring.
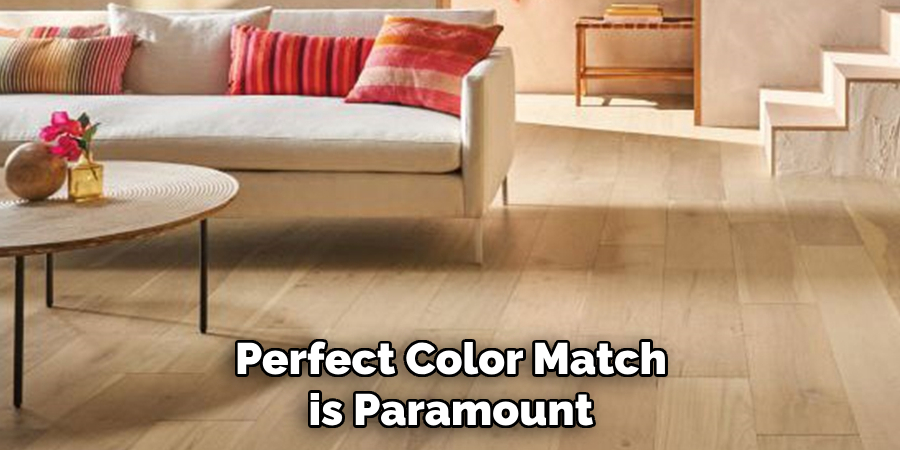
By observing how these stains react to the wood and comparing them to your existing floors, professionals can adjust the mix, adding other colors or diluting the stain until the perfect match is achieved. For homeowners, experimenting with pre-mixed stains on scrap wood pieces can also be a fruitful endeavor. Gradually adjusting the color by applying different stains or combining them can yield a close match, though this method may require a bit of trial and error and patience.
B. Importance of Sheen Level
The sheen level of the finish, whether matte, satin, or gloss, significantly affects the visual continuity between old and new hardwood floors. A mismatch in sheen can create a noticeable disruption in the flow of the flooring, even if the color match is perfect.
Selecting the appropriate type of finish, such as polyurethane or oil-based products, and applying it in the correct manner is critical to achieving the desired sheen level that complements your existing floors. Consulting with a flooring professional can help ensure that the new and old sections blend flawlessly, not just in color but also in finish and texture.
C. Achieving an Aged Appearance (optional)
Matching new hardwood flooring with an older, character-rich floor often means more than just color and finish; achieving an aged look can be just as important. Techniques such as distressing the wood by hand using tools to create dents and scratches and applying antiquing glazes can lend a venerable appearance to new planks.
This process helps the new sections of flooring embody the character and patina of age, making them complement rather than contrast with the existing floor. While these techniques require a careful hand and an eye for detail, when done correctly, they can significantly contribute to a harmonious and authentically aged aesthetic across your hardwood floors.
Acclimating New Hardwood
Before installation, it is crucial to acclimate new hardwood to the ambient temperature and humidity levels of your home. This process, which typically takes about 5 to 7 days, involves storing the hardwood in the room where it will be installed. Acclimation prevents the wood from expanding or contracting post-installation, a common cause of gaps, warping, or buckling.

By allowing the wood to adjust to the environmental conditions of its future setting, homeowners can ensure a stable and lasting installation that seamlessly integrates with existing flooring, maintaining the beauty and integrity of their hardwood floors.
That’s it! You’ve now learned how to match old hardwood floors with new ones. Whether you choose to consult with experts, shop at local stores, or explore online options, achieving a harmonious blend between old and new hardwood floors is possible with the right techniques and attention to detail. Remember to consider color, finish, and acclimation when matching your flooring for a flawless and cohesive look that will enhance the beauty of your home for years to come.
Installation Considerations
A. Subfloor Preparation
The foundation for any successful hardwood flooring installation is a properly prepared subfloor. The subfloor must be level, smooth, and, most importantly, free of moisture before laying down new hardwood floors. Variations in the level can lead to uneven wear, squeaks, and potential damage to the new flooring.
Methods such as using self-leveling compounds for concrete subfloors or plywood for wooden subfloors can resolve unevenness. Additionally, it may be necessary to repair or replace parts of the subfloor that show signs of water damage or structural weakness to ensure longevity and stability of the hardwood flooring.
B. Choosing an Installation Method
When it comes to installing new hardwood, the method chosen—nail-down, glue-down, or floating—depends largely on the type of hardwood and the nature of the existing floor and subfloor. Nail-down installation is traditional for solid hardwood and requires a wooden subfloor. Glue-down is often used for engineered wood floors and concrete subfloor, providing a stable and secure fit.
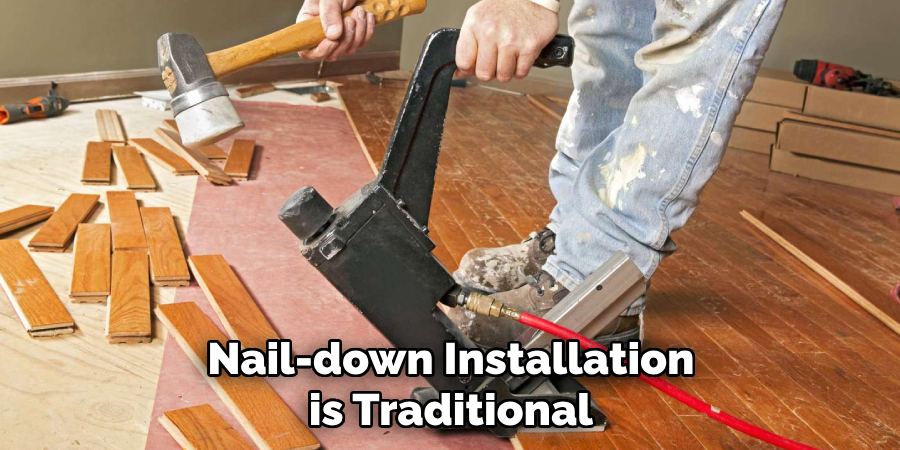
Floating floors, which are not attached to the subfloor but rather interlock, offer a versatile option for both engineered and, in some cases, solid wood over a variety of subfloor types. Selecting the right installation technique is crucial for durability and aesthetics.
C. Matching Plank Layout
Achieving a visually seamless transition between old and new hardwood floors often involves replicating the existing plank layout pattern. Whether the original layout is straight, staggered, or in a more elaborate design, continuing this pattern can significantly impact the overall look and feel of the space.
It requires careful planning and precise execution, particularly at the juncture of the old and new sections. Ensuring that the planks are aligned and the flow of the wood grain is consistent helps in creating a cohesive appearance that minimizes the distinction between the two sections.
D. Dealing with Uneven Existing Floors
Existing hardwood floors often exhibit some degree of unevenness over time. When installing new hardwood next to it, minor discrepancies can be addressed by using shims to raise the new flooring to the same level or employing sanding techniques post-installation to even out the transition.
These strategies ensure a smoother integration between the old and new sections, reducing tripping hazards and achieving a more professional finish. It’s essential to accurately assess the extent of unevenness and choose an appropriate method to mitigate it, ensuring a level and cohesive floor.
Techniques for Seamless Integration
A. Thresholds and Transitions
Creating a smooth transition between the new and existing flooring, especially at doorways or room separation points, can significantly enhance your home’s aesthetic continuity. Utilizing appropriate thresholds or T-molding strips serves not only as a practical solution for bridging gaps but also adds a refined touch to the overall look. These elements help to visually integrate the two flooring sections, ensuring a cohesive and seamless flow throughout the space.
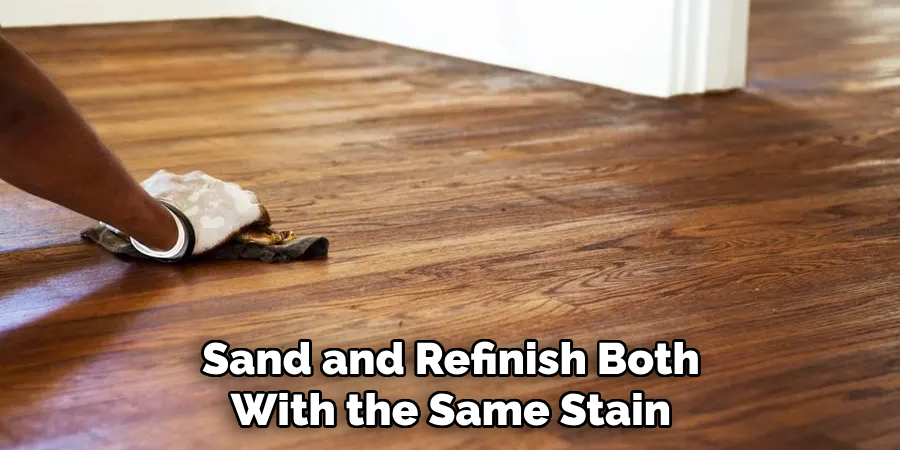
B. Sanding and Refinishing
One of the most effective strategies for ensuring a uniform appearance between new and existing hardwood floors is to sand and refinish both with the same stain and finish. This process removes old wear and tear from the existing floors while seamlessly blending the new sections. Sanding down to the bare wood allows for a fresh start across both areas, ensuring that the final color and finish are perfectly matched, thereby eliminating any visual discontinuity.
C. Lacing Techniques
The lacing technique is a refined method for integrating new hardwood planks into an existing floor with precision. It involves strategically removing portions of the old floor and weaving in new planks, ensuring that the new sections’ grain, color, and layout are indistinguishable from the original. This meticulous process creates a beautifully unified surface that appears to have been laid down all at once rather than in separate instances.
D. Addressing Gaps and Imperfections
Even with careful installation, small gaps or imperfections may appear between the new and old hardwood planks. Using color-matched wood filler or caulk to fill these discrepancies is a practical approach to achieving a refined finish. This not only improves the aesthetic quality of the floors but also protects them by preventing moisture or debris from accumulating in the gaps. Matching the filler or caulk to the floor’s stain and sheen ensures that these fixes are virtually invisible, maintaining the integrity and beauty of the hardwood.
Maintaining a Cohesive Floor
A. Cleaning and Maintenance
To preserve the seamless appearance and integrity of both new and existing hardwood floors, it is crucial to use cleaning products specifically designed for hardwood. These products help maintain the floor’s beauty without causing harm to the finish or inducing color variations over time.
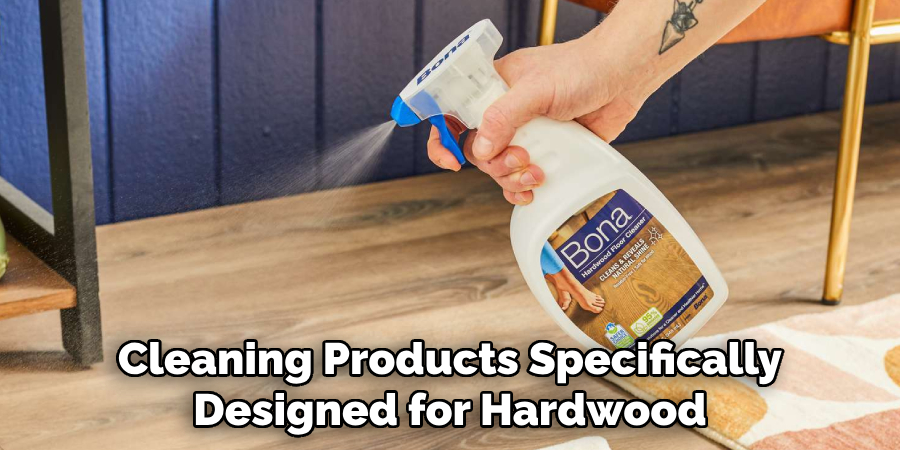
Regular cleaning should involve gentle sweeping or vacuuming to remove debris, followed by a damp mop with the appropriate cleaner. This regimen not only enhances the floor’s longevity but also prevents the buildup of grime that can lead to discrepancies in appearance between the old and new sections.
B. Sun Protection
Minimizing the hardwood floor’s exposure to direct sunlight is essential in maintaining a uniform appearance across both new and existing sections. Sunlight can cause fading or color variations, which might accentuate the division between them. Using blinds, curtains, or UV-protective window films can significantly reduce this risk and help preserve the floor’s cohesive aesthetic.
C. Regular Inspections
Conducting regular inspections of the hardwood floor for any signs of damage or moisture is crucial in maintaining its cohesive appearance. Early detection of issues such as warping, cracking, or water damage allows for prompt corrective actions, preventing further discrepancies between the old and new sections. Addressing these concerns as soon as they arise ensures the longevity and beauty of the entire floor.
When to Call a Professional
A. Extensive Floor Matching Projects
When undertaking large-scale floor-matching projects, dealing with significantly uneven subfloors, or facing complex installation requirements, it’s prudent to seek the help of a professional. These scenarios demand a high level of skill and precision that only experienced flooring specialists can provide.
Professionals are equipped to handle the challenges of ensuring an exact match between new and existing hardwood floors, especially in extensive areas where the slightest discrepancy can be glaringly obvious. Their expertise in assessing and preparing subfloors to ensure a level base for installation is invaluable for achieving optimal results.
B. Benefits of Professional Expertise
The advantages of hiring a professional for hardwood floor installation and matching cannot be overstated. With years of experience, a professional can match wood types and grains almost flawlessly, ensuring that the new and existing floors blend seamlessly. Their proficiency in installation techniques guarantees not only a visually appealing outcome but also the structural integrity of the flooring.

Additionally, professionals can foresee potential issues and rectify them before they become problematic, saving homeowners time and money in the long run. The peace of mind that comes with a professionally executed project is perhaps the greatest benefit of all, ensuring a beautiful, cohesive, and durable hardwood floor.
Conclusion
Successfully matching old hardwood floors with new ones is an art that requires careful consideration and meticulous planning. Key steps in this process involve selecting the right wood species and finish, adopting proper installation methods, and applying techniques that ensure a seamless transition between the old and new sections.
Factors such as the direction of the planks, threshold placements, sanding and refinishing, as well as addressing gaps and imperfections, play crucial roles in achieving a cohesive and aesthetically pleasing outcome. Understanding how to match old hardwood floors not only involves technical knowledge but also an appreciation for the subtle nuances that contribute to the overall look and feel of your home.
Proper execution, alongside regular maintenance and protection of the hardwood floors from elements like sunlight and moisture, ensures that both the new and existing floors age uniformly over time, maintaining their beauty and integrity. Whether you decide to undertake this project on your own or enlist the help of a professional, the effort to match old hardwood floors can significantly revitalize your living space, adding warmth, character, and value to your home.
About the Author
Adrian Green, a lifelong woodworking enthusiast, shares his passion for the craft through The Woodenify Blog. With a foundation built on years of hands-on experience in his father’s woodworking shop, Adrian is dedicated to helping others learn and grow in the world of DIY woodworking. His approach to woodworking combines creativity, practicality, and a deep appreciation for the art of building with your own hands. Through his blog, he inspires individuals of all skill levels to embark on their own woodworking journeys, creating beautiful, functional pieces of furniture and décor.
Professional Focus
- Specializes in DIY woodworking projects, from furniture to home décor.
- Provides step-by-step guides and practical tutorials for woodworkers of all skill levels.
- Dedicated to helping readers build confidence and skill through easy-to-follow instructions and tips.
- Passionate about fostering a community of makers who can share, learn, and grow together.
Education History
- University of Craft and Design – Bachelor of Fine Arts (BFA) in Woodworking and Furniture Design
- Woodworking Apprenticeships – Extensive hands-on training with skilled craftsmen to refine carpentry and furniture making techniques.
- Online Courses & Masterclasses – Continued education in advanced woodworking techniques, design principles, and specialized tools
Expertise:
- DIY woodworking, carpentry, furniture making, and home décor projects.
- Creating accessible tutorials and guides for beginner to advanced woodworkers.
- Sharing the joys and satisfaction of woodworking, from raw materials to finished products.