Are you tired of the plain and boring look of your interior doors? Do you want to add a touch of warmth and character to your home decor? Look no further than paint front door to look like wood!

How to paint a door to look like wood is a creative and cost-effective way to elevate the aesthetic of your home without replacing the door entirely. Whether you’re transforming a plain metal, fiberglass, or already painted door, the process involves using paint and a few specialized techniques to replicate the texture and appearance of natural wood. This method allows you to achieve the charm and warmth of wood grain while giving you the flexibility to choose the shade and finish that best suits your décor.
With the right tools, materials, and a bit of patience, you can turn an ordinary door into a stunning wood-inspired centerpiece.
What Are the Benefits of Faux Wood Doors?
Faux wood doors offer a variety of benefits that make them a popular choice among homeowners. Some of the advantages of using faux wood doors include:
- Cost-effective: Faux wood doors are typically more affordable than real wood doors, making them a budget-friendly option for those looking to add some warmth and character to their home without breaking the bank.
- Low Maintenance: Unlike real wood, faux wood does not require regular maintenance such as sanding, staining, or sealing. This makes it an ideal choice for busy households or those looking for a low-maintenance option.
- Durable: Faux wood doors are made from materials that are resistant to warping, rotting, and cracking. This makes them a long-lasting option for your home, saving you money in the long run.
What Will You Need?
To install faux wood doors in your home, you will need the following tools and materials:
- Faux wood door of your choice
- Measuring tape
- Screws and screwdriver
- Level
- Drill (if needed)
- Hinges (if not included with the door)
- Door knob or handle (if not included with the door)
It is important to ensure that you have all the necessary materials before starting the installation process. This will help avoid any delays or interruptions during the installation.
10 Easy Steps on How to Paint a Door to Look Like Wood
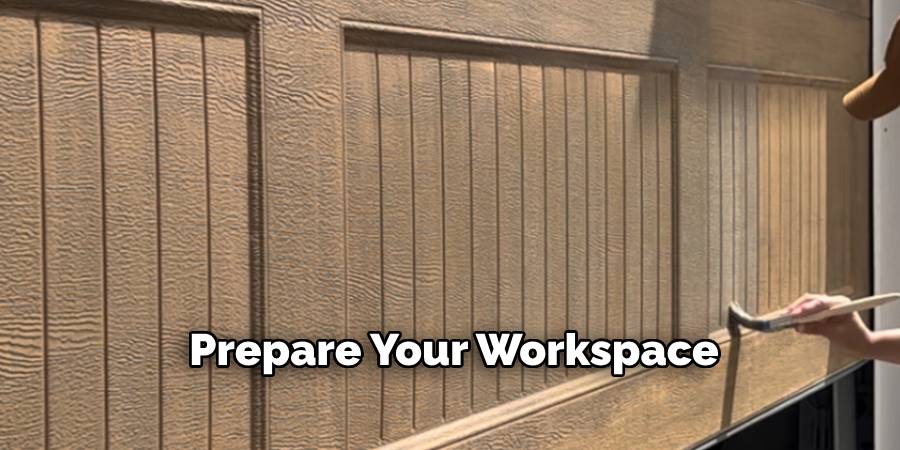
Step 1. Prepare Your Workspace
Ensure that your workspace is clean, well-ventilated, and free of any clutter. Lay down a drop cloth or plastic sheeting to protect the surrounding area from paint splatters or spills. If you are painting indoors, open windows or use a fan to improve airflow. Remove any hardware from the door, such as the knob, hinges, or screws, and place them in a safe location for easy reinstallation later.
If the door is already in place, you may want to remove it from its frame and lay it flat on a set of sawhorses or a sturdy surface to make it easier to work with. Proper preparation of your workspace will create a smoother painting experience and ensure a professional-looking result.
Step 2. Remove Hardware from the Door
Start by carefully unscrewing and removing any hardware on the door, such as the doorknob, latch, hinges, or locks. This step is crucial as it allows you to paint the door evenly without obstacles. Place all the removed hardware, including screws and small components, in a labeled container or a sealed bag to prevent them from getting lost. If the door has intricate hardware or decorative elements, take extra caution to avoid damaging them during removal. By removing the hardware, you’ll achieve a cleaner and more professional finish when painting.
Step 3. Clean the Door Surface
Cleaning the door surface is an essential step to ensure the paint adheres properly and delivers a smooth, even finish. Start by using a soft cloth or sponge and a mixture of warm water and mild detergent to wipe down the entire surface of the door. Focus on removing dirt, grime, grease, and any other residues that may have accumulated over time.
For tougher stains or sticky areas, consider using a gentle degreaser. Once the door is clean, use a damp cloth to rinse off any remaining soap, then allow the door to dry completely before proceeding. If the surface feels rough or uneven, this is also a good time to lightly sand it, ensuring better paint application in the next steps.
Step 4. Sand the Door
Sanding the door is a crucial step to ensure a smooth surface for painting. Use medium-grit sandpaper to evenly sand the entire door, focusing on any rough patches or areas with old paint or imperfections. This process helps to create a better bond between the paint and the surface. After sanding, use a damp cloth or vacuum to remove all the dust and debris. For a professional finish, consider using fine-grit sandpaper for a final pass to achieve a smoother texture. Once finished, inspect the surface to ensure it’s ready for priming and painting.
Step 5. Apply a Base Coat
Using a high-quality paintbrush or roller, apply a base coat of primer evenly across the entire surface of the door. Primer is essential for ensuring proper adhesion of the paint and helps to create a uniform appearance by covering any stains or discoloration. Start by applying primer to the edges and corners before moving to the larger flat surfaces.
Make sure to work in smooth, consistent strokes to avoid streaks or uneven coverage. Allow the primer to dry completely according to the manufacturer’s instructions before proceeding to the next step. For best results, one or two coats of primer may be required, depending on the surface and the paint you plan to use.

Step 6. Draw Faux Wood Grain
To create a realistic faux wood grain effect, start by choosing a wood grain tool or a comb specifically designed for this purpose. After the primer has dried, apply a base coat of paint in the desired wood color, such as a light beige or tan tone, and allow it to dry completely. Next, apply a slightly darker glaze or paint mixture over the base coat.
While the glaze is still wet, use the wood grain tool to form patterns that mimic natural wood grain. Drag the tool through the glaze in a wavy or curved motion, periodically rocking or rotating it to create knots and imperfections that resemble real wood. Practice on a scrap surface first if needed, and work in sections to ensure the glaze doesn’t dry before you finish the design.
Step 7. Blend and Add Depth
Use a soft, dry brush or a clean rag to gently blend the edges of the wood grain patterns while the glaze is still workable. This will soften any harsh lines and create a more natural transition between the colors and textures. To add depth, you can layer additional glazes of slightly darker or lighter tones, applying them sparingly in areas where shadows or highlights would naturally occur on wood. Be sure to blend each layer thoroughly to maintain a realistic appearance.
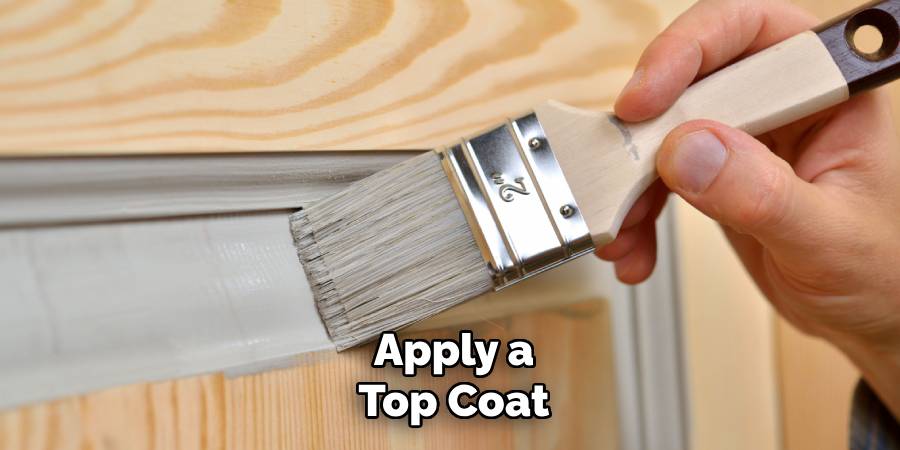
Step 8. Apply a Top Coat
To protect your work and enhance its finish, apply a top coat to seal the surface. Choose a clear polyurethane or varnish appropriate for the desired sheen—matte, satin, or glossy. Use a high-quality brush or foam applicator to apply the top coat in long, even strokes, following the grain of the wood. Avoid over-brushing, as this can leave visible marks or bubbles. Allow the first coat to dry according to the manufacturer’s instructions, then lightly sand the surface with fine-grit sandpaper to ensure smoothness.
Step 9. Reattach Hardware
Once the finish has fully dried and cured, it’s time to reattach the hardware to your piece. Carefully align screws, hinges, or handles with their original positions to ensure a proper fit. Tighten screws securely but avoid over-tightening, as this could damage the wood or hardware. Take this opportunity to clean or polish the hardware if needed, ensuring it complements the refreshed surface. With the hardware in place, your project is complete and ready to be admired!
Step 10. Inspect and Final Touch-Ups
With the hardware secured, it’s time to thoroughly inspect your piece. Check for any imperfections in the finish, such as uneven paint, missed spots, or rough edges, and address them as necessary. Use fine-grit sandpaper to smooth any uneven areas, and apply touch-up paint or finish to create a seamless look. Ensure all hardware functions properly, and give the entire piece a final cleaning to remove any dust or fingerprints. Taking these final steps guarantees a polished and professional result, leaving your project looking its absolute best.

Conclusion
How to paint a door to look like wood is a rewarding process that allows you to transform an ordinary surface into something with a rich, natural appearance.
By carefully following the steps, from preparing the door and selecting the right tools to applying base coats and wood grain effects, you can achieve a stunning and realistic result. Patience and attention to detail are key, especially when creating the grain patterns and blending colors.
With the right techniques and a little creativity, you can elevate the aesthetic of your door, giving it the timeless beauty of wood without the cost of replacing it.
About the Author
Adrian Green, a lifelong woodworking enthusiast, shares his passion for the craft through The Woodenify Blog. With a foundation built on years of hands-on experience in his father’s woodworking shop, Adrian is dedicated to helping others learn and grow in the world of DIY woodworking. His approach to woodworking combines creativity, practicality, and a deep appreciation for the art of building with your own hands. Through his blog, he inspires individuals of all skill levels to embark on their own woodworking journeys, creating beautiful, functional pieces of furniture and décor.
Professional Focus
- Specializes in DIY woodworking projects, from furniture to home décor.
- Provides step-by-step guides and practical tutorials for woodworkers of all skill levels.
- Dedicated to helping readers build confidence and skill through easy-to-follow instructions and tips.
- Passionate about fostering a community of makers who can share, learn, and grow together.
Education History
- University of Craft and Design – Bachelor of Fine Arts (BFA) in Woodworking and Furniture Design
- Woodworking Apprenticeships – Extensive hands-on training with skilled craftsmen to refine carpentry and furniture making techniques.
- Online Courses & Masterclasses – Continued education in advanced woodworking techniques, design principles, and specialized tools
Expertise:
- DIY woodworking, carpentry, furniture making, and home décor projects.
- Creating accessible tutorials and guides for beginner to advanced woodworkers.
- Sharing the joys and satisfaction of woodworking, from raw materials to finished products.