Updating your furniture can significantly enhance the overall decor of your living space, and one of the simplest ways to achieve this is by painting a nightstand. Not only is painting a nightstand a cost-effective solution to refresh your bedroom, but it also allows for endless customization options to express your personal style.

Whether you opt for bold colours or subtle pastels, a freshly painted nightstand can serve as a striking focal point in your room. The process involves several straightforward steps: preparing the nightstand, selecting the right paint, applying it carefully, and adding decorative elements to make it uniquely yours. By following this guide on how to paint a nightstand, you’ll not only revitalize your furniture but also gain the satisfaction of completing a rewarding DIY project that elevates your home’s aesthetic.
Materials and Tools Needed
Materials
To successfully paint a nightstand, gather the following necessary materials: primer, paint (choose from latex, oil-based, or chalk for your desired finish), sandpaper, painter’s tape, a drop cloth to protect your workspace, and wood filler for any repairs. You may also wish to consider optional materials such as decorative knobs or handles to enhance the final look, and a sealant to protect your painted surface.
Tools
Essential tools include a variety of paintbrushes for precision, a foam roller for larger areas, a screwdriver for disassembling parts, a putty knife for applying wood filler, and clean rags for any spills or touch-ups. Additionally, be sure to wear safety equipment such as gloves, a mask, and safety glasses to protect yourself while working.
Preparing the Nightstand
Cleaning and Disassembling
Before starting the painting process, it’s essential to thoroughly clean the nightstand to remove any dust, dirt, and grease. Use a mild detergent mixed with water and a soft cloth to wipe down all surfaces. Pay special attention to areas with built-up grime or residues. Once cleaned, it’s time to disassemble the nightstand.

Carefully remove any removable parts such as drawers, knobs, and handles, placing them in a safe location for easy reassembly later. This step makes the painting process smoother and ensures that every part of the nightstand is properly painted.
Sanding
Sanding the surface of the nightstand is crucial for achieving a smooth and even paint finish. This step helps to create a better bond between the paint and the surface, ensuring lasting results. Start with coarse grit sandpaper to remove any existing finish or imperfections, and gradually work your way up to fine grit for a smoother surface. Sanding in the direction of the wood grain is key to avoiding scratches. After sanding, wipe down the surface with a clean cloth to remove dust and debris left behind, preparing it for the next steps.
Repairing and Priming
Inspect the nightstand closely for any dents or scratches that may require repair. Use wood filler to fill in these imperfections, allowing it to dry completely before proceeding. Once repairs are done, applying a primer is essential for ensuring an even paint finish and improved adhesion.
Choose a quality primer suitable for your chosen paint type, and apply it evenly across all surfaces, following the manufacturer’s instructions. Proper priming not only enhances the final appearance but also extends the life of the paint job.
How to Paint a Nightstand: Choosing Paint and Color
Types of Paint
When it comes to selecting paint for your nightstand, understanding the different types available is crucial. Latex paints are water-based, making them easy to clean and fast-drying while offering durability and a variety of finishes. Oil-based paints, on the other hand, provide a more durable, harder finish, ideal for furniture that may see more wear and tear, though they take longer to dry and require solvents for cleanup.

Chalk paint is another popular option, known for its matte finish and ease of use, making it perfect for achieving a vintage or rustic look without extensive prep work. When choosing paint, consider the finish you desire, whether it be matte, satin, or glossy, as well as the durability required for your piece.
Selecting a Color
Choosing the right color is essential for ensuring your newly painted nightstand enhances your room’s decor. When selecting a hue, consider the existing colour palette in your space; a contrasting or complementary colour can create a striking visual impact. To help visualize your options, try using paint samples on the nightstand and observe how they look in different lighting throughout the day. Ultimately, aim for a shade that aligns with your personal style and contributes positively to the overall atmosphere of the room, making it a harmonious addition to your décor.
How to Paint a Nightstand: Painting the Nightstand
First Coat
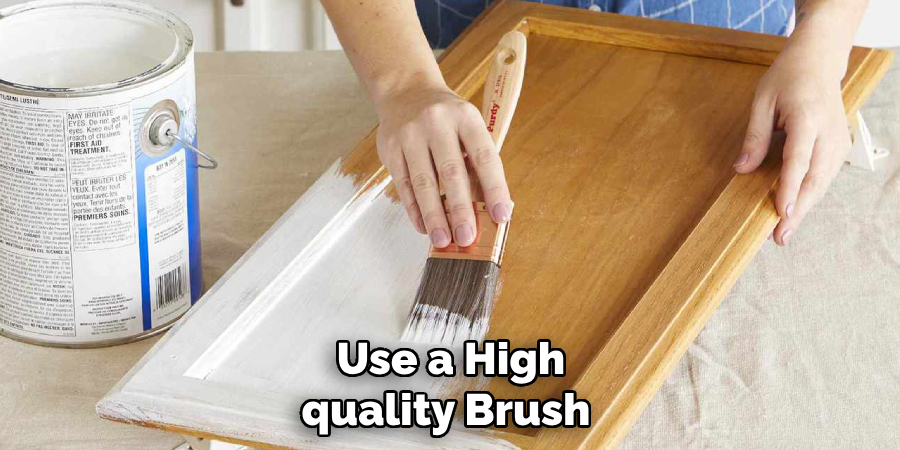
Once you have selected your paint and are satisfied with the preparations, it’s time to apply the first coat. Begin by stirring the paint thoroughly to ensure an even consistency. Use a high-quality brush to cut in around the edges of the nightstand, focusing on areas where the roller might not reach, such as corners and crevices.
After working the edges, switch to a foam roller for the larger flat surfaces. This tool allows for even distribution of the paint and helps minimize brush strokes, creating a smooth finish. When rolling on the paint, use a light hand and maintain a consistent pressure to prevent drips and pooling. Apply the paint evenly, moving in long strokes, and work in sections to avoid overlapping areas that may dry inconsistently.
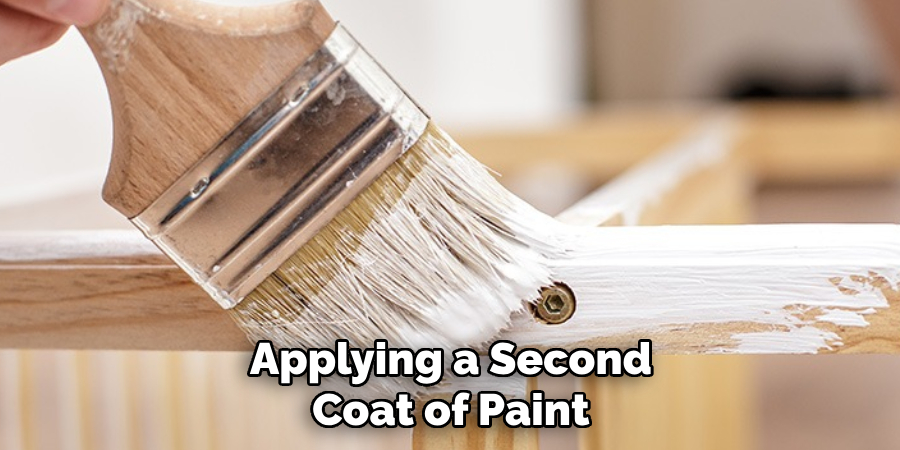
Second Coat and Touch-Ups
After allowing the first coat to dry completely as per the paint manufacturer’s recommendations, inspect your nightstand closely for any thin spots or areas that may have been missed. Applying a second coat of paint not only enhances the coverage but also provides a richer colour and durability.
Repeat the application process, using the brush for edges and the roller for flat surfaces. Once the second coat is dry, take a moment to carefully check for any spots needing touch-ups. If you find areas with thin paint or bare wood showing through, using a small brush to apply paint directly to these blemishes can ensure a flawless finish. It’s important to allow each coat to dry thoroughly before moving on to the next to avoid any unsightly marks or texture inconsistencies.
Drying and Curing
Allow proper drying time between coats to ensure optimal adhesion and finish quality. Generally, water-based paints require between 1 to 4 hours for the first coat to dry, while oil-based paints might take significantly longer. Always refer to the specific drying times noted on your paint can for guidance.
After the final coat is applied, it’s vital to let the paint cure completely before using the nightstand—this can take anywhere from several days to a couple of weeks depending on the paint type and the surrounding conditions (like temperature and humidity). To ensure the paint cures effectively, avoid placing any items on the surface during this period and keep it in a well-ventilated area. This patience will result in a resilient finish, allowing you to enjoy your beautifully painted nightstand for years to come.

Adding Decorative Elements
Hardware
To elevate the appearance of your nightstand, consider updating the hardware by selecting new knobs or handles that align with your design vision. This simple change can significantly enhance the overall aesthetic, transitioning the piece from ordinary to eye-catching. Ensure the new hardware is installed securely after the paint has fully dried to prevent any damage to your fresh finish.
Stenciling and Accents
Incorporating stencils can add a creative flair to your nightstand, allowing you to introduce intricate designs or patterns that reflect your personal style. Choose stencils that complement the overall décor and carefully apply them using contrasting paint for a striking effect. Additionally, adding accent colors or finishes, such as gold leaf or glossy highlights, can further personalise your nightstand, making it a unique statement piece in your room.
Sealing and Protecting the Finish
Once your paint has fully cured, it’s essential to protect your nightstand with a sealant. A good sealant not only enhances the durability of your finish but also offers resistance against scratches, moisture, and wear. Choosing the right sealant can depend on your desired finish and how you intend to use the nightstand. For example, a polyurethane sealant provides a robust protective layer, making it ideal for high-use furniture. Wax offers a softer, natural finish that may require more frequent reapplication but allows for easy touch-ups. A clear coat can enhance the color while providing a safeguard against daily use, making it a versatile option for various styles.
Choosing a Sealant
When selecting a sealant, consider the type of use your nightstand will see. Polyurethane is excellent for strong protection but comes in various finishes from matte to glossy. Wax offers a low-luster finish and is best for pieces that won’t be heavily used, providing a soft sheen without sacrificing beauty. Clear coats can enhance and protect the paint without altering its appearance too much, making them a great choice for painted finishes.
Applying the Sealant
To apply your chosen sealant, ensure the nightstand’s surface is clean and free of dust. Use a high-quality brush or foam applicator to apply the sealant evenly, starting from one corner and working your way across in long, smooth strokes. It’s important to follow the manufacturer’s instructions regarding drying time between coats; typically, two to three coats are recommended for optimal protection. For a flawless finish, lightly sand between coats with fine-grit sandpaper to remove any imperfections and encourage proper adhesion. Finally, allow the sealant to cure fully before putting items back on the nightstand, ensuring maximum longevity for your beautifully finished piece.
Reassembling and Final Touches
Once the sealant has fully cured, it’s time to reattach the drawers and any hardware. Begin by carefully sliding the drawers back into place, ensuring they operate smoothly. Next, secure the new knobs or handles, taking care to match the positioning of the screws with the pre-drilled holes.
After reassembling the nightstand, conduct a thorough inspection for any final touch-ups or adjustments. Look for spots that may have been overlooked, such as uneven paint or areas needing a bit more sealant. Making these minor tweaks will ensure your nightstand looks polished and ready for use in your space.
Conclusion
In conclusion, understanding how to paint a nightstand involves several key steps: preparing the surface, applying primer and paint, selecting and applying sealant, and finally, reassembling and adding personal touches. Each step is crucial in achieving a professional-looking finish that revitalizes your furniture.
Don’t hesitate to personalize your piece with unique colours, decorative accents, and updated hardware to truly make it your own. The transformation of a simple nightstand into a stylish statement piece adds character to your space. Engaging in DIY projects not only boosts creativity but also provides immense satisfaction as you see your hard work come to life. So gather your materials, embrace the process, and enjoy the rewarding experience of refreshing your furniture with paint!
About the Author
Adrian Green, a lifelong woodworking enthusiast, shares his passion for the craft through The Woodenify Blog. With a foundation built on years of hands-on experience in his father’s woodworking shop, Adrian is dedicated to helping others learn and grow in the world of DIY woodworking. His approach to woodworking combines creativity, practicality, and a deep appreciation for the art of building with your own hands. Through his blog, he inspires individuals of all skill levels to embark on their own woodworking journeys, creating beautiful, functional pieces of furniture and décor.
Professional Focus
- Specializes in DIY woodworking projects, from furniture to home décor.
- Provides step-by-step guides and practical tutorials for woodworkers of all skill levels.
- Dedicated to helping readers build confidence and skill through easy-to-follow instructions and tips.
- Passionate about fostering a community of makers who can share, learn, and grow together.
Education History
- University of Craft and Design – Bachelor of Fine Arts (BFA) in Woodworking and Furniture Design
- Woodworking Apprenticeships – Extensive hands-on training with skilled craftsmen to refine carpentry and furniture making techniques.
- Online Courses & Masterclasses – Continued education in advanced woodworking techniques, design principles, and specialized tools
Expertise:
- DIY woodworking, carpentry, furniture making, and home décor projects.
- Creating accessible tutorials and guides for beginner to advanced woodworkers.
- Sharing the joys and satisfaction of woodworking, from raw materials to finished products.