White-painted wood floors have become a popular choice for homeowners seeking a clean, bright, and modern aesthetic in their living spaces. Their timeless elegance and ability to make rooms feel larger and more open have cemented their place in both contemporary and traditional home designs. Painting wood floors white offers several advantages over refinishing, including cost-effectiveness, greater flexibility for creative designs, and the simplicity of a DIY approach that can save time and money.
This article provides a comprehensive guide on how to paint wood floors white, outlining each step to ensure a safe, smooth, and long-lasting finish. By following the process carefully, homeowners can achieve stunning results that enhance the beauty of any room while staying within budget. Whether you’re looking to refresh an old floor or completely transform a space, this guide is designed to help you succeed.
Choosing the Right Type of Paint and Supplies
Best Paint for Wood Floors
When painting wood floors white, selecting the right type of paint is crucial for achieving a durable and professional finish. Floor and porch enamel is a top choice due to its exceptional hardness and resistance to wear. You can choose between oil-based and water-based options based on your needs. Oil-based paint tends to be more durable and offers a smooth finish, but it has a longer drying time and a more pungent odor.
On the other hand, water-based paint dries faster, has less odor, and is more environmentally friendly, making it a popular choice for indoor projects. Whichever you select, ensure the paint is specifically designed for floors to withstand foot traffic and prevent scuffing.
Finishes and Sheens
White floors can be finished in different sheens, each providing a distinct look and practical benefits. Matte and satin finishes are ideal if you prefer a more understated, contemporary look, as they effectively conceal imperfections. Semi-gloss and gloss finishes, while more reflective and vibrant, can highlight imperfections and require more maintenance to keep clean. The choice between finishes ultimately depends on your desired aesthetic and the level of wear and tear the floor will experience.
Essential Tools and Materials
To paint wood floors successfully, gather essential tools and materials, including paint rollers, brushes, painter’s tape, primer, sandpaper, a cleaner, and a sealant or topcoat for protection. Optional tools like an orbital sander can ensure a smooth surface, while paint tray liners and knee pads add convenience and comfort to the process. Having the right supplies at hand will make the job more efficient and guarantee a lasting result.
Preparing the Room and Floor Surface
Proper preparation is key to achieving a flawless and durable painted wood floor.
Clearing the Space
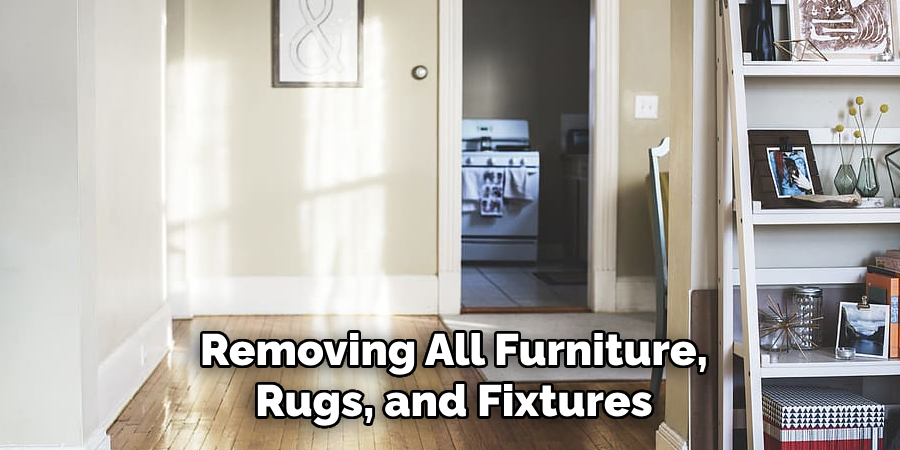
Begin by removing all furniture, rugs, and fixtures from the room to ensure a clear and unobstructed workspace. Any items left behind could interfere with the painting process or be damaged by paint splatters.
Cleaning the Floors
Thoroughly clean the floors to eliminate dust, debris, and oils that can prevent proper paint adhesion. Start by vacuuming to collect loose dirt, followed by mopping with a wood-safe cleaner or a TSP substitute for degreasing. Allow the floors to dry completely before proceeding to the next step.
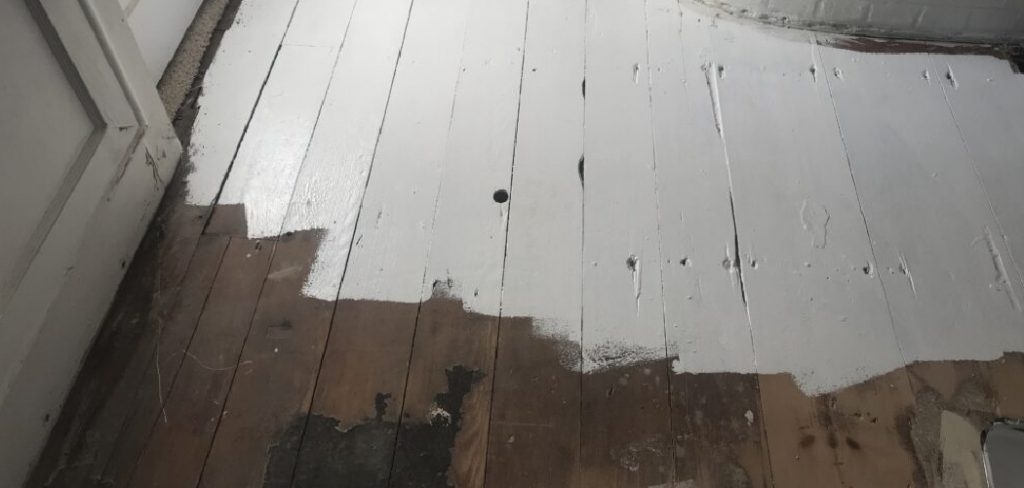
Sanding the Surface
Lightly sand the wood floor to scuff up the old finish, creating a surface that the primer and paint can grip. Use sandpaper or an orbital sander for efficiency. Inspect the floor for any cracks or gouges, filling them with wood filler as needed. Once the filler has dried, sand those areas until they are perfectly smooth, ensuring a consistent surface for painting.
Protecting Adjacent Surfaces
Protect nearby surfaces to prevent accidental paint spills. Apply painter’s tape along the edges of baseboards and door trim. Additionally, cover vents, outlets, and surrounding areas with plastic sheeting secured with tape. This step not only safeguards adjacent surfaces but also helps maintain clean paint lines for a professional finish.
Carefully completing these preparatory steps sets the stage for a successful and long-lasting paint job.
How to Paint Wood Floors White: Priming the Wood Floor
Why Primer is Crucial
Priming a wood floor is an essential step in achieving a durable and visually appealing finish. Primer helps create a strong bond between the surface and the paint, ensuring better adhesion and reducing the likelihood of peeling or chipping over time. Additionally, primer plays a vital role in blocking wood tannins, which can seep through and discolor lighter paint shades, such as white.
Choosing the Right Primer
When working with wood floors, it is highly recommended to select an oil-based or stain-blocking primer. These types of primers are specifically designed to seal the surface effectively, preventing stains and tannins from bleeding through while providing a smooth foundation for paint application.
Application Tips
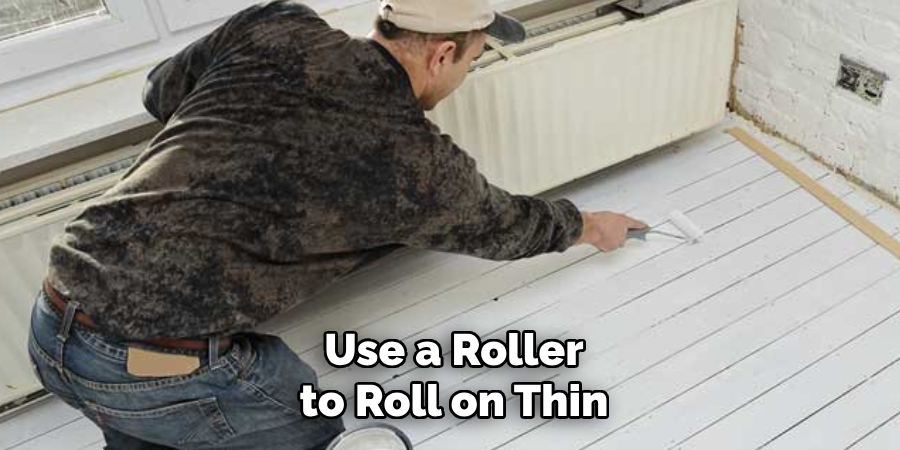
To apply primer, use a roller to roll on thin, even coats across the wood floor. Avoid overloading the roller, as this can lead to uneven coverage or pooling. Allow sufficient drying time between coats, as recommended on the product label, and ensure the room is adequately ventilated to facilitate the drying process.
Inspecting the Surface
After each coat of primer has dried, inspect the surface for rough patches or imperfections. Lightly sand the floor between coats with fine-grit sandpaper to achieve a smooth and even base. Cleaning away any sanding residue after this step will further ensure a polished finish when the paint is applied.
Painting the Wood Floor White
Planning the Work Area
Before starting, it is crucial to plan your work area strategically. Begin painting from the farthest corner of the room and gradually work your way toward the door. This approach ensures you don’t accidentally step on wet paint and minimizes interruptions during the process. Clear the room of furniture and ensure you have all necessary tools ready, including rollers, brushes, and painter’s tape for edges.
First Coat Application
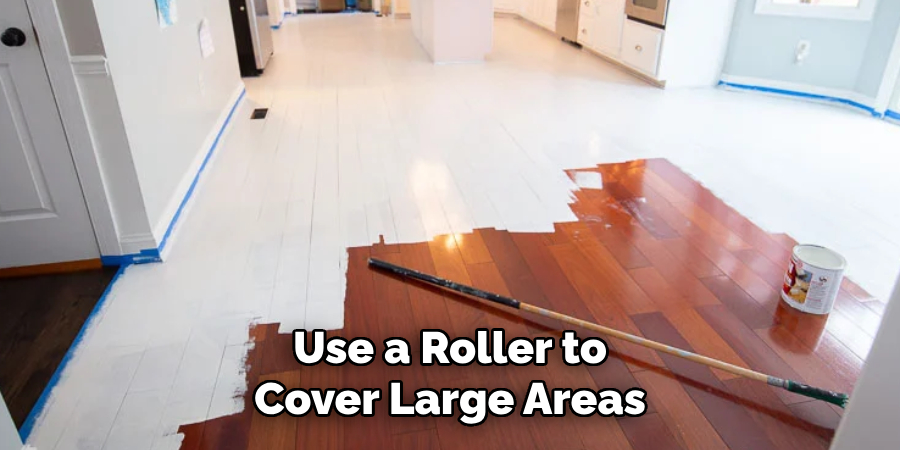
For the first coat, use a roller to cover large areas efficiently and a brush to neatly paint edges, corners, or tight spaces. Apply a thin, even layer of paint to avoid drips, roller marks, or uneven texture. Maintain consistent pressure on the roller to achieve a smooth finish, and work carefully along the grain of the wood where applicable. Paying attention to detail during this step lays the groundwork for a flawless outcome.
Dry Time and Light Sanding
Once the first coat is applied, allow sufficient drying time as specified by the paint manufacturer. A dry environment with good ventilation will help expedite the process. After the surface is arid, lightly sand it with fine-grit sandpaper to remove any imperfections or raised areas. Be sure to clean away any sanding residue carefully before moving on to the next coat.
Second (and Optional Third) Coat
Apply the second coat following the same process as the first, ensuring consistent coverage and a smooth, even finish. Inspect the surface for any thin spots or uneven areas, and touch them up as needed. Depending on the desired vibrancy and opacity, you may consider applying a third coat for a flawless and long-lasting result.
Common Issues to Avoid
To achieve professional-grade results, avoid common issues such as streaks, pooling, or peeling. These problems often arise from inconsistent application, insufficient drying time, or overly thick layers of paint. Taking the time to ensure each coat is dried correctly and sanded before proceeding will prevent such issues and ensure a pristine, durable finish.
Sealing and Protecting the Floor
Importance of a Topcoat
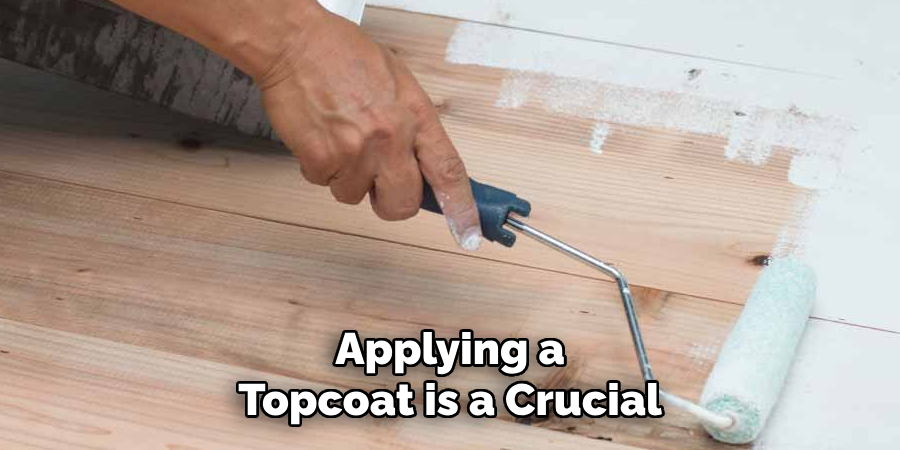
Applying a topcoat is a crucial step in ensuring the longevity and durability of your floor. A high-quality topcoat enhances protection against scratches, stains, and the wear and tear caused by daily foot traffic. It acts as a shield, preserving the pristine look of your work while preventing damage from spills, furniture movement, and dirt accumulation.
Choosing the Right Sealer
When selecting a sealer, consider options such as polyurethane or polycrylic. Polyurethane is available in both water-based and oil-based varieties, each with unique benefits. Water-based polyurethane dries quickly, emits fewer odors, and maintains a clear finish, while oil-based polyurethane provides a warm, amber tone and exceptional durability. Polycrylic, on the other hand, is a popular choice for its low odor and fast drying time, making it ideal for indoor projects.
Application Process
For optimal results, apply the sealer in thin, even layers using a clean roller or brush. Ensure each coat is completely dry before applying the next one, and allow the final coat to cure for the recommended time specified by the manufacturer. This careful approach guarantees a smooth, protective layer.
Long-Term Durability Tips
To maintain the floor’s appearance and durability, add felt pads to the bottoms of furniture legs to prevent scratches. Place rugs in high-traffic areas to minimize wear, and avoid using harsh chemicals for cleaning. These precautions can significantly extend the life of your beautifully finished floor.
Curing Time and When to Move Furniture Back
Drying vs. Curing
While the finish may feel dry to the touch within a few hours, it typically takes several days or even weeks to fully cure. Drying indicates that the surface is no longer tacky, but curing refers to the complete hardening of the finish, ensuring it can withstand regular use and wear.
Recommended Waiting Times
It is crucial to wait at least 48–72 hours before walking on the floor, even with socks, to avoid disrupting the finish. For replacing furniture, it’s best to wait up to 5–7 days to ensure the surface can handle the weight. Rugs and heavy items should not be placed back until the floor is fully cured, which may take several weeks depending on the product and conditions.
Protecting the Finish During the Cure Period
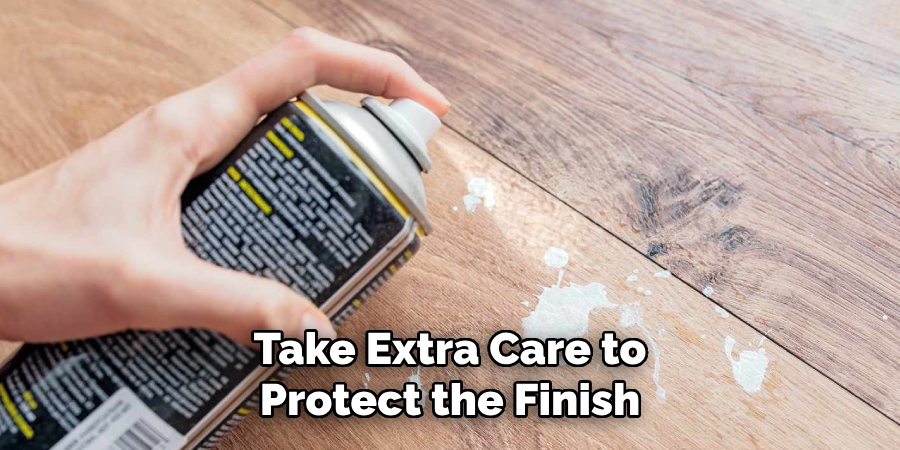
During the curing period, take extra care to protect the finish. Avoid scuffing the surface, rolling furniture across it, or using wet cleaning methods, as these actions may damage the delicate curing layer. Patience during this time will help guarantee a durable and flawless result.
Maintenance and Touch-Up Tips
Routine Cleaning
To keep your floors looking their best, regular sweeping and gentle mopping are essential. Use soft-bristle brooms or microfiber dust mops to remove dirt and debris. For deeper cleaning, choose non-abrasive, pH-balanced cleaners specifically designed for your floor type to prevent damage to the finish.
Handling Scratches or Wear
Over time, minor scratches or worn areas may appear. Spot-painting these areas with matching paint can restore the surface. Once the touch-up is complete, apply a fresh coat of sealer to the repaired area to ensure it blends seamlessly and remains protected.
Long-Term Care
For long-lasting beauty, plan to recoat your floors every few years. Recoating helps to refresh the finish, maintain brightness, and provide an extra layer of protection against wear and tear. Following this schedule will ensure your floors stay durable and visually appealing over the years.
Conclusion
By following the step-by-step process of preparation, priming, painting, and sealing, you’ll achieve a smooth and lasting finish on your floors.
Proper surface prep and the careful application of primer set the foundation, while precision in painting and sealing ensures durability and aesthetic appeal. Remember, “how to paint wood floors white” isn’t just about applying paint—it’s about patience and attention to detail at every stage. With thoughtful planning and care, white-painted wood floors ideas can transform any room into a bright, elegant space, providing a timeless and affordable design upgrade.
About the Author
Adrian Green, a lifelong woodworking enthusiast, shares his passion for the craft through The Woodenify Blog. With a foundation built on years of hands-on experience in his father’s woodworking shop, Adrian is dedicated to helping others learn and grow in the world of DIY woodworking. His approach to woodworking combines creativity, practicality, and a deep appreciation for the art of building with your own hands. Through his blog, he inspires individuals of all skill levels to embark on their own woodworking journeys, creating beautiful, functional pieces of furniture and décor.
Professional Focus
- Specializes in DIY woodworking projects, from furniture to home décor.
- Provides step-by-step guides and practical tutorials for woodworkers of all skill levels.
- Dedicated to helping readers build confidence and skill through easy-to-follow instructions and tips.
- Passionate about fostering a community of makers who can share, learn, and grow together.
Education History
- University of Craft and Design – Bachelor of Fine Arts (BFA) in Woodworking and Furniture Design
- Woodworking Apprenticeships – Extensive hands-on training with skilled craftsmen to refine carpentry and furniture making techniques.
- Online Courses & Masterclasses – Continued education in advanced woodworking techniques, design principles, and specialized tools
Expertise:
- DIY woodworking, carpentry, furniture making, and home décor projects.
- Creating accessible tutorials and guides for beginner to advanced woodworkers.
- Sharing the joys and satisfaction of woodworking, from raw materials to finished products.