Wood flooring is a popular choice for many homeowners due to its durability, beauty, and easy maintenance. However, over time, even the best wood floors can begin to show signs of wear and tear. When this happens, it may be time to pull up your existing wood flooring and replace it with new planks.
Pulling up wood flooring may seem like a daunting task, but with the right tools and techniques, you can easily do it yourself. In this guide, we will walk you through the steps of how to pull up wood flooring and offer some tips for a successful project.
Tools Needed
Before you begin pulling up your wood flooring, make sure you have all the necessary tools on hand. Here are some of the essential tools you will need:
- Pry bar or crowbar
- Hammer
- Pliers
- Utility knife
- Floor scraper
- Safety goggles
- Dust mask
12 Steps on How to Pull Up Wood Flooring
Step 1: Prepare the Area
First, remove all furniture and belongings from the room where you will be pulling up the wood flooring. Lay down drop cloths to protect your floors and walls from any damage. Also, make sure to wear safety goggles and a dust mask to protect yourself from any debris.
Step 2: Locate the Beginning Point
Start by identifying where the first wood plank was installed. This is usually in a corner or against a wall. Use this as your starting point for pulling up the flooring. As you work your way through the room, keep track of which direction the wood planks were laid.
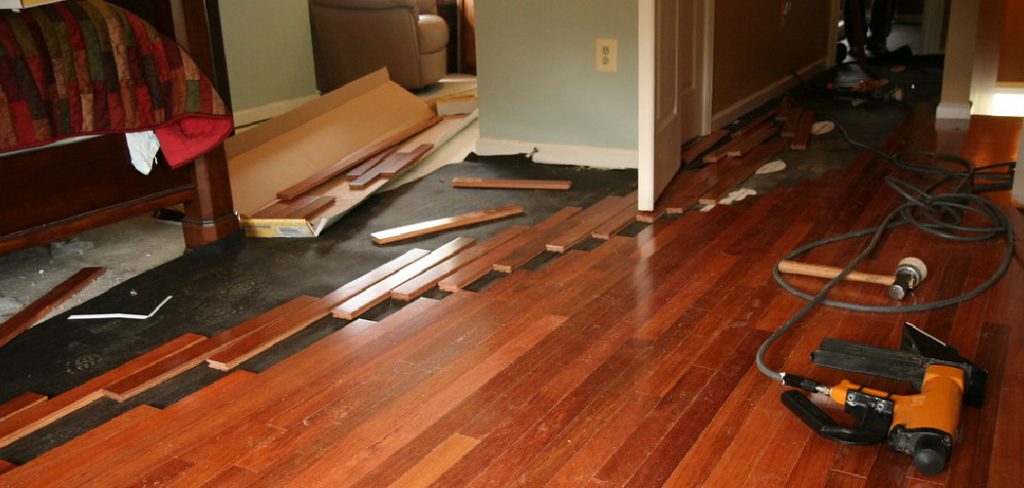
Step 3: Begin Removing the First Plank
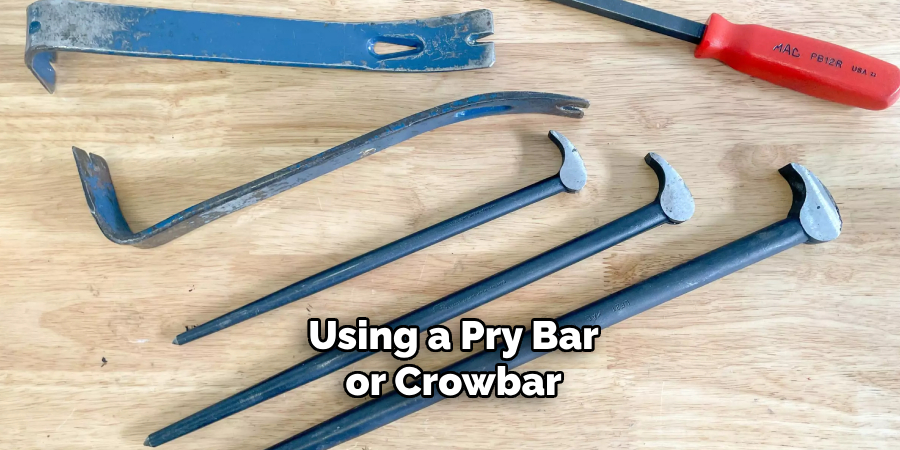
Using a pry bar or crowbar, wedge it between the first plank and the subfloor. Gently tap on the end of the pry bar with a hammer to loosen the plank from the floor. Once it is lifted, you can use your hands or pliers to remove any remaining nails or staples. Repeat this process for the rest of the first row of planks.
Step 4: Continue Removing Planks
Once the first row is removed, move on to the next row by repeating the same process. Be sure to keep track of which direction each plank was laid as you go. So, when you are ready to install the new flooring, you can follow the same pattern.
Step 5: Remove Nails and Staples
As you remove each plank, make sure to check for any nails or staples that may be sticking out of the subfloor. Use pliers or a hammer to pull them out completely. This will ensure that your new flooring has a smooth and even base on which to lay.
Step 6: Cut Planks Into Sections
If you encounter a long plank that is difficult to remove in one piece, use a utility knife to cut it into smaller sections. This will make it easier to remove and prevent any damage to the surrounding planks or the subfloor.
Step 7: Remove Adhesive
Some wood flooring may have been installed using adhesive. If this is the case, use a floor scraper to remove any remaining adhesive from the subfloor. This will ensure that your new flooring has a clean and even surface to lay on.
Step 8: Remove Baseboards
If your wood flooring was installed up against baseboards, you will need to remove them before pulling up the flooring. Use a pry bar and hammer to gently remove the baseboards without damaging them. You can then reinstall them once your new flooring is in place.
Step 9: Clear Out Debris

As you work, be sure to keep a trash bag or bin nearby to dispose of any debris, such as old nails, staples, or wood shavings. This will help keep your work area clean and safe. And, if you plan on reusing your old wood planks for another project, be sure to stack them carefully in a designated area.
Step 10: Remove Underlayment
If there is an underlayment or padding beneath your wood flooring, remove it using the same process as removing the planks. This will give you a clean and smooth subfloor to install your new flooring on.
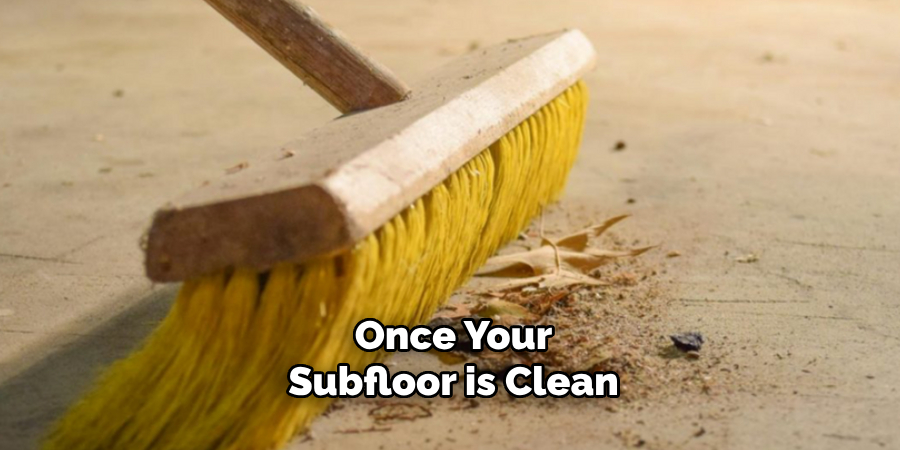
Step 11: Clean and Inspect the Subfloor
After all the wood flooring and underlayment have been removed, sweep or vacuum the subfloor to remove any remaining debris. Then, inspect the subfloor for any damage or uneven spots. If there are any issues, make the necessary repairs before installing your new flooring.
Step 12: Install New Flooring
Once your subfloor is clean and in good condition, you can begin installing your new wood flooring. Follow the manufacturer’s instructions for installation, and use the same pattern as before to ensure a seamless look.
Pulling up wood flooring may seem like a daunting task, but with the right tools and steps, it can be done easily and efficiently. Remember to prepare the area, keep track of which direction your planks were laid, remove any nails or staples, and clean the subfloor before installing new flooring. With these tips in mind, you can successfully pull up your old wood flooring and replace it with a fresh, new look. So, don’t be afraid to take on this DIY project and enjoy the beautiful results of your hard work!
9 Safety Measures
1) Wear Appropriate Protective Gear
As mentioned earlier, it is essential to wear safety goggles and a dust mask when pulling up wood flooring. This will protect your eyes and lungs from any debris or dust that may be released during the process.
2) Use Tools Properly
Make sure you are using all tools correctly and safely. This includes holding them securely, avoiding any dangerous positions or angles, and using the appropriate tool for each task. So, take your time and be cautious while handling tools.
3) Clear the Area
Before beginning any work, make sure the area is clear of any furniture, belongings, or tripping hazards. This will help prevent accidents and keep your workspace clutter-free. While working, be careful not to leave any tools or debris lying around.
4) Work in a Well-Ventilated Area
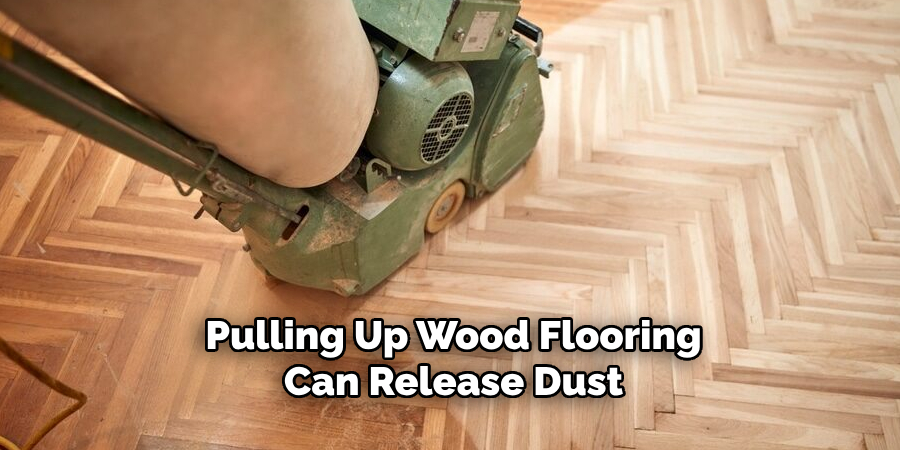
Pulling up wood flooring can release dust and debris into the air, which can be harmful if inhaled. Make sure you are working in a well-ventilated area by opening windows or using fans. This will also help with odor control if any adhesive or sealants are being removed.
5) Take Breaks as Needed
This can be a physically demanding task, so it’s important to take breaks as needed. Don’t push yourself too hard, and listen to your body. If you start feeling tired or sore, take a break to rest and recharge.
6) Use Caution When Cutting
If you need to cut planks into sections, be extra careful when using a utility knife. Always cut away from your body and make sure the blade is sharp to avoid any accidents. Then, dispose of any used blades in a designated container.
7) Avoid Using Excessive Force
When removing planks, be careful not to use excessive force. This can lead to the tool slipping and causing injury. Instead, take your time and apply steady pressure to gently loosen the plank from the subfloor.
8) Protect Your Hands
Wearing gloves can help protect your hands from any sharp edges or splinters while removing planks. This can also help with grip and prevent blisters if you are using hand tools. Then, wash your hands thoroughly after completing the project.
9) Ask for Help
If you are having trouble removing a particularly difficult plank or if the task becomes too physically demanding, don’t hesitate to ask for help. Having a second set of hands can make the job easier and safer. Remember, safety should always be a top priority when taking on any DIY project. So, be sure to follow all safety measures on how to pull up wood flooring and take breaks as needed to ensure that your wood flooring removal is a success.
8 Things to Avoid When Removing Wood Flooring
1) Rushing Through the Process
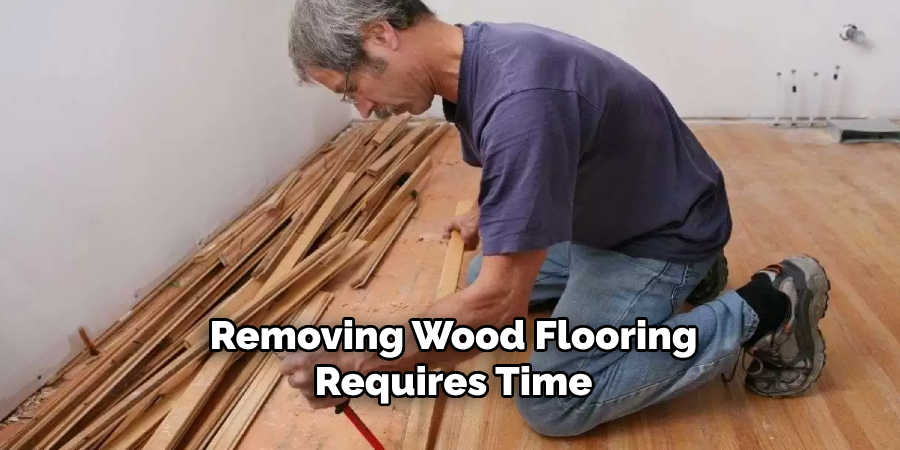
Removing wood flooring requires time and patience. Trying to rush through the process can lead to mistakes, injuries, or damage to your subfloor. So, make sure you are taking your time and doing each step carefully.
2) Using Incorrect Tools
Using the wrong tools can make the task more difficult and potentially damage your flooring or subfloor. Make sure you have the appropriate tools for the job, such as a pry bar, hammer, and utility knife.
3) Not Preparing the Area
Before starting, it’s essential to prepare the area by removing furniture and tripping hazards. This will also make clean-up easier once the project is complete. So, take the time to clear the workspace before beginning.
4) Forgetting to Label Planks
Keeping track of which direction your planks were laid is crucial when reinstalling new flooring. Forgetting to label them can lead to a mismatched or uneven look in your final project. So, be sure to label each plank as you remove it from the subfloor.
5) Neglecting Safety Measures
As mentioned earlier, safety should always be a top priority. Neglecting to wear appropriate gear or not following proper safety measures can lead to accidents and injuries. So, make sure you are taking all necessary precautions before starting the project.
6) Trying to Remove Glued Planks
If your wood flooring was glued down, it can be tempting to try and pull up the planks without properly removing the adhesive. This can damage your subfloor and make installation of new flooring more challenging. So, take the time to remove any adhesive before trying to remove the planks.
7) Skipping Subfloor Inspection
Before installing new flooring, it’s essential to inspect your subfloor for any damage or moisture issues. Skipping this step can lead to problems with your new flooring, such as warping or buckling. So, be sure to thoroughly inspect and repair your subfloor before moving forward.
8) Not Properly Disposing of Waste
After removing the old wood flooring, it’s essential to properly dispose of all waste materials. This includes any used blades, nails, or adhesives. Failure to do so can be a safety hazard and also lead to issues with your new flooring installation.
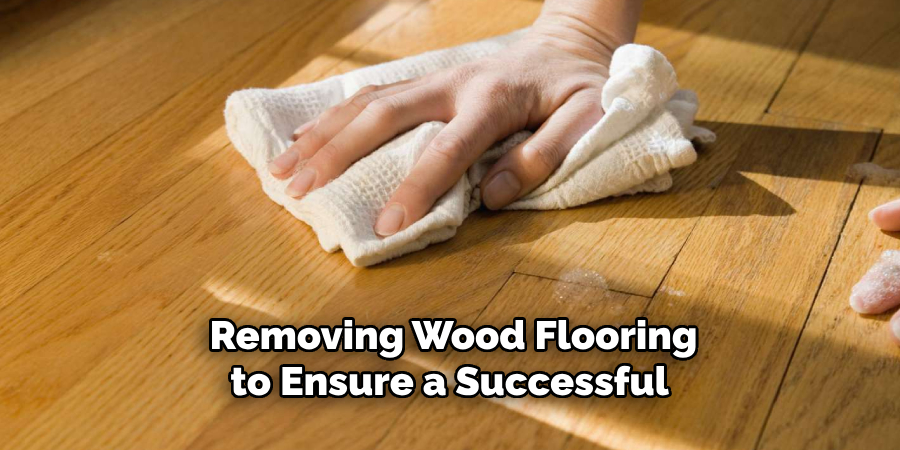
So, make sure you are disposing of waste properly. Remember these tips when removing wood flooring to ensure a successful and safe project. By taking the time to prepare, following safety measures, and avoiding common mistakes, you can make the task easier and more efficient.
8 Additional Tips for Removing Wood Flooring
1) Work in Small Sections
Instead of trying to remove the entire floor at once, work in smaller sections. This will make the task more manageable and prevent fatigue or injuries. Plus, it will give you a chance to clean up any debris as you go.
2) Use a Pry Bar with a Protective Cap
Using a pry bar can make removing planks easier, but it can also damage the subfloor if not used carefully. To avoid this, use a pry bar with a protective cap to prevent scratches or dents on your subfloor.
3) Soak Glued Planks
If you need to remove glued planks, try soaking them in warm water first. This can help loosen the adhesive and make the planks easier to remove. Then, use a pry bar to gently lift the planks from the subfloor.
4) Consider Renting Tools
If you don’t have the necessary tools for removing wood flooring, consider renting them instead of purchasing them. This can save you money and ensure that you are using high-quality tools for the job. Even if you have some of the tools, renting others (such as a floor scraper) can make the task easier and more efficient.
5) Use a Heat Gun
In addition to warm water, using a heat gun can also help loosen glued planks. Be sure to use caution when operating the heat gun and always direct it away from your body. While this method may take longer, it can be a helpful tool for removing stubborn planks.
6) Keep Track of Nails
Removing nails from the subfloor can be time-consuming and tedious. To make clean-up easier, keep track of nails as you go by using a magnet or holding them in a cup or container. While this may seem like a minor step, it can save time and frustration in the long run.
7) Use a Circular Saw for Difficult Planks
If you encounter any planks that are particularly difficult to remove, use a circular saw to cut them into smaller pieces. This will make it easier to remove and reduce the risk of damage to your subfloor. Just be sure to use caution and follow all safety measures when using power tools.
8) Consider Hiring a Professional
If you are unsure about how to safely remove wood flooring or if the task becomes too challenging, it may be best to hire a professional. They have the experience, tools, and knowledge to complete the job efficiently and correctly. While it may cost more upfront, it can save you time and potential damage to your subfloor in the long run. So, if you are feeling overwhelmed or unsure, don’t hesitate to seek professional help. With these tips on how to pull up wood flooring in mind, you can confidently tackle your wood flooring removal project and prepare for a successful installation of new flooring.
Frequently Asked Questions
Can I Reuse My Old Wood Planks for a New Flooring Project?
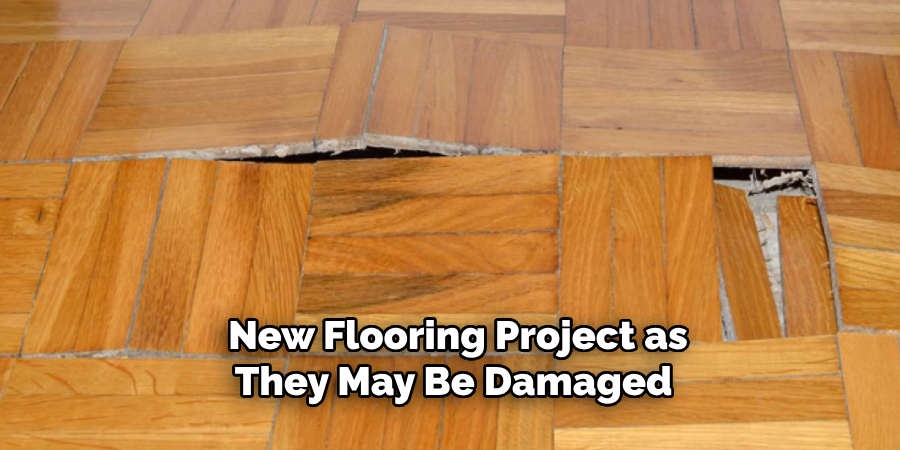
It is not recommended to reuse old wood planks for a new flooring project as they may be damaged or warped, and it can be challenging to ensure they are properly installed. It’s best to use new, high-quality materials for your flooring installation.
How Do I Dispose of My Old Wood Flooring?
Old wood flooring can be disposed of in several ways, depending on your local regulations. You can either take it to a designated landfill or recycling facility, hire a waste removal service, or check with your local municipality for any specific guidelines or programs for disposing of construction materials.
Can I Install New Flooring Over Old Wood Flooring?
It is generally not recommended to install new flooring directly over old wood flooring. This can cause unevenness and issues with the new flooring’s stability. It’s best to remove the old wood flooring before installing new flooring for a smooth, long-lasting result.
How Do I Know if My Subfloor is Damaged?
Inspect your subfloor for any signs of water damage, rotting, or cracks. If you are unsure, it’s best to have a professional inspect and repair any issues before proceeding with new flooring installation. So, don’t skip this important step in the process. Inspecting and repairing your subfloor can ensure a successful and long-lasting flooring installation.
Can I Remove My Wood Flooring Without Damaging the Subfloor?
With proper care and techniques, wood flooring can be removed without damaging the subfloor. However, if you are uncertain or inexperienced, it’s best to hire a professional to ensure the subfloor remains intact. Safety and accuracy should always be prioritized over speed when removing wood flooring.
Conclusion
Removing wood flooring requires proper preparation, safety measures, and attention to detail. By following these additional tips on how to pull up wood flooring and FAQs, you can make the process smoother and avoid common mistakes. Remember to prioritize safety and take your time for a successful project that will result in beautiful new flooring for your home.
Overall, removing wood flooring can be a challenging but necessary step in preparing for new flooring. Following these tips and precautions can make the process easier, safer, and more efficient. Don’t hesitate to seek professional help if needed, and remember to always prioritize safety during
About the Author
Adrian Green, a lifelong woodworking enthusiast, shares his passion for the craft through The Woodenify Blog. With a foundation built on years of hands-on experience in his father’s woodworking shop, Adrian is dedicated to helping others learn and grow in the world of DIY woodworking. His approach to woodworking combines creativity, practicality, and a deep appreciation for the art of building with your own hands. Through his blog, he inspires individuals of all skill levels to embark on their own woodworking journeys, creating beautiful, functional pieces of furniture and décor.
Professional Focus
- Specializes in DIY woodworking projects, from furniture to home décor.
- Provides step-by-step guides and practical tutorials for woodworkers of all skill levels.
- Dedicated to helping readers build confidence and skill through easy-to-follow instructions and tips.
- Passionate about fostering a community of makers who can share, learn, and grow together.
Education History
- University of Craft and Design – Bachelor of Fine Arts (BFA) in Woodworking and Furniture Design
- Woodworking Apprenticeships – Extensive hands-on training with skilled craftsmen to refine carpentry and furniture making techniques.
- Online Courses & Masterclasses – Continued education in advanced woodworking techniques, design principles, and specialized tools
Expertise:
- DIY woodworking, carpentry, furniture making, and home décor projects.
- Creating accessible tutorials and guides for beginner to advanced woodworkers.
- Sharing the joys and satisfaction of woodworking, from raw materials to finished products.