Adding ribbon to kitchen cabinets can transform the look of your kitchen, injecting a touch of charm and personality into an otherwise utilitarian space. This simple and cost-effective decorating technique allows for endless creativity, whether you’re aiming for a whimsical style, a rustic feel, or a more elegant touch.

In this guide on how to put ribbon on kitchen cabinets, we will explore various methods and tips for applying ribbon to your cabinets, enabling you to enhance your kitchen decor while showcasing your unique aesthetic. Get ready to unleash your creativity and refresh your kitchen with ribbon!
Materials You Will Need
Measuring Tape:
A measuring tape is an essential tool for this project, ensuring that your ribbon is applied evenly and meets your aesthetic requirements. Start by measuring the length of the cabinet doors where you plan to place the ribbon. This will help you determine how much ribbon you’ll need, allowing you to cut it to the desired length before you start applying it. Accurate measurements will also enable you to center the ribbon properly, creating a polished and professional look in your kitchen decor.
Ribbon:
Choose a ribbon that complements the color scheme and style of your kitchen. You can opt for a solid-colored ribbon or a patterned one, or you can even mix and match different ribbons for a unique look. Consider the width of the ribbon as well, depending on how much surface area you want to cover on your cabinets. Wider ribbons can make a bolder statement, while thinner ones provide delicate accents.
Scissors:
Sharp scissors are essential for cutting the ribbon to the desired length and ensuring clean edges for a neat finish. It’s best to use fabric scissors if your ribbon is made from fabric material, as they will prevent fraying.
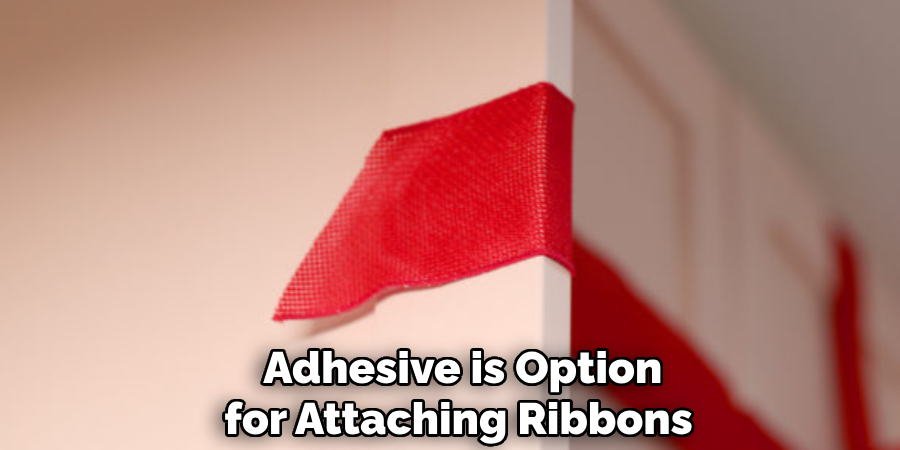
Adhesive:
There are various adhesive options when it comes to attaching ribbons to your kitchen cabinets. Double-sided tape, glue dots, and hot glue guns are all effective choices. Keep in mind that the adhesive should be strong enough to hold the weight of the ribbon and withstand daily wear and tear.
7 Simple Methods on How to Put Ribbon on Kitchen Cabinets
Method 1: Straight Across
One of the simplest and most effective ways to apply the ribbon to your kitchen cabinets is to run it straight across the front of the cabinet doors. Begin by measuring the width of your cabinet doors and cutting a length of ribbon that matches this measurement, adding a few extra inches to secure the ends. Next, use your adhesive to attach the ribbon at the desired height—typically, this can be around the middle or lower part of the door, depending on your preference.
Make sure to adhere the ends securely to prevent any lifting. This method creates a clean, streamlined look that enhances the overall aesthetic of your kitchen while remaining easy to update or change in the future.
Method 2: Diagonal Stripes
Inject a playful and whimsical touch into your kitchen decor by applying diagonal stripes of ribbon to your cabinets. This method works well with a colorful or patterned ribbon, adding visual interest and personality to the space.
To achieve this look, cut two ribbons that are long enough to cover the width of your cabinet doors diagonally. Attach one end of each ribbon at the top corner of the door, running them down diagonally until they meet at the bottom corner. Secure the ends with adhesive, and voila! Your cabinets now have an eye-catching design element.
Method 3: Vertical Stripes
For a more classic and elegant look, try applying vertical stripes of ribbon to your kitchen cabinets. You can achieve this by measuring and cutting a length of ribbon that matches the height of your cabinet doors. Attach one end at the top corner of the door and run it down vertically, securing it in place with adhesive as you go.
Repeat this process until the entire door is covered in evenly spaced vertical stripes. This method adds a touch of sophistication to your kitchen decor while allowing you to play with different colors and patterns.
Method 4: Bow Accents
Turn your plain cabinet knobs into charming accents by adding small bows made from ribbon. Cut a length of ribbon that is long enough to wrap around the knob and tie into a small bow. You can also opt for pre-tied ribbons or bows if you don’t want to make them yourself. Simply secure the bows in place with adhesive, and your cabinet knobs now have an elegant touch.

You can also use this method to add bows to the corners of cabinet doors or at the top and bottom of vertical stripes for a more whimsical look.
Method 5: Outline Cabinets
Add a pop of colour to your kitchen by outlining your cabinets with ribbon. This technique works best with thinner ribbons, as they are easier to manipulate around corners and edges. Measure and cut lengths of ribbon that match the width and height of each cabinet door, then attach them along the edges using adhesive. You can choose to outline just the outer edges or create a frame around the entire door.
This method adds a subtle but effective touch of style to your cabinets, making them stand out in your kitchen decor.
Method 6: Create a Pattern
Get creative and personalize your kitchen cabinets by creating a pattern with ribbon. Whether it’s a chevron design, polka dots, or stripes, this method allows you to showcase your unique style. You can use different colors and ribbon widths to create a more intricate pattern.
To achieve this look, cut your ribbon into desired lengths and attach them using adhesive in the desired pattern. This method works best on flat cabinet doors with minimal detailing, allowing the ribbon to take center stage.
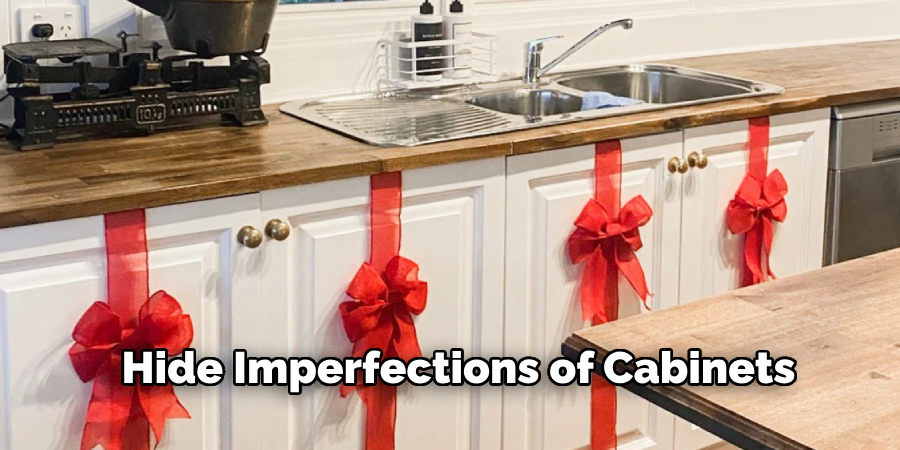
Method 7: Hide Imperfections
If you have old or damaged cabinets that need a little love, adding ribbon can be an effective way to hide imperfections. Simply measure and cut lengths of ribbon to cover any dings, scratches, or chips on your cabinets. Attach them with adhesive for a quick fix that also adds a decorative touch to your kitchen.
Following these methods on how to put ribbon on kitchen cabinets, you can easily add ribbon to your kitchen cabinets and elevate the overall look of your kitchen decor. Have fun experimenting with different styles, colors, and patterns to find the perfect fit for your space. Remember to always use sharp scissors and high-quality adhesive for a polished and professional finish. Whether you want to make a bold statement or add subtle accents, the ribbon is an affordable and versatile option for enhancing the aesthetic of your kitchen cabinets. Happy decorating!
Frequently Asked Questions
Q: Can I Use Ribbon to Cover the Entire Surface of My Kitchen Cabinets?
A: While it is possible, covering the entire surface of your cabinets with ribbon may not be a practical solution. Depending on the material and width of the ribbon, it may not provide enough coverage to hide the surface underneath. Additionally, it may not be durable enough to withstand daily wear and tear in a high-traffic area like your kitchen. It’s best to use ribbon as an accent or decorative touch rather than a full cover.
Q: How Can I Remove Ribbon from My Kitchen Cabinets Without Damaging Them?
A: If you want to change up the look of your cabinets or remove the ribbon for any reason, carefully peel off the adhesive and gently wipe away any residue with a damp cloth. Avoid using harsh chemicals or pulling too hard, as this can damage the surface of your cabinets.
Q: Can I Use Ribbon on All Types of Cabinet Materials?
A: Yes, you can use ribbon on most cabinet materials, such as wood, laminate, or metal. Just make sure to choose an adhesive that is suitable for the material of your cabinets and won’t cause any damage. You may also want to test a small area first before applying it to the entire surface.
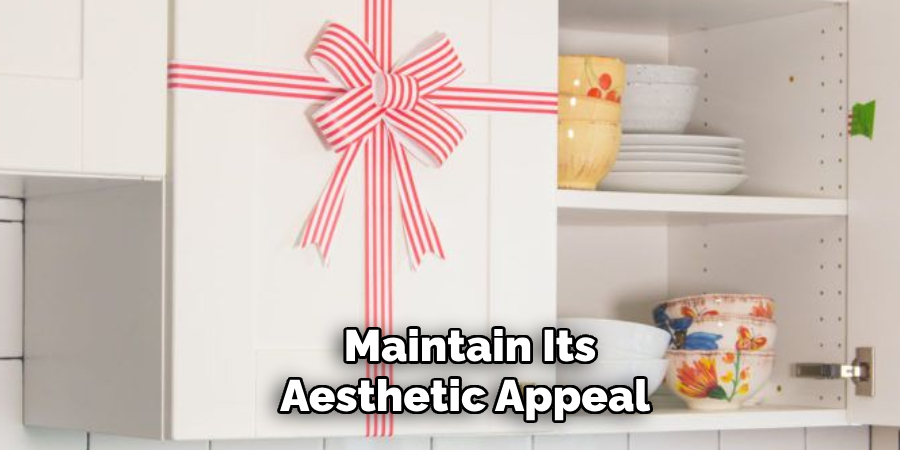
Q: How Often Should I Replace or Update the Ribbon on My Kitchen Cabinets?
A: It ultimately depends on personal preference and the condition of the ribbon. If you notice any wear and tear, it’s best to replace it with fresh ribbon to maintain its aesthetic appeal. Otherwise, you can update it as often as you like whenever you feel like giving your kitchen decor a little refresh.
Remember, the beauty of using ribbon to decorate your kitchen cabinets is that it’s a quick and easy way to change up the look without making permanent alterations. Have fun experimenting with different methods and designs to find the perfect fit for your kitchen!
Conclusion
Adding ribbon to your kitchen cabinets is a delightful and cost-effective way to enhance your space’s aesthetic while allowing for personal expression. Whether you choose to implement simple straight lines or intricate patterns, the methods outlined above provide various options to suit your style and create a vibrant atmosphere.
With just a few supplies and some creativity, you can transform your kitchen with decorative ribbons that reflect your personality. Don’t hesitate to refresh your cabinets regularly, experimenting with different colors and designs to keep your kitchen feeling lively and inviting. Thanks for reading this article on how to put ribbon on kitchen cabinets.
About the Author
Adrian Green, a lifelong woodworking enthusiast, shares his passion for the craft through The Woodenify Blog. With a foundation built on years of hands-on experience in his father’s woodworking shop, Adrian is dedicated to helping others learn and grow in the world of DIY woodworking. His approach to woodworking combines creativity, practicality, and a deep appreciation for the art of building with your own hands. Through his blog, he inspires individuals of all skill levels to embark on their own woodworking journeys, creating beautiful, functional pieces of furniture and décor.
Professional Focus
- Specializes in DIY woodworking projects, from furniture to home décor.
- Provides step-by-step guides and practical tutorials for woodworkers of all skill levels.
- Dedicated to helping readers build confidence and skill through easy-to-follow instructions and tips.
- Passionate about fostering a community of makers who can share, learn, and grow together.
Education History
- University of Craft and Design – Bachelor of Fine Arts (BFA) in Woodworking and Furniture Design
- Woodworking Apprenticeships – Extensive hands-on training with skilled craftsmen to refine carpentry and furniture making techniques.
- Online Courses & Masterclasses – Continued education in advanced woodworking techniques, design principles, and specialized tools
Expertise:
- DIY woodworking, carpentry, furniture making, and home décor projects.
- Creating accessible tutorials and guides for beginner to advanced woodworkers.
- Sharing the joys and satisfaction of woodworking, from raw materials to finished products.