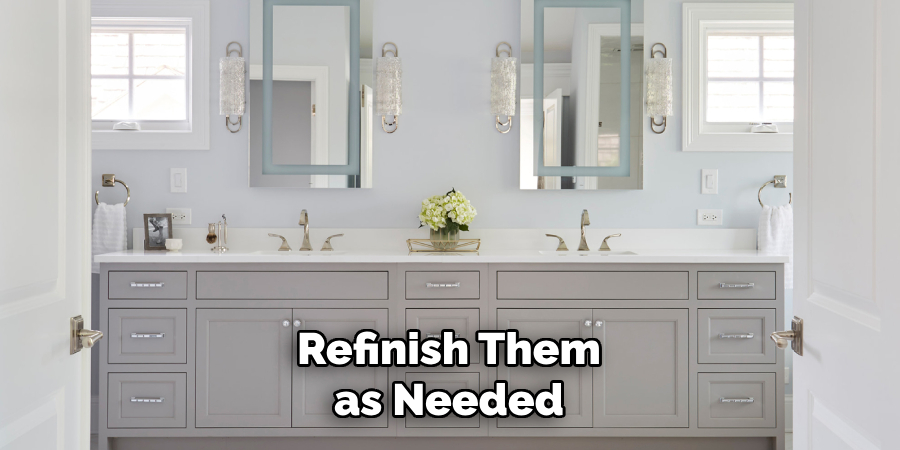
Refinishing bathroom cabinets is an effective way to breathe new life into your space without the expense of a full remodel. Over time, cabinets can become worn, faded, or outdated due to moisture and frequent use.
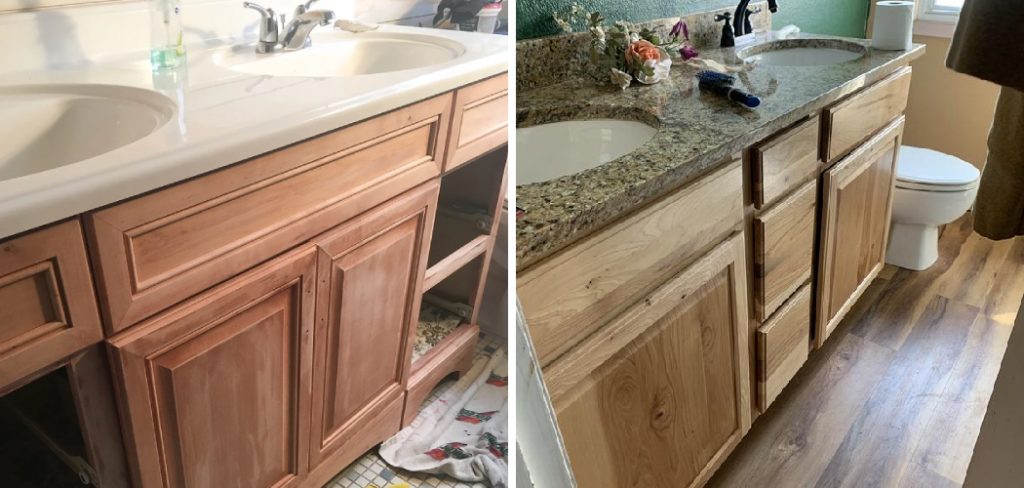
This guide on how to refinish bathroom cabinets will walk you through the essential steps to transform your cabinets, from preparing the surfaces and choosing the right materials to applying the finish and reassembling the hardware. By following these guidelines, you can achieve a professional-looking result that enhances the overall aesthetic of your bathroom while also increasing its functionality.
Why Refinish Bathroom Cabinets?
Before diving into the process of refinishing, it’s essential to understand why this is a worthwhile project. There are several reasons why you may want to refinish your bathroom cabinets instead of replacing them completely.
Cost:
Refinishing cabinets is significantly less expensive than purchasing and installing new ones. You can save hundreds or even thousands of dollars by refinishing your cabinets. The cost of materials for this project is relatively low, making it an ideal option for those on a budget.
Time:
Refinishing cabinets takes much less time than replacing them. While installing new cabinets can take several days or weeks, depending on the complexity of the project, refinishing can typically be completed in just a few days. This is especially beneficial if you use your bathroom frequently and cannot afford to have it out of commission for an extended period.
Customization:
Another advantage of refinishing bathroom cabinets is the ability to customize them to your liking. If you are happy with the layout and functionality of your current cabinets but simply want to update the look, refinishing allows you to choose a new color or finish that better suits your style. You can also add unique details such as distressing or stenciling, to make your cabinets stand out.
Needed Materials
To successfully refinish your bathroom cabinets, you will need the following materials:
- Screwdriver or Drill
- Sandpaper or Electric Sander
- Tack Cloth
- Wood Filler (if Needed)
- Primer
- Paint or Stain of Your Choice
- Polyurethane Topcoat (Optional)
- Paintbrushes and Rollers
8 Step-by-step Guidelines on How to Refinish Bathroom Cabinets
Step 1: Remove Doors, Drawers, and Hardware
The first step in refinishing your bathroom cabinets is to carefully remove all doors, drawers, and hardware. Start by using a screwdriver or drill to take off the cabinet doors and any accompanying hinges. Place them in a safe location where they won’t get damaged. Next, remove the drawers by pulling them out and taking off the front facings if needed.
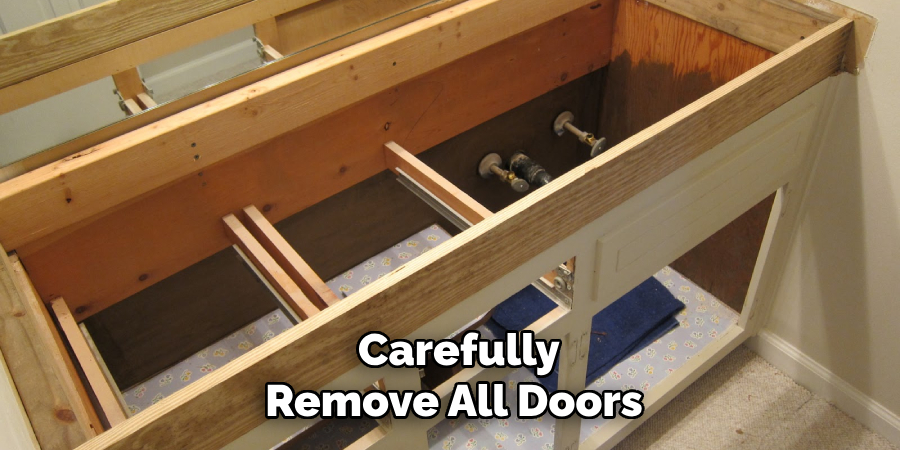
Ensure you keep all screws and hardware together in a labeled bag to avoid losing them during the project. This step not only makes the refinishing process easier but also helps you achieve a more uniform finish on all surfaces.
Step 2: Clean and Prep the Surfaces
Once you have removed the doors, drawers, and hardware, the next step is to thoroughly clean and prep the surfaces. Use a mild detergent mixed with warm water to wipe down all cabinet surfaces, including the doors and drawer fronts. This will remove any dust, grime, or residue that has built up over time. After cleaning, rinse with clean water and allow everything to dry completely.
If your cabinets have any old paint or finish that is peeling or flaking, use sandpaper to gently sand those areas until smooth. Be sure to focus on the edges and corners where wear and tear are often more prominent. After sanding, wipe the surfaces again with a tack cloth to eliminate any sanding dust. Preparing the surfaces properly is crucial for ensuring that the new finish adheres well and provides a professional-looking result.
Step 3: Repair Any Damage
After preparing the surfaces, it’s important to inspect your cabinets for any damage that may need repair. Check for cracks, dents, or holes in the wood, particularly around joints and edges. If you find any imperfections, use wood filler to fill in these damaged areas. Follow the manufacturer’s instructions for application, ensuring that the filler is slightly overfilled to allow for sanding later. Once the filler is applied, allow it to dry completely, which usually takes a few hours.
After drying, sand the repaired areas smoothly with fine-grit sandpaper until they are flush with the surrounding wood. This step is crucial for achieving a seamless and polished look in the final finish of your cabinets. Wipe away any excess dust with a tack cloth.
Step 4: Apply Primer
Primer is an essential step in refinishing cabinets as it helps the new finish adhere to the wood and provides a smooth base for the paint or stain. Use a high-quality primer that is suitable for your chosen finish and follow the manufacturer’s instructions for application. Using a brush, roller, or sprayer, apply an even coat of primer to all surfaces of your cabinets, including doors and drawers. Allow the primer to dry completely before moving on to the next step.
It is essential to choose a primer that is specifically designed for use on bathroom cabinets to ensure durability and resistance to moisture.
Step 5: Paint or Stain
Now comes the fun part – applying the paint or stain! Choose a high-quality product that is suitable for the material of your cabinets and your desired finish. Use a brush, roller, or sprayer to apply an even coat of paint or stain to all surfaces. Apply multiple coats if necessary, allowing each coat to dry completely before applying the next one.
If using paint, consider adding unique details such as stenciling or distressing for a custom look. If using stain, make sure to evenly distribute it and wipe away any excess with a clean cloth.
Step 6: Add a Protective Topcoat (Optional)
To ensure the longevity of your newly refinished cabinets, you may want to add a protective topcoat. This step is particularly important if you are using paint as it provides added durability and resistance to moisture. Choose a polyurethane topcoat that is suitable for your chosen finish and follow the manufacturer’s instructions for application. Apply an even coat with a brush or roller and allow it to dry completely before moving on to the next step.
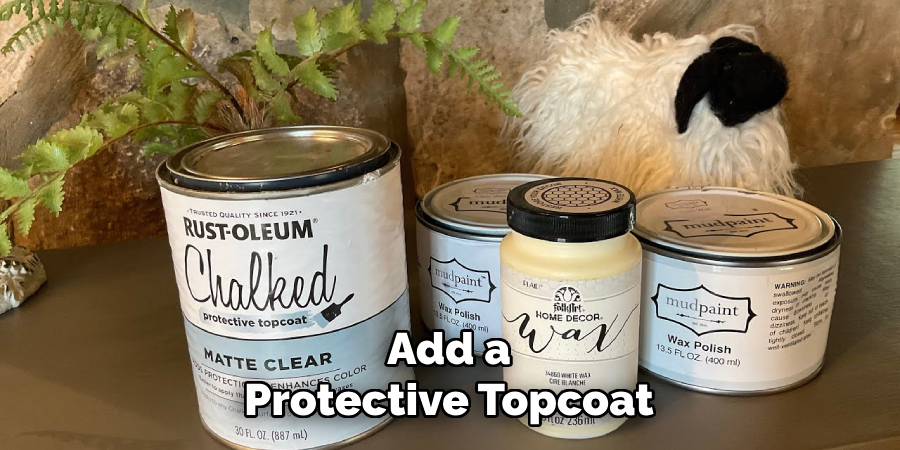
You can also choose a topcoat with a glossy, satin, or matte finish, depending on your preference. It’s always a good idea to test the topcoat on a small, inconspicuous area first to make sure you are happy with the result.
Step 7: Reattach Doors, Drawers, and Hardware
Once the paint or stain is fully dry, it’s time to reattach the doors, drawers, and hardware. Start by taking the cabinet doors and aligning them with the hinges, ensuring they are positioned properly for smooth operation. Use your screwdriver or drill to secure the doors back into place, double-checking that they open and close without any hindrance. Next, reinsert the drawers, ensuring that they are placed correctly in their tracks.
It’s always a good idea to give the doors and drawers a light sanding before reattaching them to help them glide more smoothly. Finally, attach the hardware back onto your cabinets, making sure everything is secure.
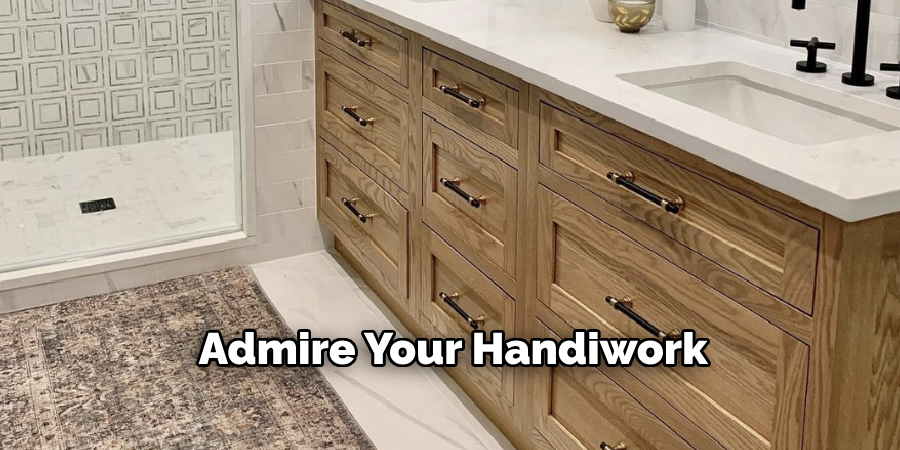
Step 8: Enjoy Your Newly Refinished Bathroom Cabinets!
Congratulations – you have successfully refinished your bathroom cabinets! Take some time to admire your handiwork and enjoy the fresh new look of your space. With proper care and maintenance, your cabinets should continue to look beautiful for years to come.
Following these steps on how to refinish bathroom cabinets and using high-quality products and tools will ensure a professional-looking result that you can be proud of. Refinishing your bathroom cabinets is an affordable and relatively easy way to update the look of your space without breaking the bank.
Frequently Asked Questions
Q: How Long Does It Take to Refinish Bathroom Cabinets?
A: The time it takes to refinish bathroom cabinets depends on the size of your cabinet and the drying time of the materials used. On average, it can take anywhere from 2-3 days to complete the project.
Q: Do I Need to Remove the Cabinets from the Wall before Refinishing?
A: It is not necessary to remove the cabinets from the wall, but it may make the process easier. If you are comfortable working with them in place, they can remain attached to the wall during refinishing.
Q: Can I Change My Stained Cabinets to Painted Ones?
A: Yes, you can change your stained cabinets to painted ones by following these steps and using a suitable primer and paint for your desired finish. However, keep in mind that this will require more preparation and potentially more coats of paint for proper coverage.
Q: How Often Should I Refinish My Bathroom Cabinets?
A: With proper care and maintenance, a refinished bathroom cabinet should last for several years. However, depending on the wear and tear of your cabinets, you may need to refinish them every 5-10 years or as needed.
Conclusion
Refinishing your bathroom cabinets can breathe new life into your space while providing an opportunity for personal expression through color and finish choices. By following the step-by-step guide on how to refinish bathroom cabinets outlined above, you can achieve a professional look and enhance the overall aesthetic of your bathroom. Remember that preparation is key, from repairing any damage to selecting the right products, as these steps will significantly impact the final result.
With attention to detail and a bit of patience, your refinished cabinets will not only be visually appealing but also durable, ensuring they serve you well for years to come. Enjoy the transformation and the satisfaction that comes with a successful DIY project!
About the Author
Adrian Green, a lifelong woodworking enthusiast, shares his passion for the craft through The Woodenify Blog. With a foundation built on years of hands-on experience in his father’s woodworking shop, Adrian is dedicated to helping others learn and grow in the world of DIY woodworking. His approach to woodworking combines creativity, practicality, and a deep appreciation for the art of building with your own hands. Through his blog, he inspires individuals of all skill levels to embark on their own woodworking journeys, creating beautiful, functional pieces of furniture and décor.
Professional Focus
- Specializes in DIY woodworking projects, from furniture to home décor.
- Provides step-by-step guides and practical tutorials for woodworkers of all skill levels.
- Dedicated to helping readers build confidence and skill through easy-to-follow instructions and tips.
- Passionate about fostering a community of makers who can share, learn, and grow together.
Education History
- University of Craft and Design – Bachelor of Fine Arts (BFA) in Woodworking and Furniture Design
- Woodworking Apprenticeships – Extensive hands-on training with skilled craftsmen to refine carpentry and furniture making techniques.
- Online Courses & Masterclasses – Continued education in advanced woodworking techniques, design principles, and specialized tools
Expertise:
- DIY woodworking, carpentry, furniture making, and home décor projects.
- Creating accessible tutorials and guides for beginner to advanced woodworkers.
- Sharing the joys and satisfaction of woodworking, from raw materials to finished products.