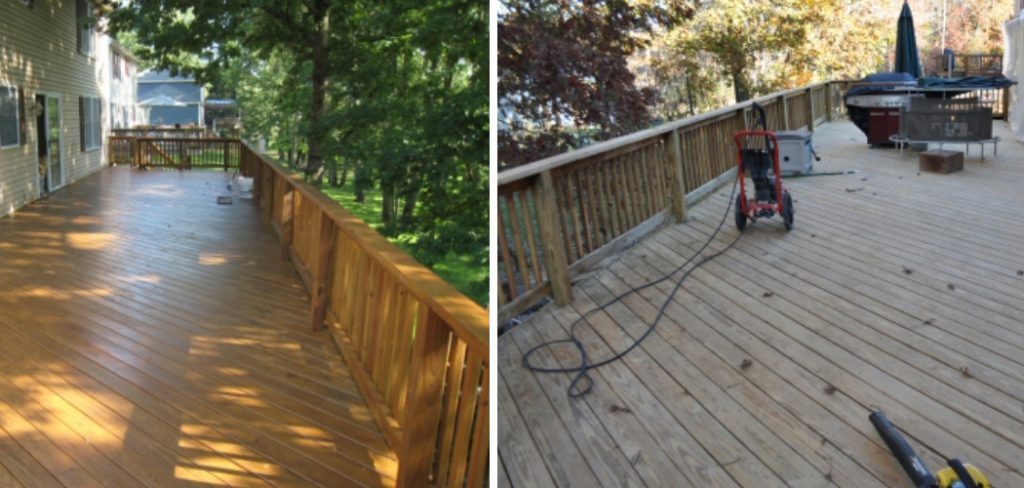
Are you tired of your old deck? Does it look worn out, faded, or damaged? If so, it may be time to remove the deck overcoating and start fresh with a new surface.
Removing a deck over can seem like a daunting task, fraught with the challenges of dealing with heavy materials and ensuring that it does not damage the underlying structure. However, with the right tools, techniques, and a bit of patience, it’s entirely possible to strip away that old deck to make way for a fresh new surface. Whether your deck has succumbed to the wear and tear of the elements or you’re simply looking to revamp your outdoor space, this guide will walk you through the essential steps on how to remove deck over.
By following these instructions, you’ll be ready to transform your outdoor area into a refreshed and inviting space.
What Are the Benefits of Removing Deck Over?
Removing the deck has various benefits, including:
- Restoring the Structural Integrity of Your Deck: Worn-out or damaged deck coatings can hide underlying problems such as rotting wood or loose boards. By removing the old coating, you’ll be able to assess any potential issues and make repairs before applying a new surface.
- Enhancing the Appearance of Your Deck: Over time, deck coatings can become faded and discolored, negatively affecting the overall look of your outdoor space. Removing it will reveal a clean surface and give you the opportunity to choose a new color or finish that better suits your style.
- Improving Safety: Old deck overcoatings can become slippery when wet or worn down, posing a safety hazard for anyone using the deck. By removing it, you’ll be able to apply a new surface with better traction and reduce the risk of slips and falls.
- Saving Money: Removing the deck over can save you money in the long run. Instead of continuously applying new coats of sealant or stain on top of an old one, starting fresh will ensure a longer-lasting and more durable surface.
These are just a few of the benefits of removing the deck, making it a worthwhile project for any homeowner looking to improve their outdoor space.
Tools and Materials You’ll Need
Before getting started, it’s essential to gather all the necessary tools and materials. Here’s a list of what you’ll need:
- Protective Gear: Wear safety glasses, gloves, and a dust mask to protect yourself from debris or chemicals used during the removal process.
- Pressure Washer: A pressure washer will make the job of removing the deck over much more manageable. It’s recommended to use a medium-strength spray to avoid damaging the wood surface underneath.
- Deck Stripper: You can find deck strippers at most hardware stores or home improvement centers. These products are specially formulated to remove deck coatings and can be applied with a roller or brush.
- Scraper: A sturdy scraper will come in handy for removing any stubborn or hard-to-reach areas of the deck over coating.
- Sander: If your deck has many grooves, using a sander can help speed up the removal process. Make sure to use coarse-grit sandpaper to remove the coating effectively.
- Deck Cleaner: Once you’ve removed all the deck over, it’s essential to thoroughly clean the surface before applying a new coating. Deck cleaners help remove any remaining residue and prepare the wood for a new finish.
Once you have all the necessary tools and materials, it’s time to get started on removing the deck over.
10 Easy Steps on How to Remove Deck Over
Step 1. Prepare the Work Area:
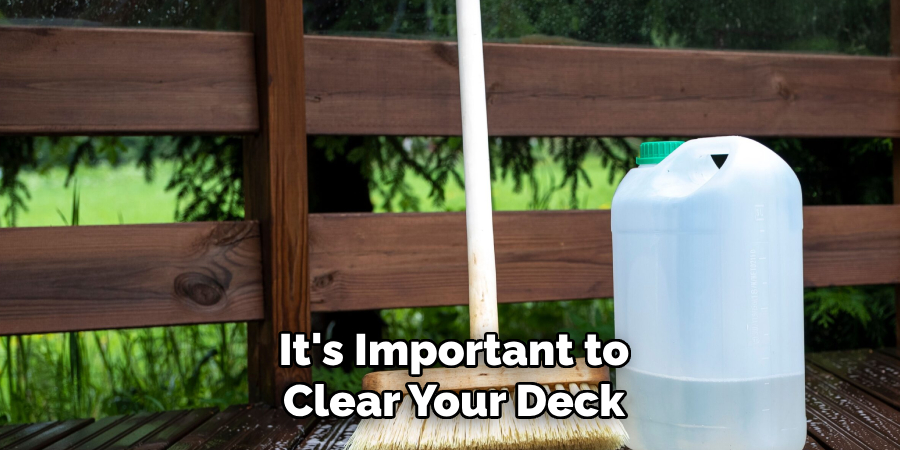
Before you begin, it’s important to clear your deck of any furniture, grills, or other items. This will give you full access to the surface and prevent any damage to your belongings. Secure any loose boards or nails to ensure a safe working environment. Cover any surrounding plants or structures with a tarp to protect them from debris and chemicals used during the removal process.
Step 2. Wear Protective Gear:
Before starting the removal process, it is crucial to prioritize your safety by wearing protective gear. Don a pair of safety glasses to shield your eyes from any flying debris or harmful chemicals. Gloves will protect your hands both from potential splinters and the chemicals found in the deck stripper. Lastly, wearing a dust mask is advised to avoid inhaling any dust or chemical vapors released during the removal process. Ensuring your personal safety is an essential step before proceeding to the more labor-intensive parts of the project.
Step 3. Apply Deck Stripper:
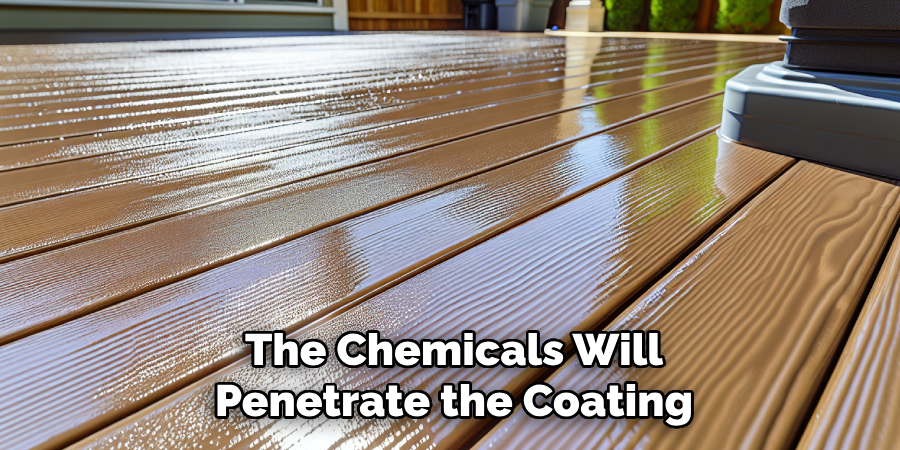
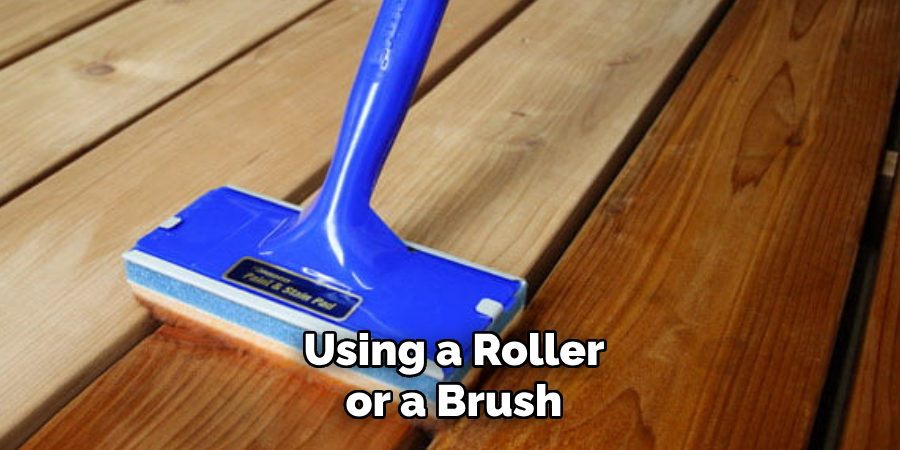
Now that you’re protected with the appropriate gear, it’s time to apply the deck stripper. Follow the manufacturer’s instructions when preparing the solution. Using a roller or a brush, evenly cover the deck’s surface with a deck stripper. Be generous in your application to ensure the old deck over coating softens enough for removal. Allow the stripper to sit on the surface for the time specified by the product—usually between 15 to 30 minutes. During this time, the chemicals will penetrate the coating, making it easier to strip away. Keep an eye on the deck, and do not let the stripper dry out; if needed, apply a little more to keep the surface wet throughout the process.
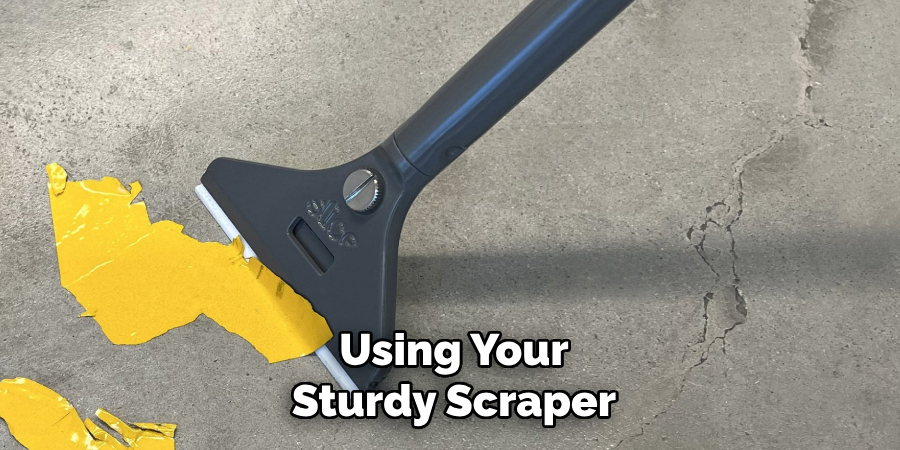
Step 4. Scrape Off the Old Coating:
After the deck stripper has had ample time to work, begin scraping off the old deck over coating. Using your sturdy scraper, start at one end of the deck and work your way to the other, removing as much of the old material as possible. Be thorough but gentle to avoid damaging the wood underneath. For those hard-to-reach areas or spots where the coating proves particularly stubborn, consider using a smaller hand scraper for better precision. This step might require patience and a bit of elbow grease, but it’s crucial for preparing the surface for a new coat.
Step 5. Pressure Wash the Deck:
After scraping off the bulk of the old deck over coating, it’s time to thoroughly clean the deck’s surface with a pressure washer. Set the pressure washer to a medium strength to ensure you do not damage the wood. Begin at one corner of the deck and methodically work your way across, keeping the nozzle at a consistent distance from the wood surface. This step will remove any remaining deck stripper solution, loosened paint, and debris, leaving the wood clean and ready for further preparation. Ensure the deck is completely dry before proceeding to the next step, which may take a day or more, depending on weather conditions.
Step 6. Sand the Deck Surface:
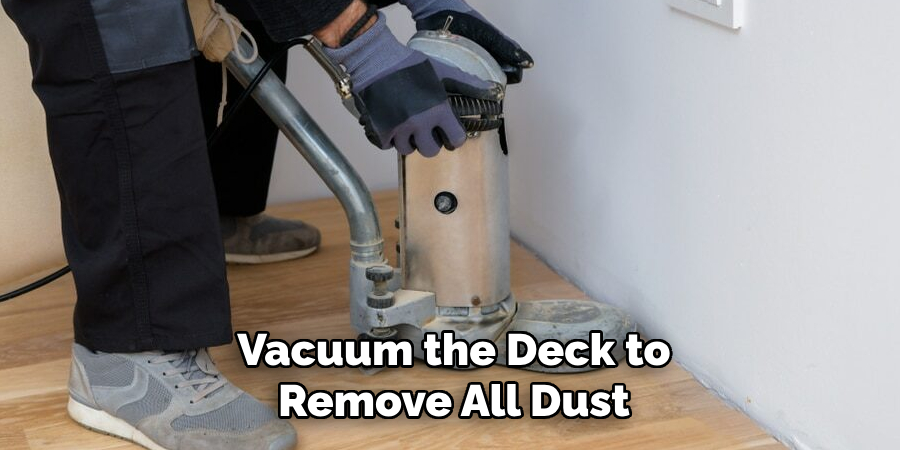
Once the deck is dry, it’s time to start sanding. This step is crucial for creating a smooth surface for the new coating to adhere to. Use a sander with coarse-grit sandpaper to efficiently remove any remaining pieces of old coating, splinters, or rough spots. Pay special attention to edges and corners where the sander might not reach, using hand sanding blocks if necessary. Ensure you sand in the direction of the wood grain to avoid scratching the surface. After sanding, sweep or vacuum the deck to remove all dust and debris, ensuring a clean surface for the next steps.
Step 7. Apply Deck Cleaner:
Now that your deck is sanded and free of debris, it’s time to apply a deck cleaner. This will help ensure the wood is entirely free of any residues and provide a clean, optimal surface for the new finish. Follow the instructions on your deck cleaner, applying it liberally with a roller or a brush. Some cleaners may require the surface to stay wet for a certain period, so read the label carefully. After applying the cleaner, rinse the deck thoroughly with a hose or a pressure washer on a low setting to remove any cleaner residue. Allow the deck to dry completely, which can take anywhere from 24 to 48 hours, depending on environmental conditions.
Step 8. Check for Repairs:
Before proceeding with applying a new coat, inspect the deck for any needed repairs. Look for any loose boards, protruding nails, or areas that may have been further damaged during the cleaning and preparation process. Secure any loose boards with screws rather than nails for a longer-lasting fix. Hammer down any protruding nails or replace them with screws. If there are any significantly damaged areas of wood, consider replacing those boards entirely to ensure a uniform and safe surface. Completing these repairs will not only make your deck safer but will also ensure the longevity of your new deck coating.
Step 9. Apply the New Coating:
Now that your deck is clean, repaired, and prepped, it’s time to apply the new coating. Start by selecting a high-quality deck over the product that suits your climate and deck material. Stir the product well before use to ensure it’s mixed thoroughly. Using a roller or a brush, begin at one end of the deck and apply the coating in smooth, even strokes. Follow the grain of the wood and maintain a wet edge to avoid lap marks.
Depending on the product and the condition of your deck, you may need to apply a second coat. Allow the first coat to dry completely, according to the manufacturer’s instructions, before applying the second. Once completed, wait for the recommended time for the coating to cure fully before moving furniture and plants back onto the deck. This final step rejuvenates your deck, providing a fresh look and extended protection against the elements.

Step 10. Maintenance and Upkeep:
Proper maintenance and periodic upkeep are vital to extending the life of your newly coated deck. Regularly sweep the deck to remove dirt and debris, which can retain moisture and lead to wood rot. Periodically check for any signs of wear or damage, especially after harsh weather conditions. Reapply a coat of the deck over the product as recommended by the manufacturer, typically every few years, to ensure ongoing protection against the sun, rain, and foot traffic. Consider using furniture pads to minimize scratches and avoid dragging heavy objects across the surface.
By following these steps and maintaining your deck properly, you can enjoy a beautiful and protected outdoor space for years to come.
5 Additional Tips and Tricks
- Apply Heat: Sometimes, applying heat can ease the removal of the deck over materials. A heat gun can soften the coating, allowing for easier scraping. Ensure to use the heat gun cautiously to avoid damaging the wood beneath.
- Chemical Strippers: Eco-friendly chemical strippers are available that can break down the deck-over material, making it easier to scrape away. Look for products specifically designed for removing deck-over material and follow the instructions carefully.
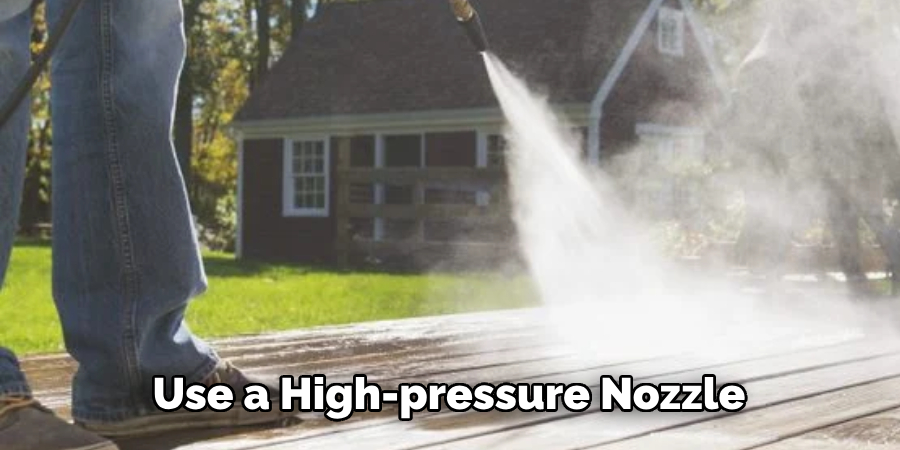
- Power Washing: If you have access to a power washer, it can be effective in removing deck over materials. Use a high-pressure nozzle and aim at a downward angle to avoid damaging the wood underneath. However, this method may not be suitable for older or weaker decks.
- Sandblasting: Sandblasting may be necessary for extremely stubborn deck over materials. It involves using compressed air to blast sand or other abrasive materials at the surface, effectively removing the coating. This method should only be done by professionals as it can be dangerous and cause damage if not done properly.
- Reapply a Finish: After successfully removing the deck over, it’s important to reapply a protective finish to the wood. This will help protect the surface from future damage and extend its lifespan. Choose a product that is suitable for your type of wood and follow the instructions carefully for the best results.
These additional tips and tricks can be helpful in removing deck over materials effectively and efficiently.
5 Things You Should Avoid
- Avoid Rushing the Process: Removing the deck over materials can be time-consuming. Rushing through the process may lead to incomplete removal or damage to the wood. Take your time and tackle one section at a time for thorough cleaning.
- Do Not Ignore Safety Precautions: When using chemical strippers, heat guns, or power washers, always prioritize safety. Wear appropriate protective gear, such as gloves, goggles, and masks, to protect yourself from harmful chemicals and debris.
- Avoid Using Too Much Pressure: When power washing or sandblasting, using too much pressure can etch or damage the wood beneath the deck over the material. Always start with lower pressure and increase gradually as needed to avoid causing harm to your deck.
- Do Not Skip the Patch Test for Chemicals: Before applying any chemical strippers to the entire deck, conduct a patch test in an inconspicuous area. This helps ensure the chemical does not react negatively with the wood or cause unexpected damage.
- Avoid Forgoing the Finish: Skipping the final step of applying a protective finish may expose the wood to elements, leading to early wear and tear. Once the deck over material is removed, seal the wood with a quality finish to protect it and extend its lifespan.
By avoiding these common mistakes, you can ensure a more successful and safe removal of deck over materials from your deck, preserving its beauty and functionality.
Why Are Your Deck Over Peeling?
There are several possible reasons why your deck may be peeling, including improper application, weather conditions, and the age of the coating. Here are some common causes to be aware of:
- Improper Preparation: Before applying the deck over materials, it’s crucial to properly prepare the surface by cleaning and sanding any rough areas. If this step is skipped or done incorrectly, the coating may not adhere properly and result in peeling.
- Moisture Damage: If your deck is exposed to frequent or excessive moisture, it can cause the wood to expand and contract, leading to cracking and peeling of the deck over material. This is why proper waterproofing and sealing are essential for maintaining a deck’s longevity.
- Extreme Temperatures: Fluctuations in temperature, especially extreme heat or cold, can cause the deck over material to expand and contract, leading to cracking and peeling. This is another reason why proper sealing and finishing are crucial for protecting your deck.
- Age of Coating: All coatings eventually break down and need to be reapplied. If your deck over material has been on for several years or exposed to harsh conditions, it may be time for a new coat.
By understanding the possible causes of peeling the deck over and taking preventative measures, you can prolong the lifespan of your deck and maintain its beauty.
Conclusion
How to remove deck over requires patience, the right tools, and a methodical approach. By following the tips and tricks outlined in this guide, homeowners can effectively strip away old coatings to reveal the wood’s natural beauty. Whether you opt for heat application, chemical strippers, power washing, sandblasting, or a combination of these methods, it’s essential to proceed with caution and adhere to safety guidelines to protect both yourself and your deck.
Crucially, the process doesn’t end with the removal of the deck over material; reapplying a protective finish is vital to ensure the wood’s longevity and resistance to the elements. Avoid common pitfalls such as rushing the job, neglecting safety precautions, excessive pressure during cleaning, skipping test patches for chemicals, and foregoing the final finish. Understanding the reasons behind peeling and flaking, like improper preparation, moisture damage, extreme temperatures, and the age of the coating, can also help prevent future issues.
With dedication and care, your deck can be restored to its former glory and serve as a cherished space for relaxation and entertainment.
About the Author
Adrian Green, a lifelong woodworking enthusiast, shares his passion for the craft through The Woodenify Blog. With a foundation built on years of hands-on experience in his father’s woodworking shop, Adrian is dedicated to helping others learn and grow in the world of DIY woodworking. His approach to woodworking combines creativity, practicality, and a deep appreciation for the art of building with your own hands. Through his blog, he inspires individuals of all skill levels to embark on their own woodworking journeys, creating beautiful, functional pieces of furniture and décor.
Professional Focus
- Specializes in DIY woodworking projects, from furniture to home décor.
- Provides step-by-step guides and practical tutorials for woodworkers of all skill levels.
- Dedicated to helping readers build confidence and skill through easy-to-follow instructions and tips.
- Passionate about fostering a community of makers who can share, learn, and grow together.
Education History
- University of Craft and Design – Bachelor of Fine Arts (BFA) in Woodworking and Furniture Design
- Woodworking Apprenticeships – Extensive hands-on training with skilled craftsmen to refine carpentry and furniture making techniques.
- Online Courses & Masterclasses – Continued education in advanced woodworking techniques, design principles, and specialized tools
Expertise:
- DIY woodworking, carpentry, furniture making, and home décor projects.
- Creating accessible tutorials and guides for beginner to advanced woodworkers.
- Sharing the joys and satisfaction of woodworking, from raw materials to finished products.