Are you tired of looking at unsightly water damage on your baseboards? Water damage can happen for various reasons, such as leaks, flooding, or even spills that go unnoticed.
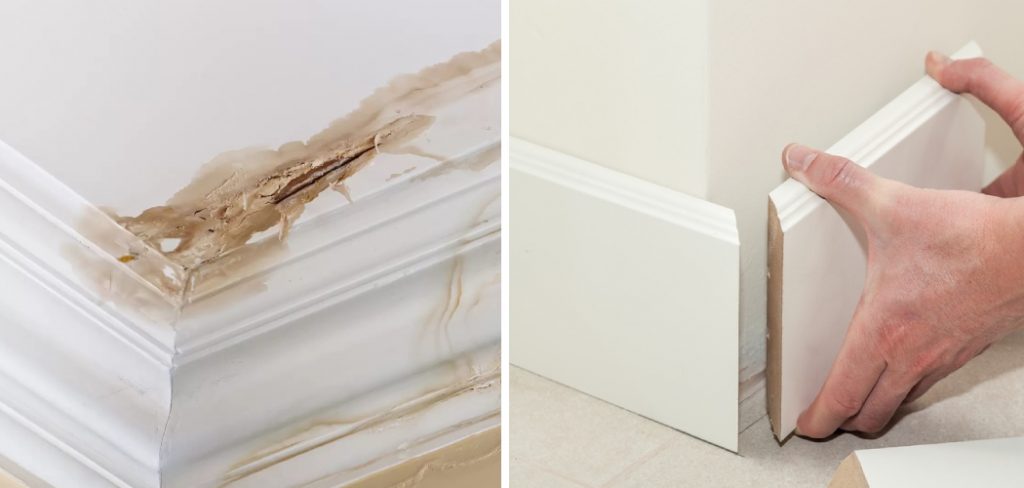
Water damage to baseboards in your home can not only be a sore sight but can also lead to bigger problems if left unaddressed, such as mold growth and structural damage. Repairing water-damaged baseboards promptly can prevent further damage to your walls and foundation, saving you money and effort in the long run.
This guide will walk you through the steps necessary on how to repair baseboard water damage, from identifying the extent of the damage to the final touches of repainting. Whether you’re dealing with the aftermath of a flood, leaky plumbing, or just accidental spills, this guide will equip you with the knowledge to restore your baseboards and protect your home from future water damage.
What are the Causes of Baseboard Water Damage?
First, it’s essential to identify the causes of water damage to your baseboards. Knowing what led to the damage can help you prevent it from happening again in the future. Some common causes include:
- Leaky Plumbing: This is one of the most common causes of water damage to baseboards and other parts of your home. Leaks can happen in pipes, toilets, showers, and sinks, so checking them regularly for any signs of leakage is essential.
- Flooding: Whether from heavy rains or a burst pipe, flooding can cause significant water damage to baseboards and other parts of your home. It’s crucial to address the source of the flooding immediately to prevent further damage.
- Accidental Spills: Spilling water on your baseboards may not seem like a big deal, but if left unattended, it can seep into the wood and cause damage over time. It’s best to clean up any spills immediately to prevent water from penetrating the baseboards.
Now that you know what causes water damage to baseboards, let’s move on to the steps to repair them.
What Will You Need?
Before starting the repair process, gathering all the necessary tools and materials is essential. Here’s a list of what you’ll need:
- Sandpaper
- Wood putty
- Spackling compound
- Putty knife
- Paint scraper
- Primer paint
- Latex or oil-based paint (match with your existing baseboard color)
Once you have all the tools and materials, let’s start repairing your water-damaged baseboards.
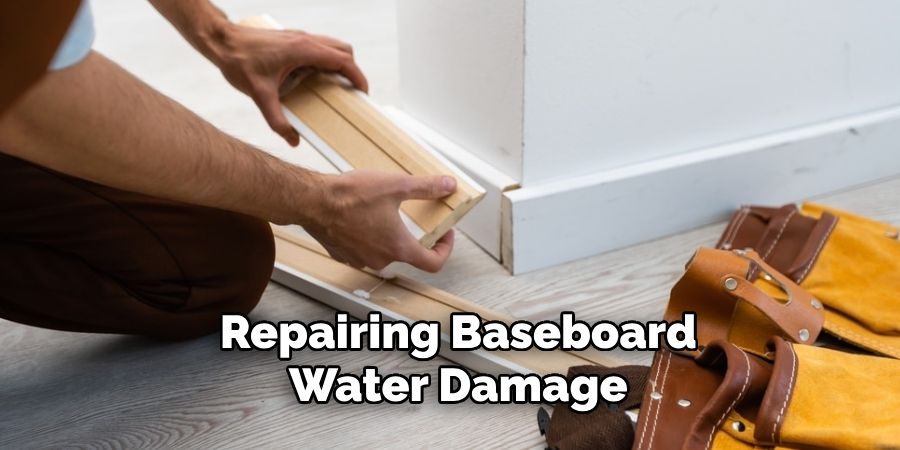
10 Easy Steps on How to Repair Baseboard Water Damage
Step 1: Assess the Damage
The first step in repairing baseboard water damage is to assess the extent of the damage. You’ll need to determine whether you can repair the damaged area or if you need to replace the entire baseboard. Here are some signs that indicate your baseboards need to be replaced:
- The baseboard is soft and spongy to the touch.
- There are visible signs of mold growth.
- The baseboard has significant cracks or breaks.
If any of these signs are present, replacing the entire baseboard is best. If you still need to, you can proceed with repairing the damaged area.
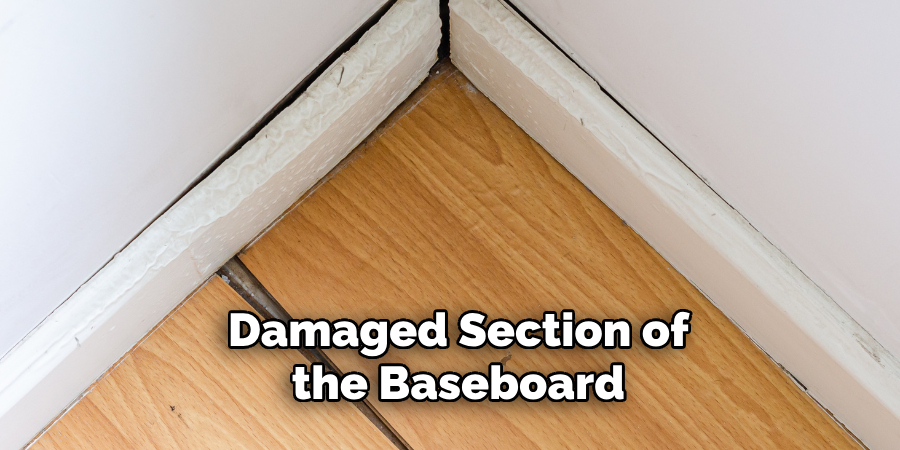
Step 2: Remove the Damaged Area
To remove the damaged area of the baseboard, carefully use the paint scraper or a putty knife to pry away the affected section. It’s essential to perform this step with care to avoid further damaging the wall behind the baseboard or the undamaged sections of the baseboard itself.
Start by gently inserting the tool under the damaged area and slowly lifting it away from the wall. If the baseboard is painted over, you may need to score the top of the baseboard where it meets the wall with a utility knife to prevent tearing the paint. Once the damaged section is removed, check behind it for any signs of moisture or additional damage to ensure that the underlying issue has been resolved before proceeding with the repair.
Step 3: Dry Out the Area
After removing the damaged section of the baseboard, it’s critical to ensure that the area behind and around it is completely dry. If you find moisture or signs of water damage in the wall or floor, use a fan or dehumidifier to thoroughly dry the area. This might take anywhere from 24 to 48 hours, depending on the extent of the moisture.
It’s essential to address any underlying leaks or moisture sources during this time to prevent future water damage. Failure to adequately dry the area can lead to mold growth and further damage, undoing the repair efforts.
Step 4: Prepare the Surface
Before applying any wood putty or spackling compound, you need to ensure the surface around the damaged area is clean and smooth. Use sandpaper to smooth out any rough edges or surface imperfections on the baseboard and the wall around the damaged section.
This step is crucial for the repair materials to adhere properly and create a seamless repair. Dust off the area thoroughly after sanding to remove any debris or dust that could interfere with the application of the repair materials. Preparing the surface carefully at this stage will produce a more polished and professional-looking repair job.
Step 5: Apply Wood Putty or Spackling Compound
With the surface prepared, it’s time to fill the damaged area with wood putty or spackling compound. If you’re dealing with a wooden baseboard, wood putty is ideal for its durability and compatibility with wood. For non-wood baseboards, the spackling compound works well.
Use your putty knife to apply the compound or putty into the damaged area, pressing firmly to ensure it fills in all gaps and crevices. Smooth out the surface with the flat edge of the knife, and remove any excess material. Allow the filled section to dry completely, following the manufacturer’s recommended drying time, ranging from a few hours to overnight. This step is crucial in restoring the integrity and appearance of your baseboard.
Step 6: Sand the Repaired Area
Once the putty or spackling compound has fully dried, it’s important to sand the repaired area to create a smooth, flush surface with the rest of the baseboard. Using a fine-grit sandpaper, gently sand over the filled area, being careful not to remove too much of the repair material or damage the surrounding baseboard.
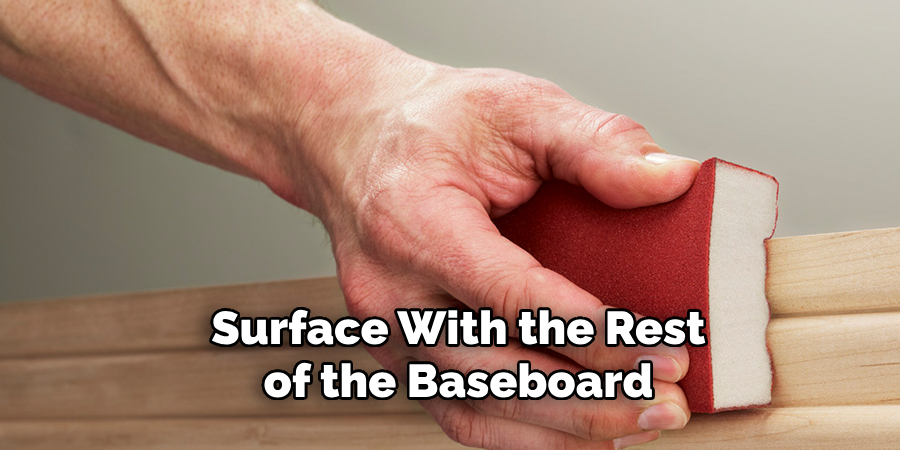
The goal is to make the repaired section indistinguishable from the rest of the baseboard. Wipe away any dust from sanding with a clean, damp cloth to prepare for painting. This step ensures that the repair blends seamlessly with the original material, leaving no visible signs of the previous damage.
Step 7: Prime the Repaired Area
Before applying the final coats of paint, it’s essential to prime the repaired area of the baseboard. This helps seal the repair material, ensuring that the paint adheres well and provides a uniform appearance across the baseboard.
Use a high-quality primer paint suitable for your baseboard material, applying it with a paintbrush or small roller for an even coat. Allow the primer to dry completely according to the product’s instructions. Priming is crucial to prevent the repaired section from standing out after the final paint application, helping to create a flawless finish.
Step 8: Paint over the Repaired Area
After the primer has dried, it’s time to paint over the repaired area with latex or oil-based paint that matches your existing baseboard color. Stir your paint thoroughly and apply it with a small brush or roller, ensuring even coverage over the primed surface.
Multiple coats may be required to achieve a color match and consistent finish, so allow each coat to dry completely before applying the next. This step is vital for camouflage and aesthetics, as it ensures the repaired section blends seamlessly with the rest of the baseboard, making the repair work virtually undetectable.
Step 9: Clean Up and Final Inspection
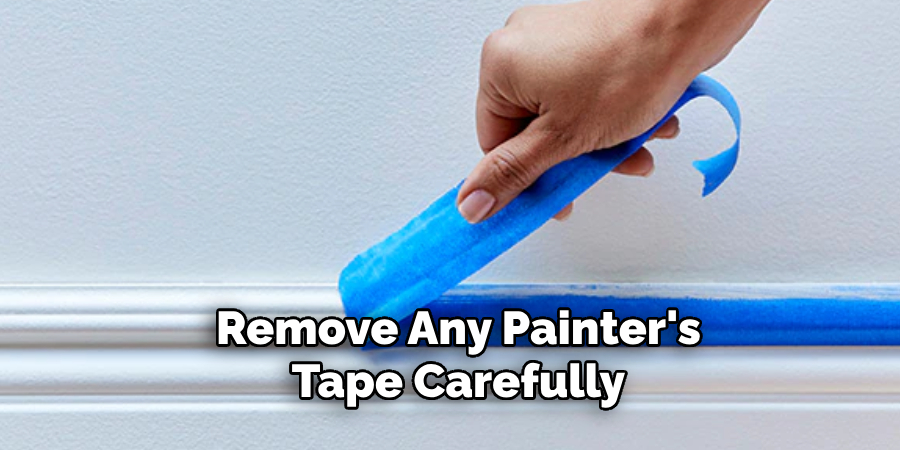
Once the final coat of paint is dry, take a moment to clean up your workspace. Remove any painter’s tape carefully, gather and dispose of any debris or leftover materials, and put away your tools. Then, a final inspection of the repaired baseboard will be conducted. Check for any missed spots, uneven textures, or discrepancies in paint color.
Touch up as necessary to ensure a professional and uniform appearance. Finally, step back and admire your work. With patience and attention to detail, you have successfully repaired and revitalized your baseboard, preserving the integrity and beauty of your home.
Step 10: Prevent Future Damage
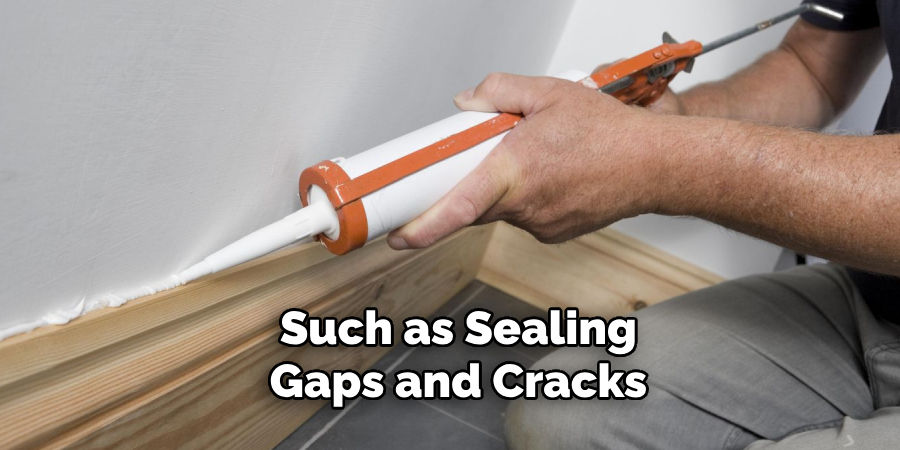
To prevent future damage, consider addressing the root causes of the initial baseboard damage. This might involve fixing persistent leaks, improving room ventilation to reduce humidity, or ensuring proper insulation near windows and doors. Regular maintenance, such as sealing gaps and cracks, can also ward off water damage and pests.
Periodically inspect your baseboards and surrounding areas for signs of wear or damage, taking proactive steps to mitigate any issues early. By taking these precautionary measures, you can preserve the longevity and appearance of your baseboards, ensuring they remain an integral part of your home’s aesthetic appeal for years to come.
By following these steps, you can effectively repair a water-damaged baseboard and restore its original appearance.
5 Additional Tips and Tricks
- Ensure Thorough Dryness: Before any repair starts, it’s crucial to ensure that the affected area is completely dry. Employ dehumidifiers and fans to expedite the drying process. Moisture meters can confirm that there’s no hidden moisture that could cause further damage or mold growth.
- Use a Sealant: After repairing or replacing the damaged baseboard, apply a waterproof sealant as a preventive measure. This sealant will act as a barrier against future water intrusion, helping to protect your baseboards and walls from potential water damage.
- Opt for Water-Resistant Materials: If water damage is recurrent, consider replacing traditional wood baseboards with water-resistant materials such as PVC or vinyl. These materials can mimic the appearance of wood but are more durable against moisture.
- Regular Inspection and Maintenance: Regularly inspect your baseboards and walls for signs of water damage. Catching issues early can prevent significant damage and costly repairs—attention areas prone to moisture, like bathrooms, kitchens, and basements.
- Improve Room Ventilation: Enhance ventilation in areas prone to moisture. This could mean installing exhaust fans in bathrooms and kitchens or ensuring that vents and air ducts are not blocked. Good airflow helps reduce moisture accumulation, thereby protecting your baseboards from potential water damage.
With these additional tips and tricks, you can further safeguard your baseboards against water damage.
5 Things You Should Avoid
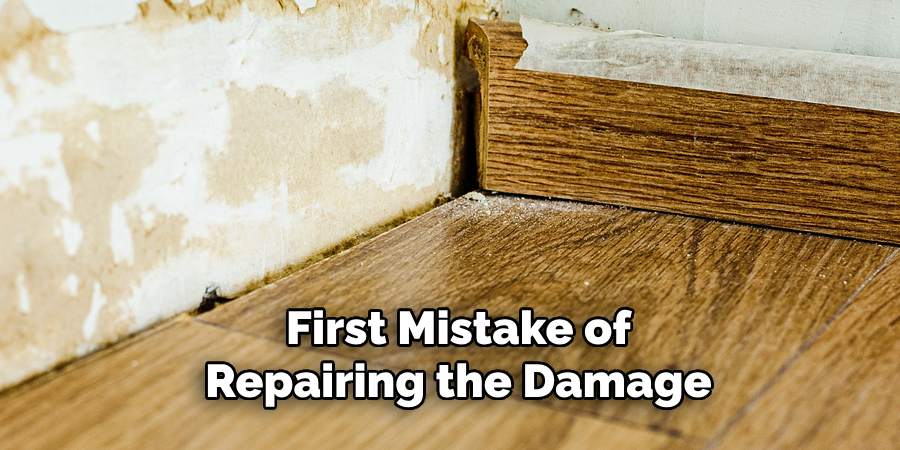
- Ignoring the Source of the Problem: Many people make the first mistake of repairing the damage without addressing the root cause of the water intrusion. Fixing the aesthetic issues without solving the underlying problem will only lead to recurring damage.
- Delaying Repairs: Postponing repairs can lead to more severe damage, including mold and structural issues. It’s essential to act quickly to mitigate further damage.
- Using Non-Water-Resistant Materials: Replacing damaged baseboards with the same non-water-resistant materials can result in a cycle of damage and repair. Opt for materials designed to withstand moisture.
- Covering Up Mold: Painting over or covering mold without properly treating it risks health problems and doesn’t solve the underlying moisture issue. Professional mold remediation may be necessary before repairs are made.
- Skipping Professional Help When Needed: Sometimes, the extent of water damage can be beyond the scope of DIY repairs. Recognizing when professional help is needed is crucial to ensure that the repair is properly addressed and future problems are avoided.
By avoiding these common mistakes, you can ensure the repair process is effective and long-lasting.
How Do You Dry Baseboards After Flooding?
If your baseboards have been affected by flooding, it’s crucial to dry them thoroughly to prevent further damage. Here are the steps you can follow to dry baseboards after flooding:
- Remove any Standing Water: First, use a wet vacuum or mop to remove any standing water from the affected area. This will help speed up the drying process.
- Use Fans and Dehumidifiers: Place fans around the room to circulate air and speed up the drying process. Use a dehumidifier to remove excess moisture from the air.
- Remove Baseboards: If the flooding has caused severe damage, it may be necessary to remove the baseboards for more thorough drying. This will also allow access to any hidden moisture behind them.
- Inspect for Hidden Moisture: Use a moisture meter to check for any hidden moisture behind the baseboards or in the walls. If moisture is found, fans and dehumidifiers are used to remove it.
- Wait until Completely Dry: It’s essential to wait until the baseboards are completely dry before repairing or replacing them. This can take several days, so be patient.
By following these steps, you can effectively dry your baseboards after flooding and prevent further damage. Remember to also address the source of the flooding to avoid future issues.
How Do You Revive Baseboards?
If your baseboards have become dull or damaged over time, here are some steps you can take to revive them and restore their appearance:
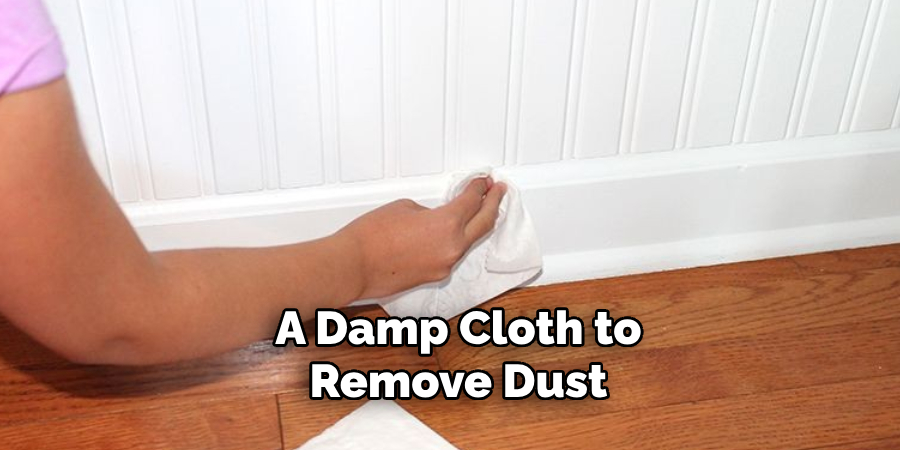
- Clean the Baseboards: First, wipe down the baseboards with a damp cloth to remove dust, dirt, and grime.
- Remove Scuffs and Scratches: Use a magic eraser or diluted vinegar to gently scrub away any scuffs or scratches on the baseboards.
- Sand and Fill in ents: For more significant damage, use sandpaper to smooth out any dents or scratches. Then, use wood filler to fill in the gaps and create a smooth surface.
- Repaint or Restain: Once the baseboards are clean and smooth, you can choose to repaint or restain them to refresh their appearance. Make sure to use a waterproof sealant for added protection.
- Regular Maintenance: To keep your baseboards looking like new, regularly dust and clean them with a damp cloth and address any scuffs or scratches as they occur.
By following these steps, you can effectively revive your baseboards and maintain their appearance for years to come. Remember to also address any underlying moisture issues to prevent future damage.
Can You Paint Over Water Damaged Baseboards?
It is possible to paint over water-damaged baseboards, but it’s not recommended. Painting over water damage will not solve the underlying issue and may lead to further damage down the line. It’s important to first address the source of the water damage and properly repair or replace the affected baseboards before considering painting.
This will ensure that the problem is addressed completely and effectively. Additionally, painting over mold or mildew without proper remediation can pose health risks. It’s always best to address water damage promptly and properly before making any cosmetic changes.
Overall, it’s important to regularly inspect and maintain your baseboards to prevent water damage, but in the event that it does occur, taking the necessary steps for repair and prevention can save you time and money in the long run.
Conclusion
How to repair baseboard water damage is an essential aspect of maintaining a healthy and aesthetically pleasing home environment.
By swiftly addressing the source of water intrusion, using the right materials for repair, and adequately drying affected areas, homeowners can effectively mitigate the effects of water damage. It is crucial to stay vigilant about potential signs of moisture damage and adopt preventive measures against future incidents.
In some cases, seeking professional assistance may be the most effective way to ensure thorough repairs and avoid recurring issues. Ultimately, taking the appropriate steps to repair water-damaged baseboards not only restores a home’s visual appeal but also contributes to its overall structural integrity and indoor air quality.
About the Author
Adrian Green, a lifelong woodworking enthusiast, shares his passion for the craft through The Woodenify Blog. With a foundation built on years of hands-on experience in his father’s woodworking shop, Adrian is dedicated to helping others learn and grow in the world of DIY woodworking. His approach to woodworking combines creativity, practicality, and a deep appreciation for the art of building with your own hands. Through his blog, he inspires individuals of all skill levels to embark on their own woodworking journeys, creating beautiful, functional pieces of furniture and décor.
Professional Focus
- Specializes in DIY woodworking projects, from furniture to home décor.
- Provides step-by-step guides and practical tutorials for woodworkers of all skill levels.
- Dedicated to helping readers build confidence and skill through easy-to-follow instructions and tips.
- Passionate about fostering a community of makers who can share, learn, and grow together.
Education History
- University of Craft and Design – Bachelor of Fine Arts (BFA) in Woodworking and Furniture Design
- Woodworking Apprenticeships – Extensive hands-on training with skilled craftsmen to refine carpentry and furniture making techniques.
- Online Courses & Masterclasses – Continued education in advanced woodworking techniques, design principles, and specialized tools
Expertise:
- DIY woodworking, carpentry, furniture making, and home décor projects.
- Creating accessible tutorials and guides for beginner to advanced woodworkers.
- Sharing the joys and satisfaction of woodworking, from raw materials to finished products.