Are you considering restoring your old oak dining table to its former glory? The good news is that you can be someone other than an expert woodworker to do it.
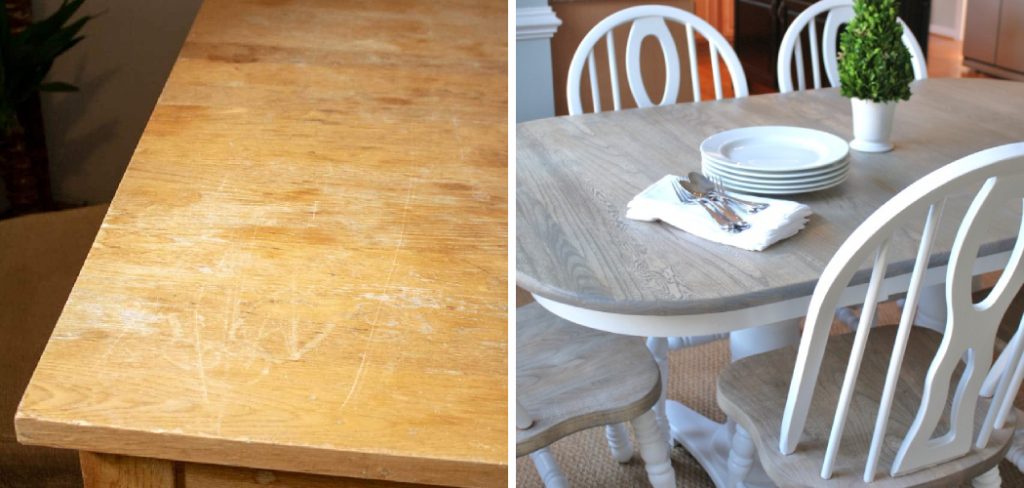
How to restore oak dining table can breathe new life into a cherished piece of furniture, transforming it from worn and tired to a stunning focal point in your home.
Oak, known for its durability and distinctive grain, is a popular choice for furniture that withstands the test of time. Whether your table has been scratched, stained, or simply dulled by years of use, the restoration process involves a few essential steps that can be tackled with some basic tools and materials.
In this guide, we’ll explore the techniques and tips for effectively restoring your oak dining table, ensuring it remains a functional and beautiful piece for years to come.
What Will You Need?
Before diving into the restoration process, gathering all the necessary tools and materials is essential. This will save you time and prevent delays while waiting for items to be delivered. Here are some of the things you’ll need:
- Sandpaper in varying grits (80-grit, 120-grit, and 220-grit)
- Wood stain (in your desired color)
- Polyurethane or varnish
- Paintbrushes (one for staining and one for finishing)
- Clean cloths
- Protective gloves and eyewear
- Drop cloth or plastic sheeting to protect floors or surfaces
Once you have all the necessary items, it’s time to restore your oak dining table.
10 Easy Steps on How to Restore Oak Dining Table
Step 1: Prepare the Surface

Preparing the surface of your oak dining table is a crucial first step in the restoration process. Start by ensuring the table is clean and free from dust, debris, and any leftover food particles. Use a vacuum cleaner or a soft brush to remove loose dirt, followed by a damp cloth to wipe down the surface. This will help prevent contaminants from being sanded into the wood during the next steps.
Once the table is clean, inspect it for any damages, such as deep scratches, dents, or areas where the finish has worn away completely. If you notice any loose veneers or parts, carefully reattach them with wood glue and hold them in place with clamps until dry.
After the surface has been cleaned and any damage is addressed, it’s time to start the sanding process, which will help to prepare the wood for staining and finishing. Proper surface preparation will significantly enhance the quality of the final restoration, ensuring a smooth and professional-looking result.
Step 2: Sanding the Table
Sanding is a vital step in the restoration process, as it removes the old finish and any imperfections from the surface of the oak table. Begin with the 80-grit sandpaper to tackle any deep scratches or rough areas. Sand along the grain of the wood to avoid creating additional scratches.
Once you’ve smoothed out the surface, gradually move to 120-grit and finish with 220-grit sandpaper for a fine, smooth finish. Be sure to wipe down the table with a clean cloth between each grit to remove the dust and debris created during sanding.
Step 3: Staining the Wood
After sanding, it’s time to bring some color back to your oak dining table. Apply your chosen wood stain using a paintbrush or cloth, following the wood grain for an even application.
Allow the stain to sit for a few minutes, then wipe off any excess with a clean cloth. The longer you let the stain sit, the darker the color will become, so adjust the timing to achieve your desired shade. Once you’re satisfied with the color, let it dry completely according to the manufacturer’s instructions.
Step 4: Applying the Finish
It’s important to protect your beautifully restored surface with the stain dry. Apply a coat of polyurethane or varnish with a clean paintbrush, ensuring an even application. Depending on the type of finish you’re using, you may need to apply multiple coats for added durability.
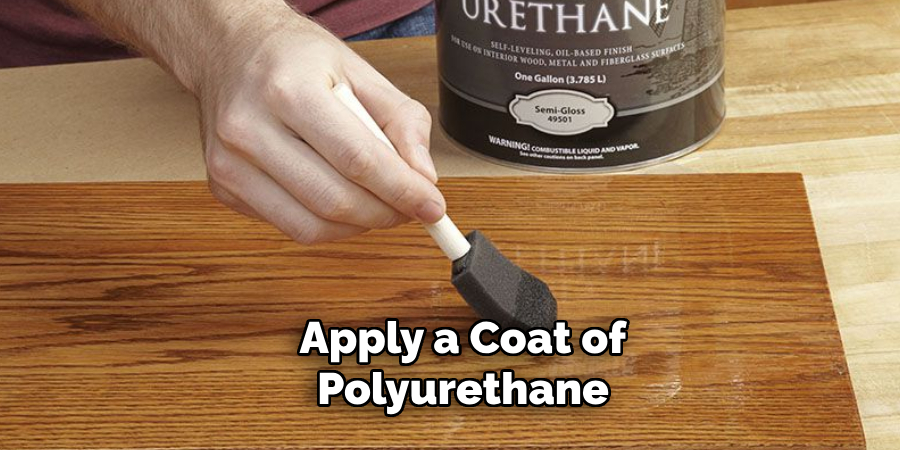
Follow the directions on your chosen product for drying times between coats, lightly sanding with 220-grit sandpaper between applications to ensure a flawless finish.
Step 5: Final Touches
Once the final coat of finish is dry, inspect your table for any missed areas or imperfections that may need touch-ups. If everything looks good, give it a final wipe-down to remove dust or debris. Consider placing felt pads under the table legs to protect your floors and prevent scratching when moving the table. Your restored oak dining table is now ready to be enjoyed!
Step 6: Maintenance and Care
Now that you have successfully restored your oak dining table, it’s essential to implement a regular maintenance routine to keep it looking its best. Begin using a soft, damp cloth to clean the surface regularly, avoiding harsh chemicals that can damage the finish. Use a mild wood cleaner specifically designed for finished wood surfaces for deeper cleaning.
Additionally, consider applying a fresh coat of varnish or polyurethane every few years to maintain the protective layer and enhance the table’s shine. Lastly, always be mindful of placing hot items directly on the surface; using coasters or trivets can help prevent heat damage and preserve the integrity of your beautifully restored table.
Step 7: Protecting Your Table
To ensure the longevity of your restored oak dining table, it’s crucial to protect it from environmental factors and everyday wear.
Consider placing your table away from direct sunlight, as prolonged exposure can fade the wood and damage the finish. Additionally, using tablecloths or placemats during meals can help shield the surface from scratches and spills. Regularly check for any signs of wear or damage and address them promptly to prevent further deterioration.
Step 8: Avoiding Excessive Moisture
Moisture can be one of the biggest enemies of your restored oak dining table. Always use coasters for beverages to prevent water damage and avoid placing wet items directly on the surface. If a spill occurs, promptly wipe it with a soft cloth to prevent the water from seeping into the wood.
Additionally, consider using a humidifier in dry climates, as fluctuating humidity levels can cause the wood to expand and contract, potentially leading to cracks or warping.
Step 9: Regular Inspections
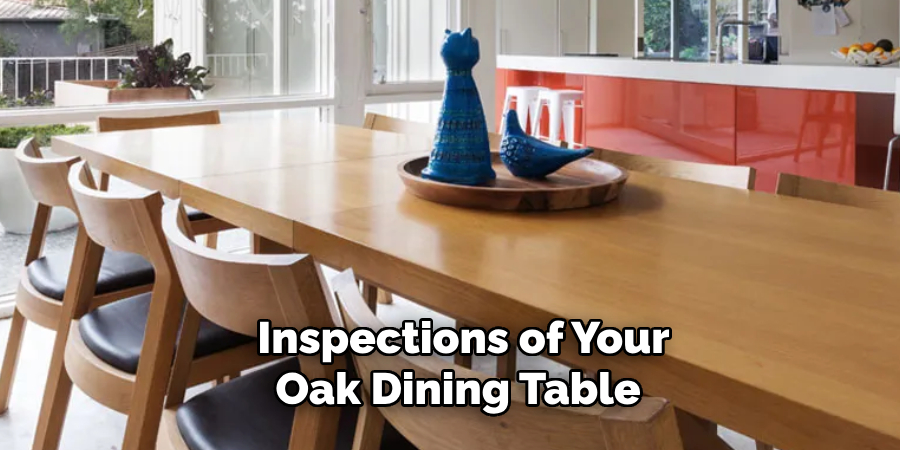
Regular inspections of your oak dining table is crucial in maintaining its condition over time. Make it a habit to check the table every few months for any signs of wear, such as scratches, dents, or changes in the finish. Pay attention to joints and seams to ensure no loose veneers or parts develop. If you spot any issues, address them immediately to prevent further damage.
Step 10: Enjoying Your Restored Table
Now that you’ve taken the time to restore and maintain your oak dining table, it’s time to enjoy it fully! Set the table for family meals, host gatherings with friends, or simply savor a quiet cup of coffee in the morning.
A beautifully restored table serves as a functional piece of furniture and a focal point for conversation and memories. Remember, the effort you’ve invested in its care will be reflected in the warmth and joy it brings to your home.
By following these steps and implementing a regular maintenance routine, your restored oak dining table will continue to be cherished.
5 Things You Should Avoid
- Using Harsh Chemicals: Avoid cleaning products that contain bleach or strong solvents, as these can damage the finish and wood fibers. Opt for milder, wood-safe cleaners instead.
- Neglecting to Test Methods: Never skip the step of testing restoration techniques on a hidden area first. This way, you can see how the oak responds without risking visible damage.
- Sanding Recklessly: Over-sanding can strip away too much of the wood’s surface, leading to uneven textures and potential structural damage. Use fine-grit sandpaper and sand with care.
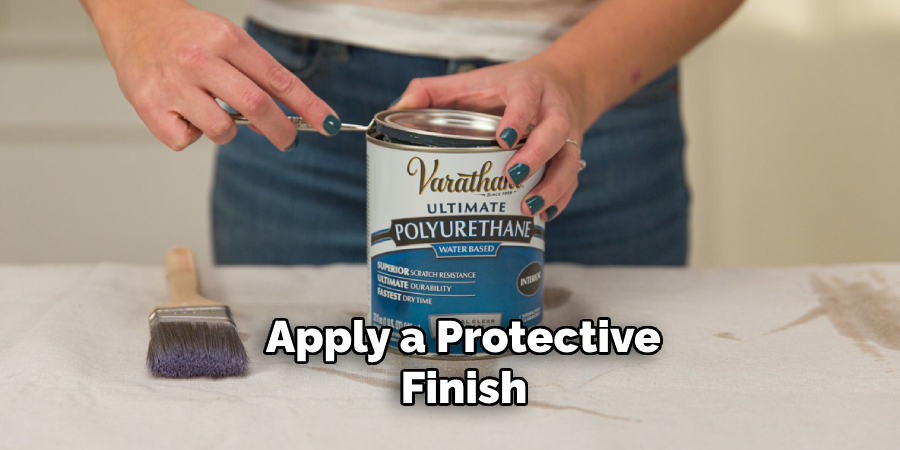
- Skipping the Finish: Failing to apply a protective finish after restoration can leave the table vulnerable to scratches, stains, and moisture damage. Always seal your work with an appropriate finish.
- Ignoring Existing Damage: Don’t overlook any pre-existing damage, such as deep scratches or water stains. Address these issues properly before beginning the restoration to ensure a more uniform and professional result.
By avoiding these common mistakes, you can ensure a successful and long-lasting restoration of your oak table.
Conclusion
Restoring an oak dining table can be a rewarding project that enhances the beauty and extends the lifespan of your furniture. By carefully following the appropriate techniques—such as selecting the right cleaning products, testing methods beforehand, sanding gently, applying a protective finish, and addressing any prior damage—you can achieve a stunning transformation.
The process may require patience and precision, but with dedication and the right approach, your oak table can regain its original charm and be a beautiful centerpiece in your dining area for years.
Always remember that investing the time and effort in proper restoration techniques will pay off in the quality and durability of your finished piece.
Hopefully, this guide on how to restore oak dining table has provided you with the necessary information and tips to regain your oak dining table successfully. Thank you!
About the Author
Adrian Green, a lifelong woodworking enthusiast, shares his passion for the craft through The Woodenify Blog. With a foundation built on years of hands-on experience in his father’s woodworking shop, Adrian is dedicated to helping others learn and grow in the world of DIY woodworking. His approach to woodworking combines creativity, practicality, and a deep appreciation for the art of building with your own hands. Through his blog, he inspires individuals of all skill levels to embark on their own woodworking journeys, creating beautiful, functional pieces of furniture and décor.
Professional Focus
- Specializes in DIY woodworking projects, from furniture to home décor.
- Provides step-by-step guides and practical tutorials for woodworkers of all skill levels.
- Dedicated to helping readers build confidence and skill through easy-to-follow instructions and tips.
- Passionate about fostering a community of makers who can share, learn, and grow together.
Education History
- University of Craft and Design – Bachelor of Fine Arts (BFA) in Woodworking and Furniture Design
- Woodworking Apprenticeships – Extensive hands-on training with skilled craftsmen to refine carpentry and furniture making techniques.
- Online Courses & Masterclasses – Continued education in advanced woodworking techniques, design principles, and specialized tools
Expertise:
- DIY woodworking, carpentry, furniture making, and home décor projects.
- Creating accessible tutorials and guides for beginner to advanced woodworkers.
- Sharing the joys and satisfaction of woodworking, from raw materials to finished products.