Sealing burnt wood, also known as charred wood, is an effective way to preserve its appearance and protect it from further damage. Burnt wood has a unique look that can add character and depth to any project. Whether you’re using burnt wood for decorative purposes or as part of a functional piece of furniture, sealing it will help maintain its beauty for years to come.
There are various methods of how to seal burnt wood, depending on the desired outcome and the type of project. In this guide, we will discuss the different techniques you can use to effectively seal burnt wood and provide tips for achieving a professional-looking finish.
Understanding Burnt Wood
Before diving into sealing techniques, it’s essential to understand burnt wood and how it differs from regular wood. Burnt wood, also known as charred wood, is wood that has been exposed to fire or heat, resulting in a layer of charred material on its surface. Depending on the intensity of the heat, this layer can range from light and subtle to deep and dark.
While burnt wood may seem damaged or ruined at first glance, it’s actually a form of natural preservation. The charred layer acts as a protective barrier, preventing the wood from rotting or deteriorating over time. This unique look has become increasingly popular in recent years, with many people deliberately charring wood for decorative purposes.
11 Best Ways on How to Seal Burnt Wood
1. Sanding and Sealing:
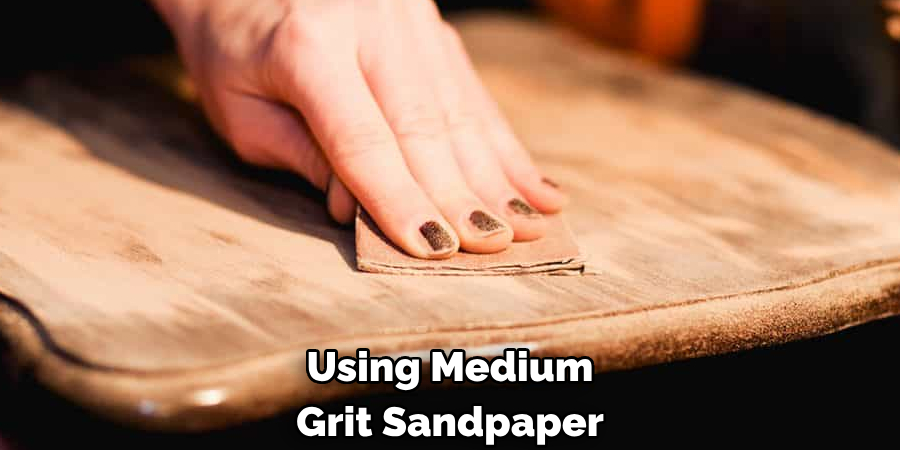
One of the most popular methods for sealing burnt wood is sanding and sealing. This technique involves sanding off the charred layer to reveal the underlying wood grain and then applying a sealant to protect it. It’s a great option if you want to maintain the natural look of the wood while still providing protection. To use this method, start by sanding the burnt wood using medium-grit sandpaper. Make sure to remove all the charred material, but be careful not to over-sand and damage the wood beneath. Once sanded, wipe off any dust or debris before applying a sealant of your choice.
2. Epoxy Resin:
Epoxy resin is a popular choice for sealing burnt wood, as it provides a durable and glossy finish. It works by creating a protective layer over the wood’s surface, preventing moisture and other elements from damaging it. To use epoxy resin, mix equal parts of resin and hardener in a bowl, then pour the mixture onto the burnt wood surface. Use a brush or roller to spread the resin evenly and allow it to dry completely for the best results.
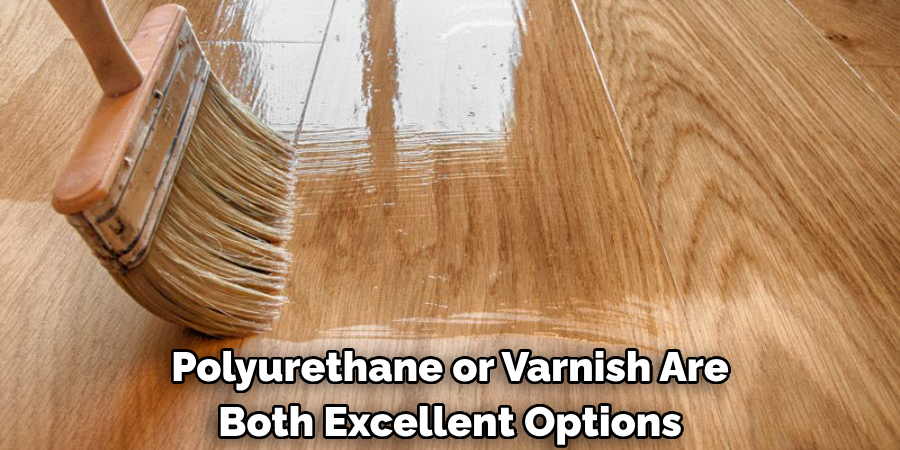
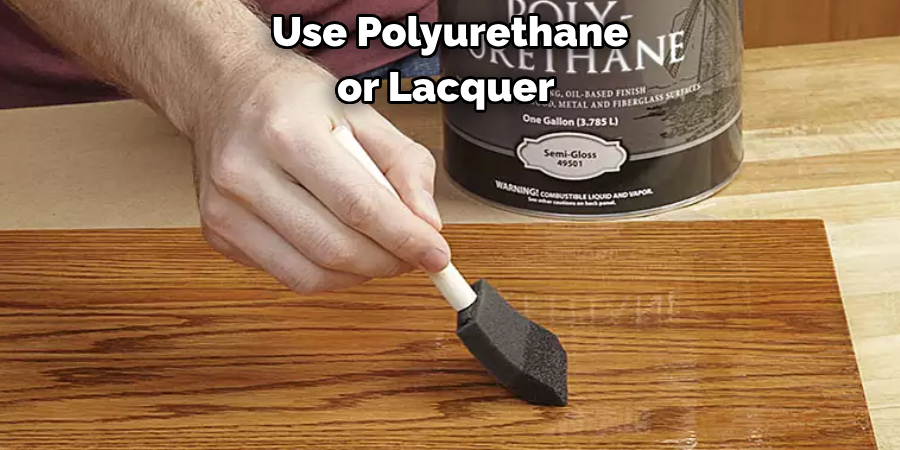
3. Polyurethane of Varnish:
Polyurethane or varnish are both excellent options for sealing burnt wood. They provide a clear protective layer that enhances the natural color and grain of the wood while also preventing damage. To use this method, apply the polyurethane or varnish using a brush, roller, or spray gun, following the instructions on the product label. Allow it to dry completely before applying additional coats for added protection.
4. Tung Oil:
Tung oil is a natural and eco-friendly option for sealing burnt wood. It provides a protective layer and enhances the grain and color of the wood, giving it a beautiful finish. To use tung oil, apply it to the burnt wood using a brush or cloth, making sure to cover the entire surface evenly. Allow it to dry completely before adding additional coats for added protection. This method may require multiple applications to achieve the desired finish.
5. Linseed Oil:
Similar to tung oil, linseed oil is a natural option for sealing burnt wood. It penetrates the wood fibers, providing protection from within while also enhancing its appearance. To use this method, apply the linseed oil using a brush or cloth and allow it to dry completely before adding additional coats for added protection. This method may also require multiple applications for the best results.
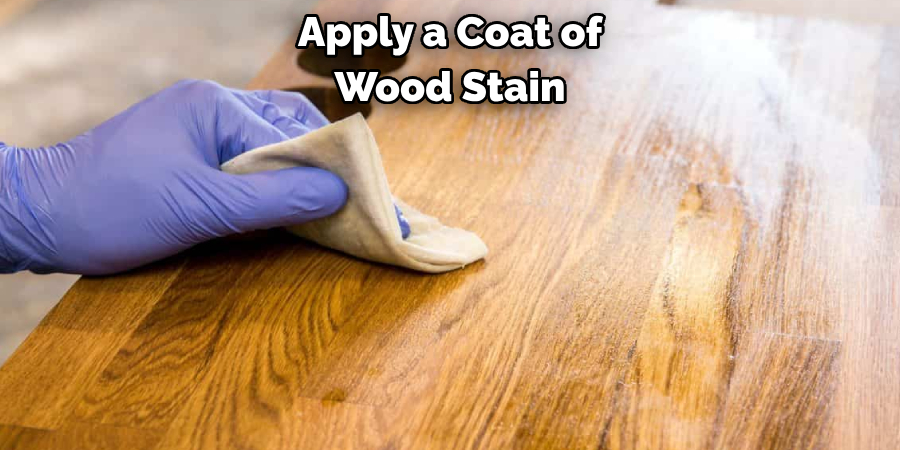
6. Stain and Seal:
Staining and sealing is a great option if you want to add color to your burnt wood project. This method involves applying a wood stain of your choice to the sanded burnt wood surface before sealing it with a clear coat. It provides protection and adds depth and character to the wood. For the best results, make sure to choose a stain that complements the natural color of your burnt wood.

7. Wax Your Burnt Wood:
Applying wax to burnt wood is a simple yet effective way to seal and protect it. It works by filling in the pores of the wood, preventing moisture and other elements from damaging it. To use this method, apply a layer of wax using a brush or cloth, working in the direction of the wood grain. Allow it to dry before buffing with a clean cloth for a smooth and glossy finish. You can also add additional layers of wax for added protection.
8. Shellac Your Burnt Wood:
Shellac is a natural resin that can be used to seal burnt wood. It provides a protective barrier while enhancing the wood’s color and grain. To use this method, mix the shellac flakes with denatured alcohol according to the instructions on the product label. Then, apply it to the burnt wood using a brush or cloth and allow it to dry completely before adding additional coats for added protection.
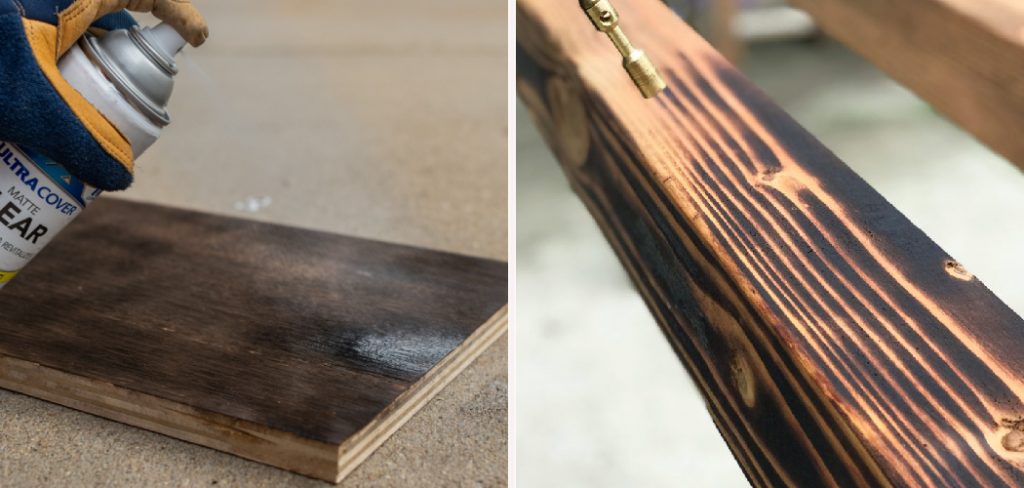
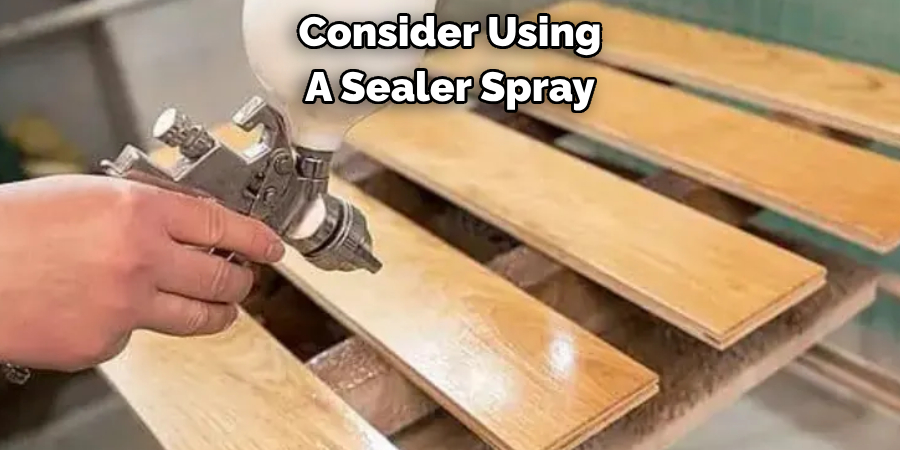
9. Burnt Wood Sealer Spray:
Consider using a sealer spray if you’re looking for a convenient and quick way to seal burnt wood. These products are specially formulated for sealing charred wood and can provide both protection and a glossy finish. To use this method, follow the instructions on the product label and spray the sealer evenly over the burnt wood surface. Allow it to dry completely before adding additional coats if necessary.
10. Acrylic Paint Sealer:
Acrylic paint sealers are great for sealing burnt wood projects that have been painted or stained. They provide a protective layer while also enhancing the color and finish of the paint or stain. To use this method, apply the acrylic paint sealer using a brush or roller and allow it to dry completely before adding additional coats for added protection. Make sure to choose a sealer that is compatible with your chosen paint or stain.
11. Tinted Lacquer:
If you want to add color and protection to your burnt wood project in one step, consider using a tinted lacquer. These products are available in various colors and provide both protection and color to the wood. To use this method, follow the instructions on the product label and apply the tinted lacquer using a brush or cloth. Allow it to dry completely before adding additional coats for added protection. If necessary, you can also sand the surface lightly between coats for a smoother finish.
Following these methods for sealing burnt wood can help preserve your project and maintain its natural beauty. Choose the method that best suits your needs and desired finish, and be sure to follow the instructions carefully for the best results. With proper sealing, your burnt wood project can last for years to come.
Additional Tips and Tricks to Seal Burnt Wood
- Use fine-grit sandpaper to gently sand the surface of the burnt wood. This will help remove any smoky residue and reveal the wood’s natural grain.
- For more effective and efficient results, a power sander may be necessary for large areas of burnt wood. However, be careful not to overspend, as this can damage the wood.
- After sanding, wipe down the surface with a damp cloth to remove any dust and allow it to dry completely before proceeding with further steps.
- To restore the wood’s color and shine, apply a coat of wood stain or finish. For best results, choose a color that closely matches the wood’s original color.
- If you are working with a heavily burnt piece of wood, you may need to apply multiple coats of stain or finish for optimum coverage.
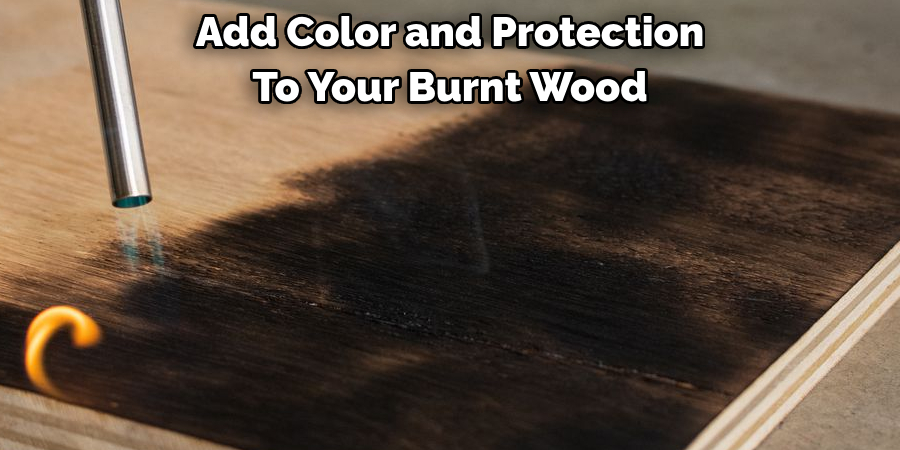
- Consider using a wood-burning tool to create intentional burn marks on the surface for a more natural and rustic look. This can add character and depth to your finished project.
- Consider applying a sealant such as polyurethane or wax to protect the newly restored wood surface. This will help prevent future damage and keep your project looking beautiful.
- When working on a burnt wood project, always take necessary safety precautions, such as wearing protective gear and working in a well-ventilated area.
- If you need clarification on any step in the restoration process, seek advice from a professional or experienced woodworker.
- Remember to be patient and take your time when restoring burnt wood. Rushing through the process may result in less than satisfactory results.
Following these additional tips and tricks will help you successfully restore burnt wood. Remember to always handle the wood with care and caution, as it can be fragile and unpredictable. With proper techniques and patience, you can transform a damaged piece of wood into a beautiful work of art. Feel free to get creative and experiment with different methods to achieve the desired look. Most importantly, have fun with the process! Enjoy the satisfaction of bringing new life to a burnt wood piece and adding your personal touch. Happy crafting!
Things You Should Consider to Seal Burnt Wood
- The first thing to consider when it comes to sealing burnt wood is the type of wood you are working with. Different types of wood have different properties and may require different types of sealants or methods for sealing.
- You should also consider the severity of the burnt in the wood. A simple sealant may be enough if only a few small cracks exist. However, you may need to use a more intensive sealing method if there are larger or deeper cracks.
- Another important factor to consider is the location of the burnt wood. If it is in an area exposed to moisture or extreme temperatures, you may need to choose a sealant specifically designed for those conditions.
- It is also crucial to assess the cause of the Burnt in the wood. If it is due to excessive moisture or insect infestation, those issues will need to be addressed before sealing the wood.
- Before applying any sealant, clean and prepare the wood’s surface properly. This may involve sanding rough edges or removing debris from the cracks.
- When choosing a sealant, consider the level of protection and durability that you require. Some sealants may only provide a temporary fix, while others can last for years.
- When applying the sealant, following the manufacturer’s instructions is important. This will ensure that it is applied correctly and provides optimal protection for your wood.
- Consider using a combination of sealants for a more effective seal. For example, using both a filler and a topcoat can provide added strength and protection.
- Regular maintenance is key to keeping the sealed wood in good condition. Inspect and reapply sealant as needed to prevent further damage.
- Lastly, consider consulting a professional if you need clarification on the best sealing method or if the Burnt wood is in a critical or sensitive area. A professional can provide expert advice and ensure that the wood is sealed properly and effectively.
Following these considerations will help you choose the right sealant and method for sealing burnt wood, ensuring that your wood stays protected and in good condition for years to come. Remember to always prioritize safety and follow proper procedures when working with sealants and repairing damaged wood. With the right approach, you can successfully seal burnt wood and preserve its strength and beauty. So, tackle those cracks and protect your wood from further damage! Happy sealing!
Troubleshooting Common Issues to Seal Burnt Wood:
1. Uneven Finish:
An uneven finish is one of the most common issues when sealing burnt wood. This can occur for various reasons, such as using too much or too little sealant, applying the sealant haphazardly, or not properly preparing the wood surface before sealing.
To troubleshoot an uneven finish, first, identify the cause of the issue. If it is due to using too much sealant, lightly sand down the affected area and reapply a thin layer of sealant evenly. If it is due to using too little sealant, apply another layer of sealant on top and spread it evenly with a brush or roller. If the uneven finish is due to haphazard application, sand down the affected area and reapply the sealant in smooth, even strokes. Lastly, if the issue is related to improper surface preparation, sand down the wood surface before reapplying the sealant.
2. Bubbles or Air Traps:
Bubbles or air traps can occur during the sealing process and can ruin the overall finish of your burnt wood. These can be caused by trapped air between the wood and sealant or due to air being trapped in the sealant itself.
To troubleshoot this issue, first identify the cause. If it is due to trapped air between the wood and sealant, lightly sand down the affected area and reapply a thin layer of sealant while ensuring that there are no bubbles. If the issue is caused by air trapped in the sealant, stir the sealant well before using it and apply it in smooth, even strokes to prevent air from getting trapped.
3. Drips or Runs:
Drips or runs can occur when too much sealant is applied, and it starts dripping down the wood surface. This can result in an uneven finish and may require sanding and reapplying the sealant.
To troubleshoot this issue, carefully scrape off the excess sealant using a putty knife or sand down the affected area and reapply a thin layer of sealant evenly. Be sure to wipe away any excess sealant before it dries to prevent drips or runs.
4. Peeling or Flaking:
Peeling or flaking can occur when the wood surface is not properly cleaned or sanded before sealing or when the sealant is of poor quality. This can also happen if the wood was previously sealed, and the old layer must be completely removed before applying a new one.
First, sand down the affected area to troubleshoot this issue to remove any peeling or flaking sealant. Then, clean the surface thoroughly and reapply a new layer of sealant evenly. If the issue persists, consider using a higher-quality sealant or seeking professional help.
5. Long Drying Time:
If the sealant takes too long to dry, it may be due to high humidity or low temperatures in the environment. This can prolong the sealing process and delay your project’s completion.
Try sealing in a well-ventilated area with low humidity and optimal temperature to troubleshoot this issue. You can also use a dehumidifier or heater to control the environment’s conditions. If the issue persists, consider using a sealant with a faster drying time.

Following these troubleshooting tips can help you overcome common issues that may arise while sealing burnt wood and ensure a smooth, professional-looking finish. Remember to always properly prepare the wood surface and follow the instructions on the sealant for best results. Happy sealing!
Frequently Asked Questions
Can I Use Any Sealant on Burnt Wood?
A sealant specifically designed for wood is recommended to ensure proper adhesion and protection. However, you can also use polyurethane or lacquer if desired. Just make sure to test it on a small, inconspicuous area first.
How Long Should I Wait Before Sealing Burnt Wood?
It is recommended that burnt wood be left to cool for at least 24 hours before sealing. This allows enough time for the wood to cool and for any moisture to evaporate. The sealant may not adhere properly if the wood is still warm or damp.
Should I Sand the Burnt Wood Before Sealing?
Yes, it is important to sand the burnt wood before sealing. This will remove any charred or uneven areas and provide a smooth surface for the sealant to adhere to.
How Many Coats of Sealant Should I Apply on Burnt Wood?
This may vary depending on the sealant type and the desired protection level. Generally, 2-3 coats are recommended for optimal coverage and protection. Be sure to follow the manufacturer’s instructions for best results.
Can I Paint Over Sealed Burnt Wood?
Yes, you can paint over sealed burnt wood. However, using a primer before painting is important to ensure proper adhesion. Sanding the sealed wood before painting is also recommended for a smooth finish.
Conclusion
Now you know how to seal burnt wood and troubleshoot common issues that may arise during the process. Remember to always properly prepare the wood surface, use a high-quality sealant, and follow the manufacturer’s instructions for best results. With these tips in mind, you can achieve a beautiful and long-lasting finish on your burnt wood projects. Happy sealing!
About the Author
Adrian Green, a lifelong woodworking enthusiast, shares his passion for the craft through The Woodenify Blog. With a foundation built on years of hands-on experience in his father’s woodworking shop, Adrian is dedicated to helping others learn and grow in the world of DIY woodworking. His approach to woodworking combines creativity, practicality, and a deep appreciation for the art of building with your own hands. Through his blog, he inspires individuals of all skill levels to embark on their own woodworking journeys, creating beautiful, functional pieces of furniture and décor.
Professional Focus
- Specializes in DIY woodworking projects, from furniture to home décor.
- Provides step-by-step guides and practical tutorials for woodworkers of all skill levels.
- Dedicated to helping readers build confidence and skill through easy-to-follow instructions and tips.
- Passionate about fostering a community of makers who can share, learn, and grow together.
Education History
- University of Craft and Design – Bachelor of Fine Arts (BFA) in Woodworking and Furniture Design
- Woodworking Apprenticeships – Extensive hands-on training with skilled craftsmen to refine carpentry and furniture making techniques.
- Online Courses & Masterclasses – Continued education in advanced woodworking techniques, design principles, and specialized tools
Expertise:
- DIY woodworking, carpentry, furniture making, and home décor projects.
- Creating accessible tutorials and guides for beginner to advanced woodworkers.
- Sharing the joys and satisfaction of woodworking, from raw materials to finished products.