Wood swings bring a sense of rustic charm, timeless elegance, and inviting comfort to porches, gardens, and yards. However, proper maintenance is essential to ensure they remain an attractive and durable centerpiece.
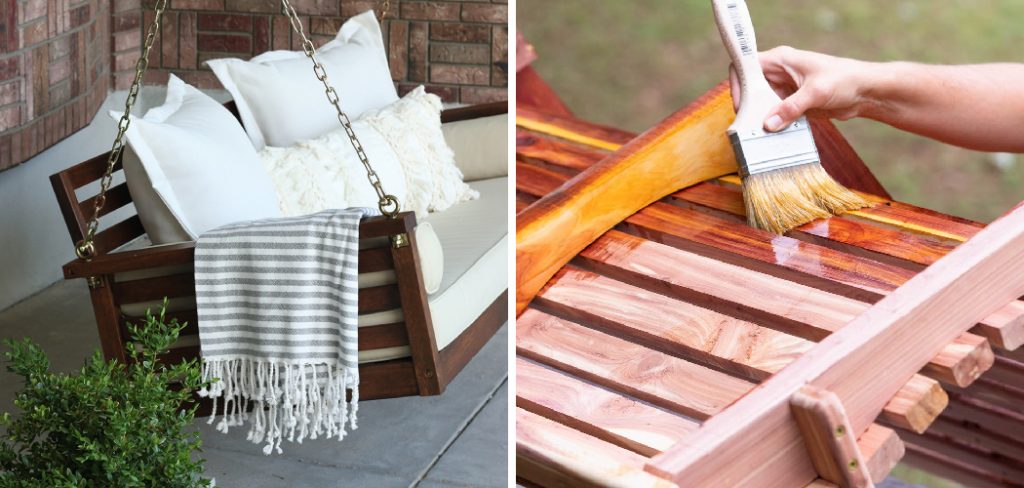
Staining is one of the most effective ways to protect and enhance a wooden swing. This process not only preserves the wood by highlighting its natural grain but also shields it from the damaging effects of moisture, UV rays, and everyday wear and tear. Staining acts as a barrier against environmental elements, preventing rot, fading, and cracks while significantly extending the swing’s lifespan.
This article serves as a comprehensive guide on how to stain a wood swing, covering each step from selecting the right stain to preparing the surface and applying the finish with precision. With these tips, you can maintain the beauty and functionality of your wood swing, ensuring it remains a cherished fixture in your outdoor space for years to come.
Choosing the Right Stain and Finish
Selecting the right stain and finish is crucial for enhancing the beauty and longevity of your wood swing. There are two primary types of stains to consider:
- Oil-based stains: These penetrate deep into the wood, providing a durable and long-lasting finish. They are particularly well-suited for outdoor use, offering excellent resistance to harsh weather conditions.
- Water-based stains: If you’re looking for faster drying times and an eco-friendly option, water-based stains are a great choice. They are low in volatile organic compounds (VOCs) and are easy to clean up with soap and water.
When it comes to stain colors, you’ll need to decide what best complements your outdoor space. Natural wood tones, such as oak, cedar, or walnut, help preserve a classic aesthetic, while bold colors can add a vibrant touch, making the swing a focal point.
For added protection, consider applying a finish such as a clear sealer or polyurethane. If your swing will endure year-round outdoor exposure, opt for a UV-resistant and waterproof finish to shield against sunlight and moisture damage.
Finally, ensure that the stain you choose is compatible with the type of wood your swing is made from—be it cedar, pine, oak, or another material—to achieve the best results.
Gathering Supplies and Tools
Before starting your wood staining project, it’s essential to gather all the necessary supplies and tools for a smooth and efficient process.
Supplies Needed
- Wood stain (and sealer, if purchased separately).
- Sandpaper (medium and fine grit) to smooth the surface and prepare the wood for staining.
- Drop cloth or tarp to protect your work area from spills and stains.
- Lint-free cloths, paintbrush, or foam brush for applying the stain evenly.
- Stir sticks and gloves to mix the stain thoroughly and protect your hands during application.
Optional Tools
- Orbital sander for sanding large swings or surfaces with more ease and consistency.
- Tack cloth to remove any remaining sanding dust and ensure the wood is clean before staining.
- Painter’s tape to mask off hardware or joints, giving your swing a more polished and professional finish.
Having these supplies and tools ready will make the staining process more manageable and enjoyable, helping you achieve excellent results.
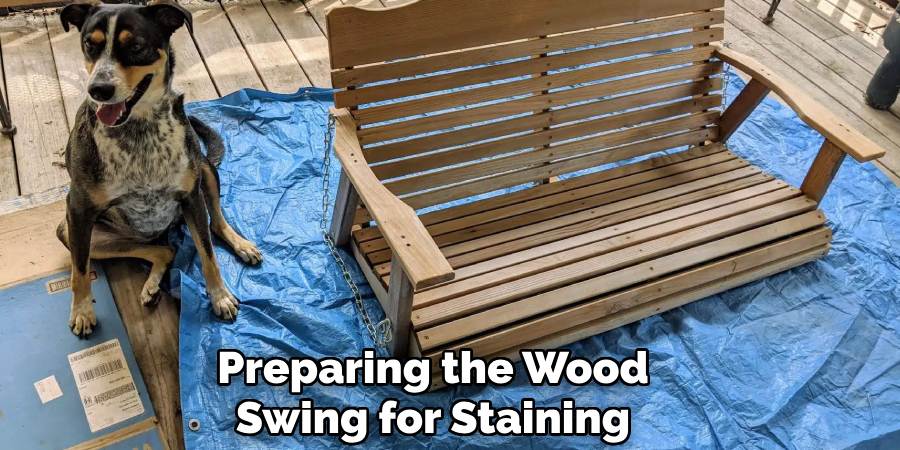
Preparing the Wood Swing for Staining
Proper preparation is essential to ensure your wood swing absorbs the stain evenly and achieves a smooth, professional finish. Follow these steps to get started:
Clean the Surface
Begin by removing all dust, dirt, and grime from the wooden swing using a damp cloth or a mild soap solution. Pay special attention to any corners or crevices where debris may accumulate. Once clean, allow the swing to dry completely before moving on to the next step.
Remove Old Finish or Paint
If the swing has an existing finish or paint, it needs to be removed. Use sandpaper or a chemical stripper to strip the surface. Work carefully to avoid damaging the wood. This step ensures the new stain adheres properly to the surface.
Sanding the Wood
Sand all swing surfaces thoroughly, first using medium-grit sandpaper to remove rough spots or imperfections. Then, switch to fine-grit sandpaper to achieve a smooth, even texture. Always sand in the direction of the wood grain to prevent scratches or uneven marks.
Inspect and Repair
Sift through the swing for any cracks, holes, or damage. Use a high-quality wood filler to repair imperfections, following the product instructions for drying and curing times. Once the filler has dried, sand the areas smooth to match the surface.
Wipe Down
Finally, use a tack cloth or a damp rag to remove all sanding dust. Ensuring the surface is clean at this stage is critical for proper stain absorption, leaving your swing with a flawless, finished look.
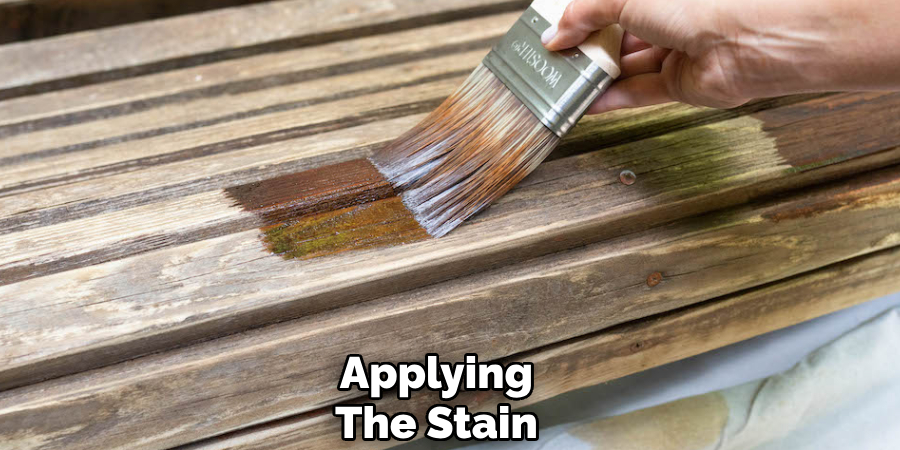
How to Stain a Wood Swing: Applying the Stain
Applying the stain properly is essential to achieving a beautiful and even finish. Follow these steps for the best results:
Test First
Begin by testing the stain on a hidden or inconspicuous swing section. This will allow you to confirm the color and penetration of the stain on the wood. Adjust your application method based on the test results if needed.
First Coat
Using a brush, cloth, or sponge, apply the stain following the direction of the grain. Work in manageable sections to ensure an even application. Allow the stain to soak into the wood for 5 to 15 minutes, depending on the richness of color you desire. After soaking, wipe off any excess stain using a clean cloth to avoid unevenness or tacky surfaces.
Second Coat (Optional)
Consider applying a second coat of stain for a darker, more saturated tone. Make sure the first coat has completely dried, which generally takes 4 to 6 hours, before moving forward. Repeat the same process as the first coat, working with the grain and wiping off excess stain after soaking.
Drying Time
Allow the stain to dry thoroughly, according to the manufacturer’s instructions. Drying times typically range around 24 hours for most stains before the swing is ready for use or sealing. Avoid handling the swing during this time to ensure a flawless finish.
Avoid Over-application
Be careful not to over-apply the stain. Excess stain can result in sticky, uneven surfaces or blotchy finishes. Instead, work gradually and wipe away any extra stain to reveal the natural beauty of the wood while achieving a professional look.
Sealing the Swing for Protection
Properly sealing your swing is essential for long-lasting durability and protection against environmental elements such as rain, UV rays, and mildew. Selecting the right sealant is the first step. Options include polyurethane, spar varnish, or an exterior wood sealer, each designed to provide robust protection and enhance the wood’s natural beauty.
Application Tips
When applying the sealant, use a clean brush or a foam applicator for best results. Apply thin, even coats to prevent drips or an uneven finish. If multiple layers are needed, allow each coat to dry fully and lightly sand the surface with fine-grit sandpaper between applications. This process ensures a smooth, professional-looking finish.

Dry and Cure Time
Patience is key during the sealing process. Allow at least 24–48 hours of drying time after the final coat before using the swing. Also, avoid any moisture or rain exposure during this period, as it can compromise the seal and overall finish. Once fully cured, your swing will look stunning and withstand the elements for years of enjoyment.
Maintenance Tips After Staining
Proper maintenance ensures the longevity and appearance of your stained swing. Follow these simple steps to keep it in excellent condition for years to come.
Regular Cleaning
Regularly wipe the swing with a damp cloth to remove dirt, pollen, and other debris. Avoid harsh chemical cleaners, which may damage the finish or compromise the sealant.
Touch-Ups
Inspect the swing periodically for chips, scratches, or worn areas. Address any imperfections promptly by lightly sanding the affected spot and applying stain to restore its original color and protection.
Reapply Sealer Annually
A quality sealer must be reapplied every year for outdoor swings that are exposed to the elements. This helps maintain a strong barrier against moisture, UV rays, and general wear and tear, ensuring your swing remains both beautiful and durable.
Cover or Store During Harsh Weather
During heavy rain, snow, or the winter season, protect your swing by covering it with a weather-resistant cover. Store the swing indoors to extend its lifespan further and reduce exposure to extreme weather conditions if possible.
By following these simple maintenance practices, your swing will remain a cherished and functional part of your outdoor space for many years.
DIY Wood Swing
Creating a DIY wood swing is a rewarding project that adds charm to any outdoor space. Start by selecting durable wood, like cedar or treated pine, to ensure longevity. Cut the wood into a solid seat and drill holes at each end to attach sturdy ropes or chains.

Sand the surface thoroughly to avoid splinters, then apply a weather-resistant stain or paint for protection and visual appeal. Secure the swing to a strong tree branch or a stable frame, ensuring all connections are tight. With minimal tools and effort, you can craft a beautiful swing perfect for relaxation and family fun.
Conclusion
By understanding how to stain a wood swing, you can ensure it remains both attractive and durable for years to come. The process involves choosing the right stain to complement your outdoor space, thoroughly prepping the swing to ensure proper application, and carefully applying the stain and sealer for optimal protection.
Lastly, maintaining the swing through regular cleaning and weatherproofing practices will further extend its lifespan. A well-stained swing not only enhances the aesthetics of your yard but also stands resilient against weather and wear, making it a lasting and cherished part of your outdoor environment.
About the Author
Adrian Green, a lifelong woodworking enthusiast, shares his passion for the craft through The Woodenify Blog. With a foundation built on years of hands-on experience in his father’s woodworking shop, Adrian is dedicated to helping others learn and grow in the world of DIY woodworking. His approach to woodworking combines creativity, practicality, and a deep appreciation for the art of building with your own hands. Through his blog, he inspires individuals of all skill levels to embark on their own woodworking journeys, creating beautiful, functional pieces of furniture and décor.
Professional Focus
- Specializes in DIY woodworking projects, from furniture to home décor.
- Provides step-by-step guides and practical tutorials for woodworkers of all skill levels.
- Dedicated to helping readers build confidence and skill through easy-to-follow instructions and tips.
- Passionate about fostering a community of makers who can share, learn, and grow together.
Education History
- University of Craft and Design – Bachelor of Fine Arts (BFA) in Woodworking and Furniture Design
- Woodworking Apprenticeships – Extensive hands-on training with skilled craftsmen to refine carpentry and furniture making techniques.
- Online Courses & Masterclasses – Continued education in advanced woodworking techniques, design principles, and specialized tools
Expertise:
- DIY woodworking, carpentry, furniture making, and home décor projects.
- Creating accessible tutorials and guides for beginner to advanced woodworkers.
- Sharing the joys and satisfaction of woodworking, from raw materials to finished products.