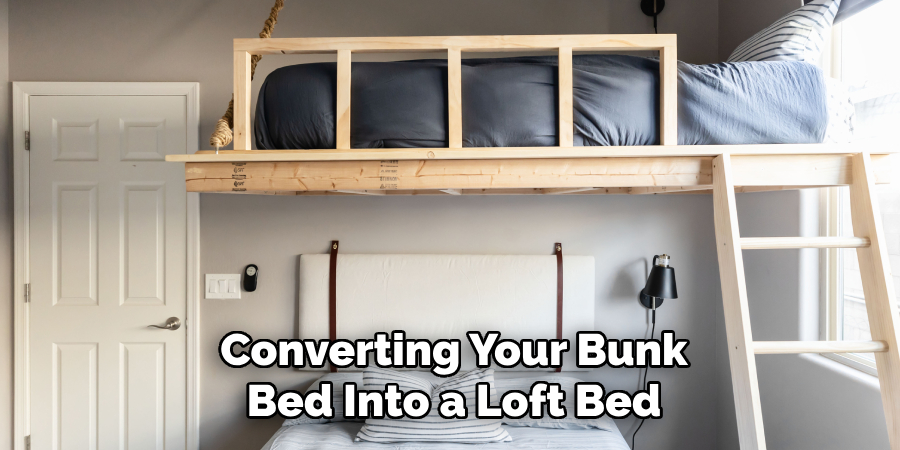
Converting a bunk bed into a loft bed is a practical and creative way to maximize the use of vertical space in a room. This guide on how to turn a bunk bed into a loft offers step-by-step instructions to help you transform an existing bunk bed setup into a single elevated sleeping area, freeing up the space beneath it.
The primary purpose of a loft bed is to create additional space underneath the bed, which can be utilized for various functions such as storage, a desk, or a play area. This conversion is particularly beneficial for small bedrooms or shared spaces where every square foot counts.

Repurposing a bunk bed into a loft bed saves money by making the most of existing furniture and allows for significant customization of the living space. This project underscores the importance of creative problem-solving and resourcefulness in home decor, providing a tailored solution that meets the specific needs and preferences of the room’s occupants.
Planning and Preparation
Assessing the Bunk Bed
Before beginning the conversion process, it is crucial to thoroughly inspect the bunk bed for stability and condition. Look for any signs of wear and tear, such as cracks in the wood, loose screws, or any wobbling parts. Ensuring that the bed is in good condition is essential for the safety and success of the project. Additionally, determine if the bed’s structure can be modified into a loft bed. This involves assessing the strength and integrity of the current joints and connections, as well as considering the materials used in the bed’s construction.
Design Considerations
Once the bed has been inspected and deemed suitable for modification, the next step is to decide on the height of the loft bed. The height will depend on the ceiling height in the room and the intended use for the space underneath the bed.
Measure the available space to ensure there is enough room for comfortably moving around below and above the loft bed. Plan for any additional features that you want to incorporate, such as a desk, storage unit, or seating area. Sketch out a rough design to visualize how these elements will fit together and ensure they meet your needs.
Safety Measures

Safety should always be a top priority when making structural modifications to furniture. Ensure that the bed’s frame can support the weight of the person using the loft bed as well as any additional weight from the added features beneath it. Reinforce joints and connections with extra screws or bolts if necessary to enhance stability.
Additionally, plan for securing the loft bed to the wall to prevent any tipping or shifting. Use heavy-duty brackets or other reliable mounting hardware to attach the bed securely to wall studs. These steps will provide additional stability and ensure a safe and sturdy loft bed.
Tools and Materials Needed
Tools:
- Screwdriver or Drill:
- Essential for removing and securing screws and bolts.
- Measuring Tape:
- Crucial for accurately measuring dimensions and spacing.
- Saw (if cutting is needed):
- Necessary for trimming legs or any extra wood components.
- Wrench:
- Useful for tightening bolts and ensuring secure connections.
- Level:
- Important for making sure your loft bed and any additional features are even and stable.
Materials:
- Extra Wood or Metal Supports (if needed):
- Required for added structural support and stability.
- Screws and Bolts:
- Essential for reinforcing joints and connections.
- Sandpaper:
- Needed for smoothing any rough edges after modifications.
- Paint or Finish (optional):
- For giving the loft bed a polished look that matches the room’s decor.
- Brackets for Wall Mounting (optional):
- Provides additional security by anchoring the loft bed to the wall.
Disassembling the Bunk Bed
Removing the Lower Bunk:
The first step in converting your bunk bed into a loft bed is to remove the lower bunk. Begin by carefully removing the mattress and bedding from both the upper and lower bunks. This ensures that the bed structure is lighter and easier to handle during disassembly.
Next, locate the screws, bolts, or other hardware that secure the lower bunk to the upper bunk. Using a screwdriver or drill, carefully unscrew and detach the lower bunk from the upper bunk. Take your time during this process to avoid damaging any parts of the frame. It’s essential to keep all screws, bolts, and other hardware organized, as you may need them later for reinforcing or reassembling certain sections of the bed.

Checking the Upper Bunk:
Once the lower bunk has been removed, it’s important to check the stability of the upper bunk. Without the support of the lower bunk, the upper bunk needs to maintain its structural integrity to ensure safety.
Inspect the joints, screws, and connections of the upper bunk to verify that everything is still secure and stable. If you notice any weak points, such as wobbly legs or loose screws, reinforce these areas with extra screws or bolts. Tighten any existing connections to enhance stability. Additionally, make sure the bed frame can support the weight of the person who will be using the loft bed.
By taking these precautions and ensuring stability, you can move forward with the confidence that your loft bed will be secure and safe. Once you’ve confirmed the structural integrity of the upper bunk, you can proceed with further modifications and installations to complete the transformation into a functional and stylish loft bed.
How to Turn a Bunk Bed Into a Loft: Modifying the Bed Frame
Strengthening the Structure:
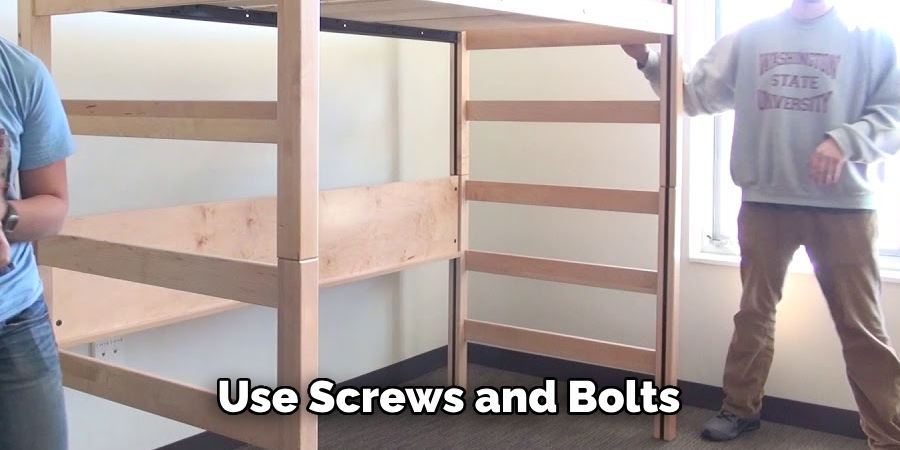
Transforming a bunk bed into a loft bed requires ensuring the bed frame is structurally sound to support additional weight and use. Begin by adding extra support beams if needed to enhance stability. Depending on the original design of the bunk bed, the upper bunk might not have sufficient support on its own.
Measure and cut additional wooden or metal beams to the required length and securely attach them to the frame. These extra supports can be placed horizontally or diagonally for maximum stabilization. Use screws and bolts, and possibly brackets, to secure all joints tightly, minimizing any wobbling or shifting during use.
Adjusting the Height:
Adjusting the height of the loft bed may be necessary to effectively accommodate the space beneath it. If cutting the legs is required, measure the desired height carefully. Use a saw to trim the legs to the correct length, ensuring all cuts are even and accurate. After cutting, it’s vital to sand any rough edges thoroughly to prevent splinters or injuries. A smooth finish enhances safety and gives a more polished and professional look to the loft bed.
Adding Guardrails:

Safety is paramount when modifying the bed frame, especially if it’s intended for a child. Guardrails play a crucial role in preventing falls from the loft bed. Ensure that the guardrails are securely attached along the sides of the bed. Use sturdy screws and brackets to fasten the guardrails firmly to the frame.
If the existing guardrails are too low, extend their height by attaching additional railings on top. Measure the required extension carefully and secure the new railings tightly to avoid any gaps or loose connections that could compromise safety. This additional height provides added security, giving peace of mind that the loft bed can be used safely.
By following these steps meticulously, you can transform your bunk bed into a stable, safe, and stylish loft bed, ready to provide both functional space and a unique sleeping area.
How to Turn a Bunk Bed Into a Loft: Securing the Loft Bed
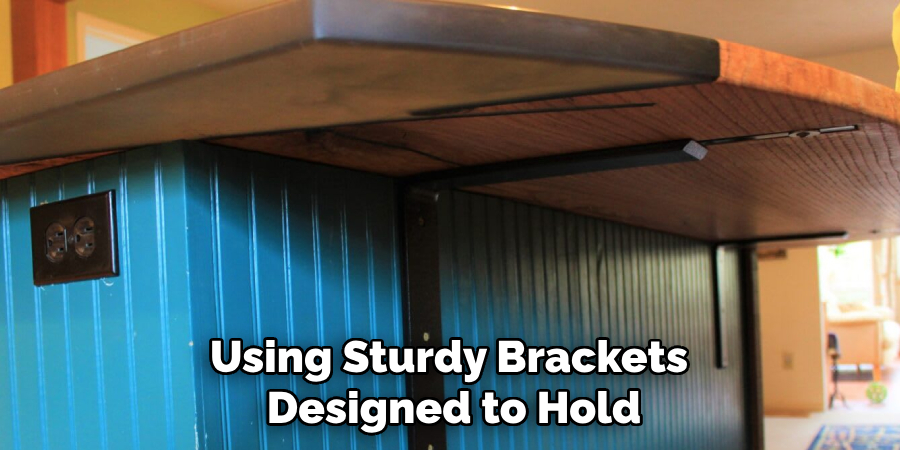
Wall Mounting:
To ensure the loft bed remains secure and stable, it is important to mount it to the wall. Begin by using sturdy brackets designed to hold significant weight. Locate the studs in the wall, as these will provide the necessary support for the brackets. Use a stud finder to mark the positions of the studs on the wall.
Once the studs have been identified and marked, position the brackets against the wall and align them with the previously marked studs. Securely attach the brackets to the wall using strong screws that penetrate the studs, ensuring they are tightly fastened. Next, align the bed frame with the wall-mounted brackets and secure it using additional screws or bolts. This provides an additional layer of stability, minimizing the risk of the bed wobbling or shifting during use.

Floor Stability:
After securing the loft bed to the wall, it’s crucial to ensure that it stands evenly on the floor. An uneven floor can cause the bed frame to tilt, reducing its stability. Begin by checking the level of the bed frame using a spirit level. If you find that the bed is uneven, use shims to level it. Place the shims under the legs of the bed where needed until the frame is level.
If the floor is significantly uneven, additional support may be required. You can add extra wooden blocks or adjustable feet under the legs of the bed to provide the necessary support. Ensure these supports are securely attached to prevent any movement. By addressing both wall mounting and floor stability, you can ensure that your loft bed is both secure and safe for use.
Creating the Under-Loft Space
Planning the Layout:
Transforming the space beneath your loft bed into a functional area requires careful planning. Start by deciding on the primary function of this space. Options include a study area, storage space, or a play area. Each choice will influence the type of furniture or storage units you’ll need.
Once you’ve determined the function, measure the available space accurately. Use these measurements to plan the arrangement of furniture or storage units. Consider the height, width, and depth of items you intend to place under the loft. Make sure there’s enough room for movement and that the arrangement allows for easy access to all items.
Building Additional Features:
To make the under-loft space more functional, consider constructing built-in features. For a study area, a custom-built desk can provide a dedicated workspace. Use sturdy materials like wood or metal, and ensure the design fits seamlessly within the space.
For storage needs, shelving units or cabinets can be built to maximize vertical space. Construct these units to fit the dimensions of the under-loft area, ensuring that they make efficient use of the space without overcrowding it.
Whether you’re building a desk or shelving units, it’s crucial to secure these features firmly to ensure stability. Attach them to the loft bed frame or wall brackets using strong screws and brackets. This not only keeps the furniture stable but also ensures safety during use.
By planning the layout meticulously and constructing stable, securely attached features, you can create a practical and appealing under-loft space that serves your needs effectively.
Finishing Touches
Sanding and Painting:
To achieve a professional look for your loft bed, start by sanding all wooden surfaces. Use fine-grit sandpaper to smooth out any rough areas, paying special attention to edges and corners that may have been cut or modified. Sanding removes splinters and prepares the wood for painting or finishing, ensuring better adhesion and a longer-lasting finish. Once the sanding is complete, thoroughly clean the surfaces to remove dust.
Next, apply paint or finish to match the room’s decor. Choose a high-quality paint or wood stain that complements the existing color scheme. If painting, consider using a primer first to allow the paint to adhere better and provide a more even color. Apply the paint or stain in thin, even coats, allowing sufficient drying time between each coat. For added durability, consider finishing with a clear sealant or varnish. This protects the wood and gives it a polished, professional appearance.
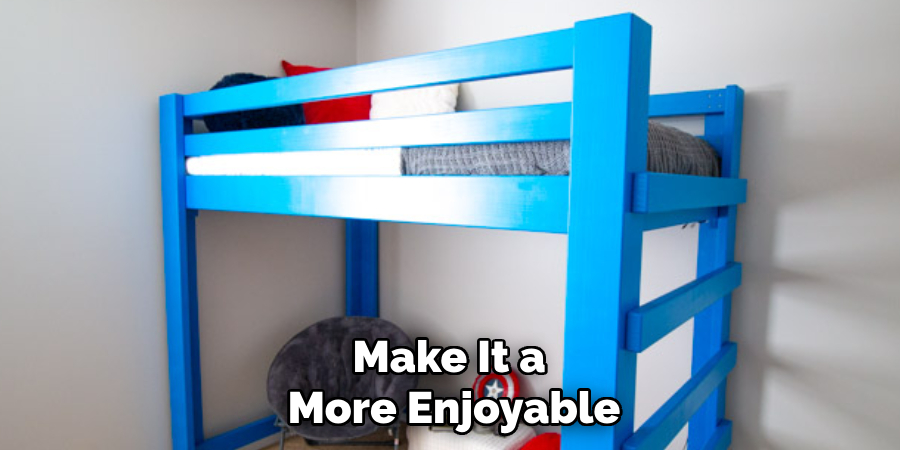
Adding Accessories:
Personalizing your loft bed can make it a more enjoyable and functional space. Start by attaching hooks to the sides or underside of the bed for hanging items like bags, hats, or coats. These hooks should be securely screwed into the wood to ensure they can hold significant weight without coming loose.
Adding lights can make the space beneath the loft bed more inviting and usable. Consider attaching LED strip lights or a small reading lamp to provide adequate illumination. Ensure that any electrical components are safely installed and that wires are neatly tucked away to prevent tripping hazards.
Curtains can offer privacy and help define the space underneath the loft bed. Use tension rods or a curtain track system that can be securely mounted to the bed frame. Choose a fabric that complements the room’s decor and is durable enough to withstand regular use.
By carefully sanding and painting the wood and adding thoughtful accessories, you can transform your loft bed into a stylish and personalized piece of furniture that enhances your room’s functionality and aesthetics.
Safety Checks
Regular Inspections:
To ensure your loft bed’s long-term safety and stability, it’s crucial to conduct regular inspections. Periodically check all screws, bolts, and supports to make sure they remain tight and secure. Over time, connections can loosen, which may compromise the bed’s stability. Tighten any loose connections immediately to maintain the structural integrity of the loft bed. Additionally, inspect the bed frame and any attached accessories for signs of wear or damage. Address any issues promptly to prevent potential accidents.
Weight Limits:
Always be aware of the weight limit specified by the manufacturer for your loft bed and avoid exceeding it. Overloading the bed can lead to structural failure and pose significant safety risks. Educating all users, including children and guests, on safe usage practices is important. Emphasize that the loft bed is not designed for activities like jumping or roughhousing, which can stress the frame and supports.
You can maintain a secure and functional loft bed environment by adhering to the weight limits and promoting safe usage. Regular safety checks and mindful use will help ensure the longevity and safety of your loft bed for years to come.
Conclusion
Transforming a bunk bed into a loft bed involves several key steps. Start by removing the bottom bunk to create an open space. Plan how you’ll use this area—whether for a study, storage, or play area—then measure and design accordingly. Construct any additional features like desks or shelving units, and ensure they are securely attached for stability. Finally, sand and paint the loft bed, adding accessories such as hooks, lights, or curtains for a personalized touch.
The additional space gained by converting a bunk bed into a loft bed offers practical benefits. This newfound area can be customized to meet your specific needs, whether for extra storage, a dedicated workspace, or a cozy play zone, enhancing both the functionality and aesthetic appeal of your room.
By following this guide on how to turn a bunk bed into a loft, you’ll enjoy a more spacious, organized, and personalized living area. Embrace the project and take pride in creating a unique, functional space that reflects your style.
About the Author
Adrian Green, a lifelong woodworking enthusiast, shares his passion for the craft through The Woodenify Blog. With a foundation built on years of hands-on experience in his father’s woodworking shop, Adrian is dedicated to helping others learn and grow in the world of DIY woodworking. His approach to woodworking combines creativity, practicality, and a deep appreciation for the art of building with your own hands. Through his blog, he inspires individuals of all skill levels to embark on their own woodworking journeys, creating beautiful, functional pieces of furniture and décor.
Professional Focus
- Specializes in DIY woodworking projects, from furniture to home décor.
- Provides step-by-step guides and practical tutorials for woodworkers of all skill levels.
- Dedicated to helping readers build confidence and skill through easy-to-follow instructions and tips.
- Passionate about fostering a community of makers who can share, learn, and grow together.
Education History
- University of Craft and Design – Bachelor of Fine Arts (BFA) in Woodworking and Furniture Design
- Woodworking Apprenticeships – Extensive hands-on training with skilled craftsmen to refine carpentry and furniture making techniques.
- Online Courses & Masterclasses – Continued education in advanced woodworking techniques, design principles, and specialized tools
Expertise:
- DIY woodworking, carpentry, furniture making, and home décor projects.
- Creating accessible tutorials and guides for beginner to advanced woodworkers.
- Sharing the joys and satisfaction of woodworking, from raw materials to finished products.