Using a wood lathe opens up a world of creativity and craftsmanship. This versatile tool, pivotal in the art of woodturning, allows craftsmen to shape wood into beautiful, functional items or artistic pieces. From creating simple wooden bowls to intricate chess pieces, the wood lathe offers endless possibilities for those willing to learn its operation.
This guide on how to use a wood lathe aims to introduce beginners to the basic principles and safety precautions of using a wood lathe, ensuring a solid foundation upon which to build your woodturning skills. Whether you’re aspiring to take up a new hobby or looking to refine your craftsmanship, understanding how to effectively use a wood lathe is the first step on your journey.
What is a Wood Lathe?
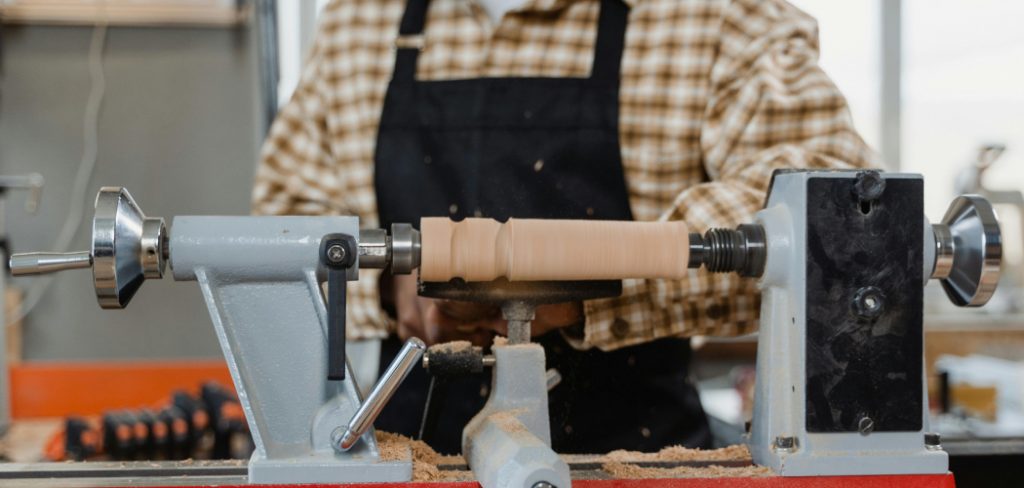
A wood lathe is a machine used to rotate a piece of wood about an axis, while cutting and shaping the wood with tools. The rotation allows the craftsman to create symmetrical shapes and designs in the wood, as well as remove excess material to achieve the desired form.
There are different types of lathes available for various woodworking needs, but the most common is a benchtop lathe. This type of lathe is compact and can be easily placed on a workbench or table. Other types include floor-standing lathes used for larger and more complex projects.
You can find wood lathes in different sizes, with varying maximum capacity and motor power. When choosing a wood lathe, consider the types of projects you plan to work on, as well as your budget and available space.
Why Use a Wood Lathe?
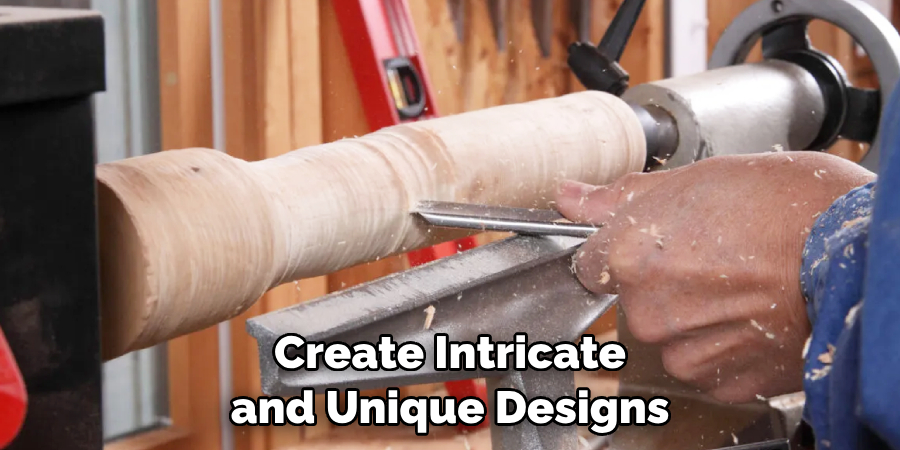
The main advantage of using a wood lathe is the ability to create intricate and unique designs that would be difficult or impossible to achieve with hand tools. The rotation of the wood also allows for more precise and consistent shaping, resulting in professional-looking pieces.
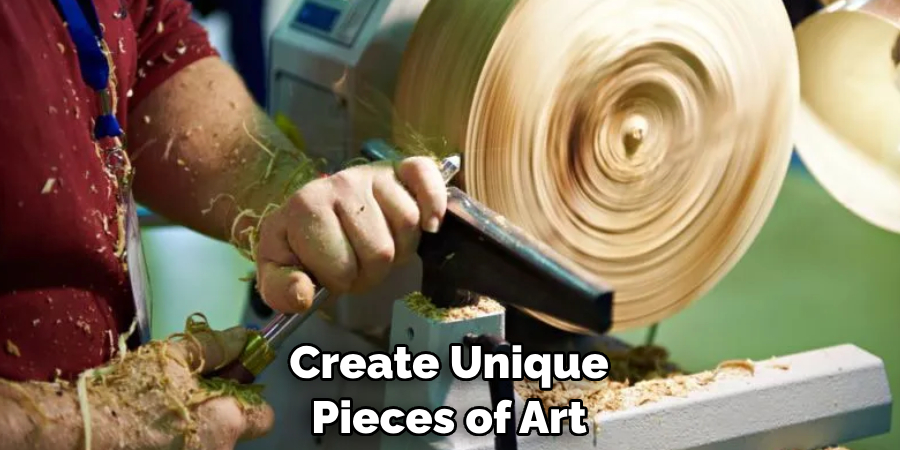
In addition to creating functional items such as bowls, pens, and candlesticks, the wood lathe also offers a creative outlet for artists to express their imagination and create one-of-a-kind pieces.
The repetitive actions involved in woodturning can also provide a meditative and relaxing experience for some individuals, making it a popular hobby for many.
Safety First
Before beginning any project on a wood lathe, it’s crucial to prioritize safety to prevent accidents and injuries. Working with a wood lathe involves rotating machinery and sharp tools, which can be dangerous without proper precautions. Here are essential safety tips to follow:
Wear Proper Safety Gear:
Always wear safety glasses or goggles to protect your eyes from flying debris. Use a face shield for additional protection, especially when working on projects that may produce larger chips or pieces of wood.
Check the Lathe Before Use:
Inspect the lathe for any damage or loose parts before turning it on. Ensure that all locking mechanisms are tight and that the tool rest is securely in place.
Use Sharp Tools:
Dull tools can be unsafe as they require more force to cut the wood, increasing the risk of slipping. Keep your tools sharp for safer and more efficient woodturning.
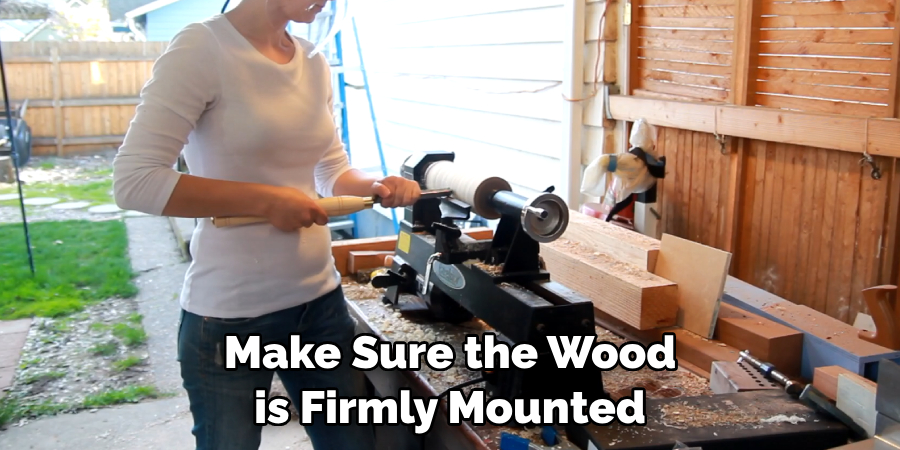
Secure the Workpiece:
Make sure the wood is firmly mounted and centered on the lathe. A loose workpiece can become a dangerous projectile.
Keep Your Workspace Clean:
Remove any obstacles or debris from around the lathe to prevent tripping or interference with your work.
Don’t Overreach:
Keep a balanced stance and do not overextend yourself while working. Overreaching can lead to loss of control and accidents.
Turn Off the Lathe Before Adjusting:
Always turn off the machine and wait for it to come to a complete stop before making adjustments or changing the tool setup.
By adhering to these safety practices, woodturners can enjoy their craft with confidence, knowing they have taken the necessary steps to work safely.
Needed Materials
To start using a wood lathe, you will need the following materials:
Wood Lathe:
As mentioned earlier, there are various types and sizes of lathes available. It’s best to invest in a high-quality lathe that suits your needs and budget.
Wood:
Choose a sturdy, solid wood such as maple, oak or cherry for your first projects. Avoid using knotty or weak woods that may cause issues while turning.
Lathe Tools:
There are a variety of tools used for woodturning, such as gouges, scrapers, and chisels. Start with a basic set and add more specialized tools as you progress in your craft.
Safety Equipment:
Safety glasses, a face shield, and a dust mask are essential to protect yourself while working on the lathe.

9 Step-by-step Guidelines on How to Use a Wood Lathe
Step 1: Familiarize Yourself with the Lathe Parts
Before using a wood lathe, it’s essential to understand its different parts and their functions. The main components of a wood lathe include:
Headstock:
This is the motorized end of the lathe that drives the rotation of the workpiece.
Tailstock:
The tailstock provides support for long pieces of wood and can be adjusted along the lathe bed to accommodate different lengths.
Tool Rest:
The tool rest is a metal bar that attaches to the lathe and supports the tools as they cut into the wood.
Banjo:
The banjo is a metal component that holds the tool rest and can be adjusted along the lathe bed to change its position relative to the workpiece.
Spindle:
This is where you mount your workpiece for turning. It rotates on an axis driven by the headstock.
Bed: The bed is the horizontal metal base that supports the lathe components.
Step 2: Prepare Your Wood and Tools
Begin by selecting a suitable type of wood for your project. Softwoods like pine are easier to work with, while hardwoods such as maple or oak require more skill and experience.
Next, gather your tools, making sure they are sharp and in good condition. Essential tools for woodturning include gouges, scrapers, parting tools, and chisels.
The type of tools you will need for a project depends on the desired shape and design, as well as personal preference. Experiment with different tools to find what works best for you.

Step 3: Mount Your Workpiece
Place your chosen wood on the lathe’s spindle and secure it using a faceplate or spur center. The faceplate attaches to the front of the wood, while the spur center inserts into a pre-drilled hole in the wood’s end.
Ensure that your workpiece is securely mounted and centered on the lathe to prevent accidents or vibration during turning.
Step 4: Adjust the Tool Rest
After mounting your workpiece securely, the next step is to adjust the tool rest. Position the tool rest as close to the workpiece as possible without it actually touching. The ideal distance is about a quarter inch (or around 6mm) from the workpiece. This proximity reduces the risk of your turning tools catching on the wood and allows for better control and precision. Also, ensure that the tool rest is set to a height where the cutting edge of your tool is at the midpoint of your workpiece when held securely against the rest.
This setup not only maximizes stability during turning but also ensures an even and consistent removal of material. Remember, as you work and the diameter of your project decreases, you may need to stop the lathe and readjust the tool rest closer to maintain optimal safety and control.
Step 5: Turn on the Lathe
Once your workpiece is securely mounted and the tool rest adjusted, it’s time to turn on the lathe. Begin by ensuring that the lathe is set to the lowest speed setting. This is important for both safety and control, especially when starting a new project. Turning the lathe on at a low speed helps you gauge the balance of your workpiece and allows you to make any necessary adjustments before increasing the speed.
After checking that your workspace is clear and you’re wearing the appropriate safety equipment, locate the power switch on your lathe. Turn the switch on, and the lathe will start rotating your workpiece. Observe the wood as it spins, looking for any signs of imbalance or wobble. If everything appears stable, you can gradually increase the speed of the lathe according to the requirements of your project and the type of wood you’re working with.
Step 6: Begin Turning
With the lathe spinning at an appropriate speed, you can now begin turning your wood. Hold your tool firmly and securely against the tool rest with one hand while using the other to guide it across the rotating workpiece. Keep in mind that you should always be cut on the downward side of your tool; this means that if you are turning in a clockwise direction, you should cut on the left side of your tool, and if you’re turning counterclockwise, you should cut on the right side.
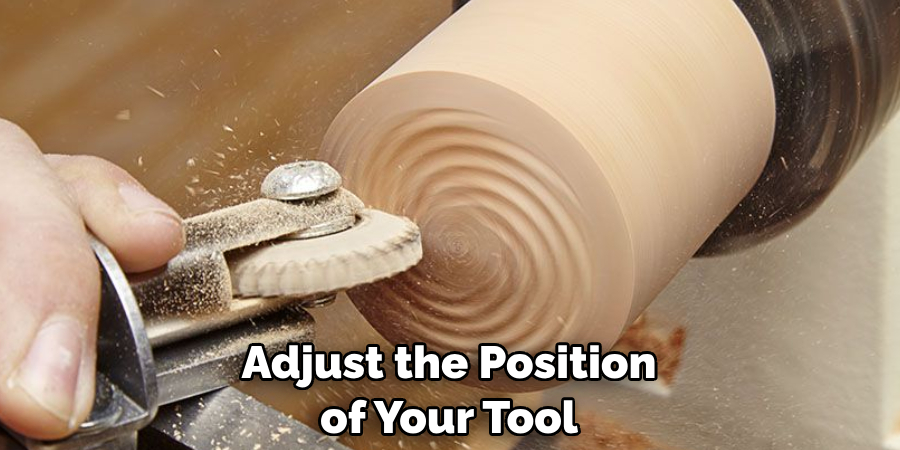
This technique ensures maximum control and precision while minimizing the risk of catching or gouging the wood. You can also adjust the position of your tool rest as needed to maintain optimal cutting angles and reduce the amount of material being removed at one time.
Step 7: Use Appropriate Cutting Techniques
The success of your woodturning project greatly depends on using the right cutting techniques. Begin with roughing out the shape of your project using a roughing gouge, which removes large amounts of material quickly. Hold the tool firmly and present its bevel to the workpiece, allowing the cutting edge to engage the wood gently. It’s crucial to move the tool across the wood smoothly and steadily, keeping constant control.
For finer shaping and detail work, switch to a spindle gouge or skew chisel. These tools allow for more precision and can create intricate patterns or shapes. When using these tools, approach the workpiece at a slight angle and use light, controlled passes to shape the wood. Remember, patience and a gentle hand are key to achieving the best results.
Step 8: Sand and Finish
Once you have achieved your desired shape and design, it’s time to finish the wood. Switch off the lathe and remove your workpiece from the spindle. Use sandpaper or a sanding tool to smooth out any rough spots or imperfections on the surface of the wood. You can also use different grits of sandpaper to achieve different levels of smoothness.
After sanding, you can apply a finish of your choice to protect and enhance the natural beauty of the wood. Common finishes for woodturning projects include wax, oil, or lacquer. Apply the finish in thin, even coats and allow it to dry completely before adding additional layers if desired.
Step 9: Practice Makes Perfect
Woodturning is a skill that takes time, practice, and patience to master. Don’t be discouraged if your first few projects don’t turn out exactly as you envisioned. Be open to learning from mistakes and continue practicing different techniques and designs. With determination and persistence, you will soon become a proficient woodturner!
Following these steps on how to use a wood lathe and safety measures, you can safely and successfully turn your own wooden projects on a lathe. Remember to always prioritize safety, use the appropriate tools and techniques, and have fun exploring the endless possibilities of woodturning. Happy turning!
Additional Tips for Woodturning
- Always wear appropriate safety gear when working with a lathe, including safety glasses or goggles, a face shield, and ear protection.
- Keep your tools sharp and properly maintained for optimal results.
- Experiment with different types of wood to see how each one responds to turning techniques and finishes.
- Don’t be afraid to ask for advice or guidance from experienced woodturners. They can offer valuable tips and tricks that will improve your skills.
- Remember to take breaks and rest your hands and arms to prevent fatigue or strain while turning. Keep a first aid kit nearby in case of any accidents or injuries.
- Lastly, don’t forget to have fun and be creative with your woodturning projects! It’s a rewarding hobby that allows you to express yourself and create unique pieces of art. Enjoy the process and don’t be afraid to try new things. Happy turning!
With these additional tips and techniques in mind, you can continue to explore and expand your skills as a woodturner. Whether you’re a beginner or an experienced woodworker, there is always something new to learn and discover when working with a lathe. Keep practicing and honing your craft, and soon, you’ll be creating beautiful turned pieces that you can be proud of!
Frequently Asked Questions
Q: Is It Necessary to Use Sandpaper on a Turned Wood Piece?
A: Yes, sanding is an essential step in the woodturning process. It helps smooth out any imperfections or rough spots and prepares the wood for finishing. You can achieve different levels of smoothness by using various grits of sandpaper.
Q: How Do I Know When to Increase the Speed on My Lathe?
A: You should increase the speed gradually as you become more comfortable and confident with the balance of your workpiece. It’s also essential to consider the type of wood you’re working with and the requirements of your project before increasing speed.
Q: What Types of Projects Can I Create Using a Wood Lathe?
A: The possibilities are endless! Some common projects include bowls, vases, pens, candle holders, and decorative objects. With practice and experimentation, you can create unique and intricate designs on a lathe. Always ensure that your wood is properly secured before turning to avoid accidents or injuries.
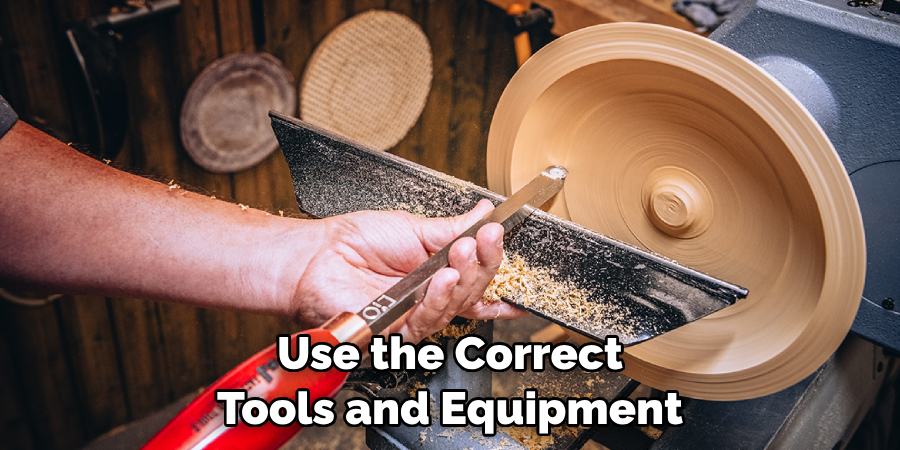
Q: Can I Use a Wood Lathe for Metalworking Projects?
A: No, it’s not recommended to use a wood lathe for metalworking as it can damage the machine and be dangerous. It’s important to use the correct tools and equipment for each type of material to ensure safety and optimal results. If you’re interested in metalworking, consider investing in a metal lathe specifically designed for that purpose.
Q: Can Children Use a Wood Lathe?
A: No, wood lathes are not safe for children to use. They require proper training, experience, and safety precautions to operate safely. It’s important to keep children away from the lathe while it is in use to avoid accidents or injuries. Always supervise any minors in the vicinity of a wood lathe and teach them about the potential dangers associated with using one.
Conclusion
Woodturning is a remarkably rewarding hobby that blends creativity with craftsmanship. Embarking on your woodturning journey requires understanding the basics of using a lathe, selecting appropriate tools, and applying proper techniques with patience and care. Safety should always be your top priority, followed by practice and continuous learning. Remember, every master woodturner started as a beginner, and with each project, your skills will improve.
By following the steps outlined in this guide on how to use a wood lathe, you equip yourself with the knowledge needed to begin crafting beautiful, unique pieces. Whether you are turning a simple pen or an intricate bowl, the joy of woodturning comes from the process of creation and the satisfaction of seeing your vision take shape. Keep pushing the boundaries of your creativity, and most importantly, enjoy the journey. Happy turning!
About the Author
Adrian Green, a lifelong woodworking enthusiast, shares his passion for the craft through The Woodenify Blog. With a foundation built on years of hands-on experience in his father’s woodworking shop, Adrian is dedicated to helping others learn and grow in the world of DIY woodworking. His approach to woodworking combines creativity, practicality, and a deep appreciation for the art of building with your own hands. Through his blog, he inspires individuals of all skill levels to embark on their own woodworking journeys, creating beautiful, functional pieces of furniture and décor.
Professional Focus
- Specializes in DIY woodworking projects, from furniture to home décor.
- Provides step-by-step guides and practical tutorials for woodworkers of all skill levels.
- Dedicated to helping readers build confidence and skill through easy-to-follow instructions and tips.
- Passionate about fostering a community of makers who can share, learn, and grow together.
Education History
- University of Craft and Design – Bachelor of Fine Arts (BFA) in Woodworking and Furniture Design
- Woodworking Apprenticeships – Extensive hands-on training with skilled craftsmen to refine carpentry and furniture making techniques.
- Online Courses & Masterclasses – Continued education in advanced woodworking techniques, design principles, and specialized tools
Expertise:
- DIY woodworking, carpentry, furniture making, and home décor projects.
- Creating accessible tutorials and guides for beginner to advanced woodworkers.
- Sharing the joys and satisfaction of woodworking, from raw materials to finished products.