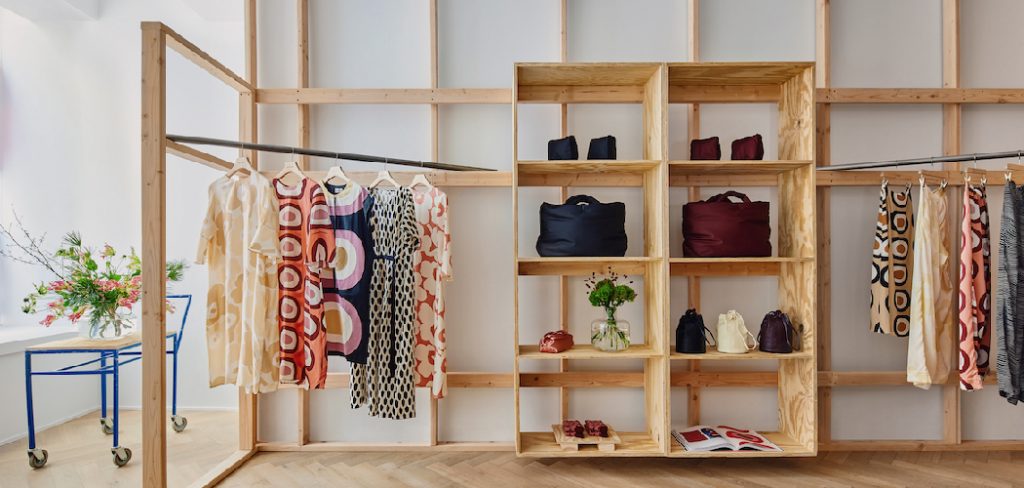
A built-in closet offers many benefits, including unparalleled customization, optimal space efficiency, and enhanced aesthetics that can elevate any room’s appearance. Tailoring your closet to fit your specific needs allows for a bespoke storage solution that maximizes the available space, ensuring everything has its place.
Building a built-in closet involves several key steps, starting with careful planning and design, selecting the right materials and tools, and ultimately constructing the frame and installing shelves and rods. This article serves as a comprehensive guide on how to build a built in closet, equipping you with the knowledge and skills needed to create a functional and visually appealing storage solution tailored to your lifestyle.
Planning and Design
Assessing Space and Needs
Before embarking on your journey to build a built-in closet, it is crucial to assess the available space meticulously. Start by measuring the area where the closet will be installed, ensuring to note any architectural features, such as windows or doors, that might impact your design. Once you clearly understand the dimensions, determine your specific storage needs.
Consider how much hanging space you require for clothing, the number of shelves for folded items, and any drawers essential for accessories or smaller items. Additionally, think about including features such as built-in lighting to improve visibility or accessories like hooks or baskets for added organization. You set a solid foundation for an effective closet design by thoughtfully evaluating your space and needs.
Designing the Layout
Once you’ve gathered your measurements and identified your storage requirements, the next step is to design the layout of your closet. Begin by sketching a basic plan that incorporates shelving, hanging rods, and any additional elements you wish to include. This blueprint will guide you in arranging items for optimal accessibility and ease of use, allowing you to reach your belongings without hassle. Be mindful of the heights of your hanging rods and shelves to accommodate different clothing types and sizes. Furthermore, choose a design style that complements the decor of the room where your closet will be installed, whether it’s modern, traditional, or something in between. A cohesive design will enhance the overall appeal of your space.

Materials and Tools
Materials
When building a built-in closet, selecting the right materials is essential for both durability and aesthetics. Common materials include various types of wood such as plywood, MDF (medium-density fiberboard), and solid wood, which provide a sturdy foundation for your structure. Additional components include screws for assembly, brackets for shelf support, and closet rods for hanging garments. For enhanced organization, consider using storage bins to neatly store smaller items. Optional materials like decorative trim can elevate the visual appeal of your closet, while paint or stain allows for customization to match your interior decor.
Tools
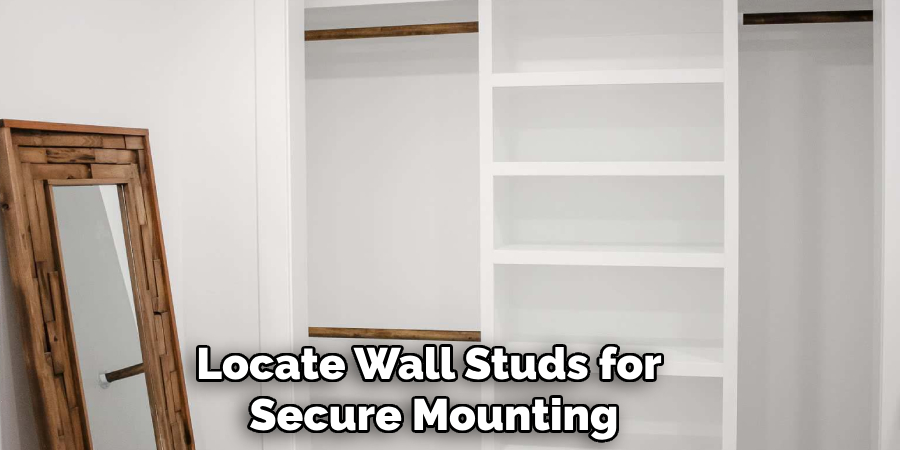
Having the right tools on hand is crucial for a smooth building process. Essential tools you will need include a tape measure for accurate dimensions, a saw for cutting wood to size, and a drill for creating holes for screws and fixtures. A level ensures that all elements of your closet are perfectly aligned, while a screwdriver simplifies the installation of screws. Clamps can be useful for holding pieces in place while assembling, and a stud finder helps locate wall studs for secure mounting. Lastly, sandpaper and a paintbrush or roller are important for finishing touches, ensuring a polished look to your completed closet.
Preparing the Space
Clearing and Measuring
Clearing the area before you begin building your built-in closet is a vital first step. Remove any existing fixtures, furniture, or items that may obstruct your work. This will provide you with a clean slate and facilitate the measuring process. Once the space is clear, take accurate measurements of the height, width, and depth where the closet will be installed. Be sure to note any architectural features that could impact your design, like electrical outlets or baseboards. These measurements are crucial to ensure your built-in closet will fit correctly and function effectively, maximizing the use of every square inch.
Prepping the Wall
After measuring the space, it’s essential to prep the wall on which your closet will be built. Begin by checking for any wall imperfections, such as cracks, holes, or uneven surfaces, and repair them as needed. A smooth, even surface is critical for the stability of your closet. Next, use a level to confirm that the wall is straight and free of obstacles that may interfere with your installation. Using shims or other tools to create a flat surface if the wall isn’t level. Taking the time to properly prepare the wall will ensure a successful and visually appealing build.
How to Build a Built in Closet: Building the Frame
Constructing the Base and Side Panels
To begin constructing the frame of your built-in closet, start by cutting the base and side panels to the desired dimensions using your chosen wood material. Ensure the cuts are precise, as accuracy is crucial for the overall stability and appearance of the closet. Assemble the base by placing the side panels vertically and attaching them securely to the base panel with screws, making sure to pre-drill the holes to prevent splitting the wood.

After assembling the base, check that it is level by using a level tool; this step is essential as an uneven base can affect the alignment of the entire closet. Secure the base to the floor using screws placed into the framing below or wall studs if applicable, ensuring it can bear the weight of the items you plan to store.
Adding the Top Panel and Dividers
With the base and side panels securely in place, cut a top panel to match the width of the side panels. Attach the top panel to the frame, ensuring it is level with the sides for a polished and consistent look. Once the top is attached, assess your layout for additional dividers or panels to create organized storage compartments. These dividers can be cut from the same material and mounted vertically inside the framework, allowing for various shelf heights tailored to accommodate different types of clothing and accessories.
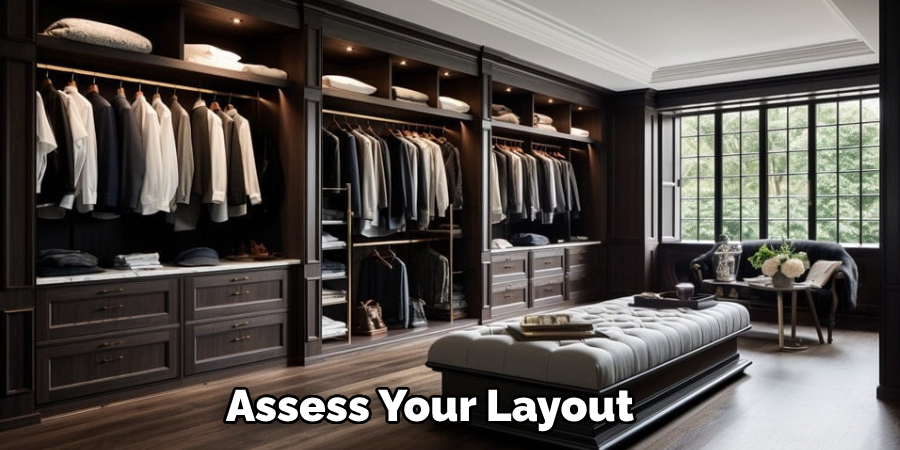
If you prefer a more modular storage system, consider leaving some sections open or adjustable. Use brackets or shelf pins to support shelving where necessary, enabling easy modifications in the future. Ensuring all panels and dividers are securely attached will contribute to the durability of your closet, giving it a sturdy and finished appearance ready for personalization and embellishments.
Installing Shelving and Rods
Mounting Shelves
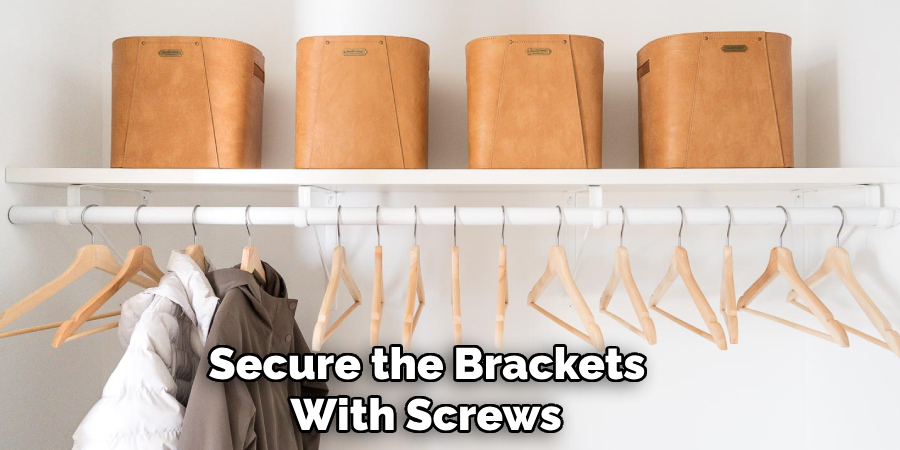
After constructing the frame, it’s time to install the shelves according to your design layout. Begin by measuring the desired height for each shelf, considering the types of items you plan to store. Use a level to mark the positions on the side panels, ensuring the shelves will be parallel and visually appealing once you’ve marked the positions, pre-drill holes where you’ll place brackets to avoid splitting the wood. Secure the brackets in place using screws, ensuring they are firmly anchored into the frame. Then, carefully place the shelves onto the brackets, double-checking that they are level before tightening the screws completely. If your design includes adjustable shelving, use shelf pins to allow for flexible arrangements, making it easy to adapt to changing storage needs.
Installing Hanging Rods
Next, focus on installing the hanging rods, providing space for garments. Determine the appropriate height for the rods, typically around 60 to 72 inches from the floor, depending on the length of the clothing items you’ll be hanging. Mark the locations for your hanging rods on the side panels, ensuring they are level and positioned to allow for easy access. Once marked, install the supporting brackets and pre-drilling holes as before to maintain the integrity of the wood.
Secure the brackets with screws, checking that they are tightly fastened to withstand the weight of the clothing. Next, slide the hanging rods into the brackets, ensuring they are evenly positioned and secure. It’s essential to test the stability of the rods by gently pulling them down to confirm their weight-bearing capacity, guaranteeing that your built-in closet will accommodate your wardrobe effectively.
How to Build a Built in Closet: Finishing Touches
Once your built-in closet frame and shelves are secure, it’s time to focus on the finishing touches that will enhance both functionality and aesthetics.
Painting or Staining
Begin by preparing the surfaces for painting or staining. Ensure all surfaces are clean and free of dust or debris, then lightly sand any rough edges to create a smooth finish. If you’re staining, consider applying a wood conditioner first to achieve an even tone. For painting, use painter’s tape to mask off areas that you don’t want to paint. Apply your chosen paint or stain evenly using a brush or roller, ensuring you follow the wood grain for a more natural look. Allow sufficient drying time as the manufacturer recommends before applying a second coat if needed for full coverage. Properly finishing the surfaces not only enhances the closet’s appearance but also provides added protection against wear and tear.
Adding Trim and Hardware
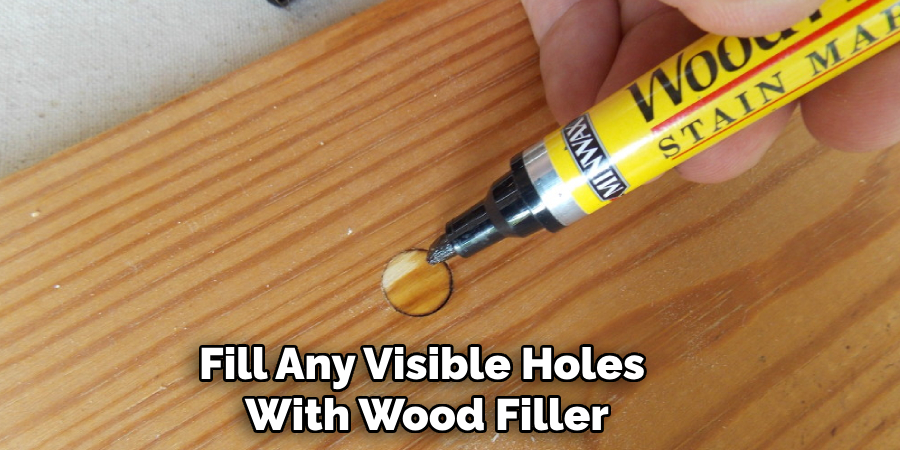
Install decorative trim around the edges to give your built-in closet a polished look. This could be simple crown moulding at the top or baseboard trim along the bottom to create a seamless look with your walls. Measure and cut the trim pieces accurately, securing them with finishing nails or adhesive, and fill any visible holes with wood filler for a clean finish. Next, add hardware such as handles or drawer pulls to any drawers or cabinets within the closet. Choose hardware that complements the overall design theme and provides ease of use. Ensure that all hardware is securely installed and aligned properly, adding functionality and a touch of style to your newly built closet.
Installing Lighting and Accessories
Adding Built-In Lighting
Consider incorporating built-in lighting to enhance the visibility and functionality of your built-in closet. Choose lighting options such as recessed lights for a sleek, unobtrusive look or LED strips along shelves for an illuminating effect. When positioning the fixtures, ensure they’re strategically placed to brighten hard-to-reach corners and evenly light the entire space.
Installing the lighting fixtures involves careful wiring planning, which should comply with local electrical codes. If you’re not familiar with electrical work, consulting a professional can ensure safety and correctness. Proper lighting transforms the closet into a more user-friendly area, making it easier to find items.
Incorporating Accessories
Accessories play a crucial role in maximizing the organization within your closet. Consider adding features like baskets, bins, or drawer organizers that can help keep everything in place while complementing the overall design. Choose accessories made of materials and colors that align with your closet’s aesthetic, such as natural wood, metal, or fabric. Incorporating pull-out trays can add convenience for items like scarves or jewelry, while adjustable dividers can create personalized compartments for smaller accessories. Thoughtfully chosen accessories not only enhance the visual appeal of your closet but also improve its functionality, making your daily routine more efficient.
Conclusion
Building a custom built-in closet involves several key steps: constructing the frame, installing shelves and hanging rods, applying finishing touches like paint and trim, and integrating lighting and accessories. Each phase allows for creativity and practicality, ensuring that your closet meets aesthetic preferences and storage requirements. Remember to personalize your space by choosing colors, materials, and accessories that reflect your style, ensuring that your closet is functional and a delight to use. A well-designed and custom-built closet not only maximizes storage but also enhances the overall look of your home, providing a sense of order and harmony. By following this guide on how to build a built in closet, you can create a space that brings joy and efficiency to your daily routine.
About the Author
Adrian Green, a lifelong woodworking enthusiast, shares his passion for the craft through The Woodenify Blog. With a foundation built on years of hands-on experience in his father’s woodworking shop, Adrian is dedicated to helping others learn and grow in the world of DIY woodworking. His approach to woodworking combines creativity, practicality, and a deep appreciation for the art of building with your own hands. Through his blog, he inspires individuals of all skill levels to embark on their own woodworking journeys, creating beautiful, functional pieces of furniture and décor.
Professional Focus
- Specializes in DIY woodworking projects, from furniture to home décor.
- Provides step-by-step guides and practical tutorials for woodworkers of all skill levels.
- Dedicated to helping readers build confidence and skill through easy-to-follow instructions and tips.
- Passionate about fostering a community of makers who can share, learn, and grow together.
Education History
- University of Craft and Design – Bachelor of Fine Arts (BFA) in Woodworking and Furniture Design
- Woodworking Apprenticeships – Extensive hands-on training with skilled craftsmen to refine carpentry and furniture making techniques.
- Online Courses & Masterclasses – Continued education in advanced woodworking techniques, design principles, and specialized tools
Expertise:
- DIY woodworking, carpentry, furniture making, and home décor projects.
- Creating accessible tutorials and guides for beginner to advanced woodworkers.
- Sharing the joys and satisfaction of woodworking, from raw materials to finished products.