Wooden dining tables are beautiful, durable, and timeless pieces of furniture that often serve as the heart of a home. However, through years of daily use, they are prone to wear and tear, including scratches, fading, and stains, which can diminish their appearance.

Rather than discarding a well-loved table, restoration offers an opportunity to bring it back to life, maintaining its charm and functionality. Learning how to restore wooden dining table surfaces can help you save money compared to purchasing a brand-new piece and allows you to preserve its sentimental and historical value.
By addressing imperfections and applying the proper techniques, a well-restored wooden dining table can look as good as new while continuing to serve its purpose for future generations. This guide will provide step-by-step instructions on cleaning, sanding, refinishing, and sealing, ensuring that your table becomes a stunning and durable centerpiece.
Assessing the Table’s Condition
Before beginning the restoration process, it is crucial to thoroughly assess the table’s condition to plan the necessary steps and ensure the best results.
Inspect the Surface
Start by closely examining the table’s surface. Look for scratches, dents, stains, and areas where the finish has worn away. Determine if the damage is only surface-level or if it involves deeper issues that require more extensive repairs. This evaluation will help you understand the level of effort needed to restore the table to its former glory.
Check the Structure
Pay attention to the table’s joints, legs, and support beams. Wiggle each leg gently and inspect for looseness or damage, which may need to be glued or reinforced. Stability is key to ensuring that the table remains functional and safe to use after restoration.
Determine Finish Type
Identify the type of finish currently on the table, whether it is varnish, lacquer, polyurethane, or oil. This is an essential step, as different finishes require specific removal methods. Testing an inconspicuous area can help confirm the finish type if you are uncertain.
Decide if Full or Partial Restoration Is Needed
Decide if your table requires a full-scale restoration or just minor touch-ups. A full restoration involves stripping the old finish, sanding the entire surface, and applying a new finish. A partial restoration may suffice for tables with minimal damage, limited to addressing small imperfections and applying a fresh protective coat.

Gathering Materials and Tools
Before beginning the restoration process, gathering all necessary materials and tools is essential. Proper preparation ensures a smoother workflow and better results.
Cleaning Supplies
Start with cleaning supplies to remove dirt and grime from the surface. You’ll need mild soap, water, microfiber cloths, and a wood cleaner designed for furniture. These items help protect the wood during the cleaning phase and prevent scratching.
Stripping and Sanding Tools
To prepare your table for refinishing, equip yourself with paint or finish stripper, a putty knife to scrape off the old finish, and sandpaper in various grits (80, 120, and 220). A sanding block or orbital sander makes the sanding process more efficient and ensures an even surface.
Repair Supplies
For tables requiring minor repairs, wood filler is essential to fix cracks or holes, and wood glue combined with clamps can resecure loose joints. These repairs restore the table’s structural integrity, setting a solid base for refinishing.
Refinishing Supplies
When it’s time to refinish, you’ll need a wood conditioner, stain in your chosen shade, and application tools like paintbrushes or clean rags. For the topcoat, choose between polyurethane, oil, or wax to provide protection and enhance the finish.
Safety Gear
Lastly, prioritize safety with gloves, a mask, and eye protection to safeguard yourself from harmful chemicals and dust during restoration.
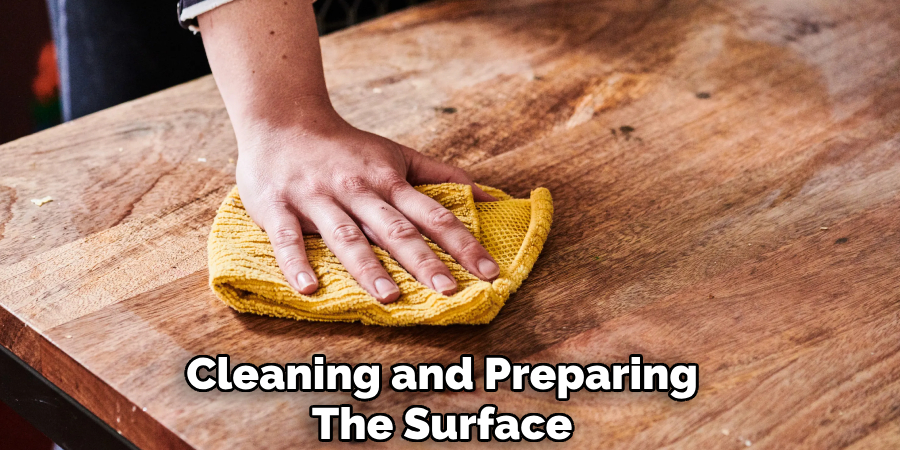
How to Restore Wooden Dining Table: Cleaning and Preparing the Surface
Proper preparation is key to achieving a flawless restoration. Follow these steps to clean and prepare the surface for refinishing:
Step 1: Initial Cleaning
Begin by wiping down the wood surface with mild soap and water. This step helps remove any grease, dirt, or surface grime accumulated over time. Use a soft cloth or sponge to cleanse thoroughly, ensuring you reach into any crevices or detailed carvings. Allow the surface to air dry completely before proceeding.
Step 2: Remove Old Finish (if applicable)
If the wood piece has an existing finish, it’s essential to remove it. Apply a chemical stripper according to the product’s instructions. Spread the stripper evenly across the surface using a paintbrush, allowing it to sit for the recommended time.
Once the finish starts to lift, gently scrape it away using a putty knife, taking care not to damage the wood underneath. Work in small sections for greater control and efficiency.
Step 3: Final Clean Before Sanding
After removing the old finish, wipe the surface with a tack cloth or a damp, lint-free rag to remove any remaining residue or dust. This ensures the wood is clean and ready for sanding. Tip: Double-check that the surface is completely dry before moving to the sanding phase to avoid affecting the wood’s texture.
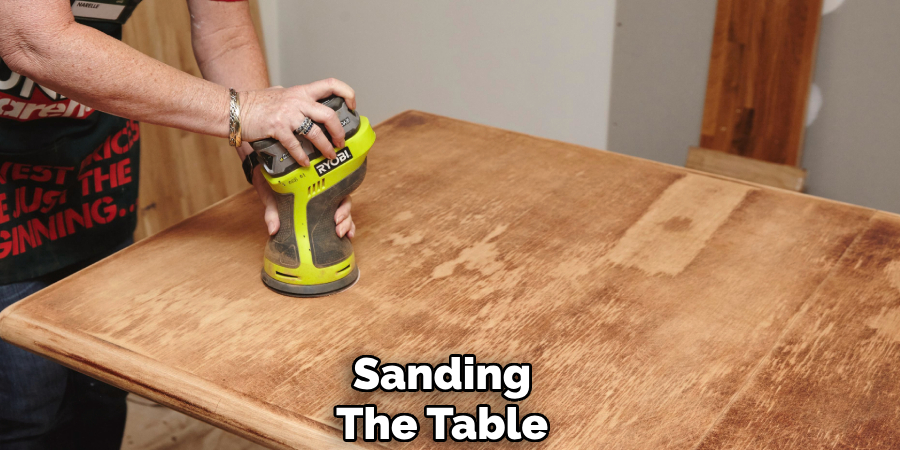
Sanding the Table
Sanding is crucial to preparing the table for a new finish and achieving a smooth, flawless surface. Start with coarse sandpaper to tackle any remaining finish and surface imperfections. Use 80-grit sandpaper to effectively remove the finish and smooth out scratches from stripping. Apply steady, even pressure, and remember to always sand with the grain of the wood to preserve its natural texture and avoid unsightly marks.
Once the initial sanding is complete, move to a medium grit sandpaper, such as 120-grit. This step refines the surface by smoothing out deeper scratches from the coarser sandpaper and further blending any irregularities. Take your time, ensuring an even, consistent result across the entire table.
Finally, finish the sanding process with fine sandpaper, such as 220-grit, to achieve a perfectly smooth surface that’s ready for staining or painting. This level of grittiness will eliminate minor imperfections, leaving the wood silky to the touch. Pay close attention to edges and details to ensure the entire table is impeccably smooth.
Sanding Tips
- Always sand along the direction of the wood grain to avoid scratches that can show through the finish.
- Use a sanding block or an orbital sander to apply even pressure and maintain consistency.
- After completing each round of sanding with a different grit, use a tack cloth to remove all dust and debris. This helps ensure a clean and professional finish.
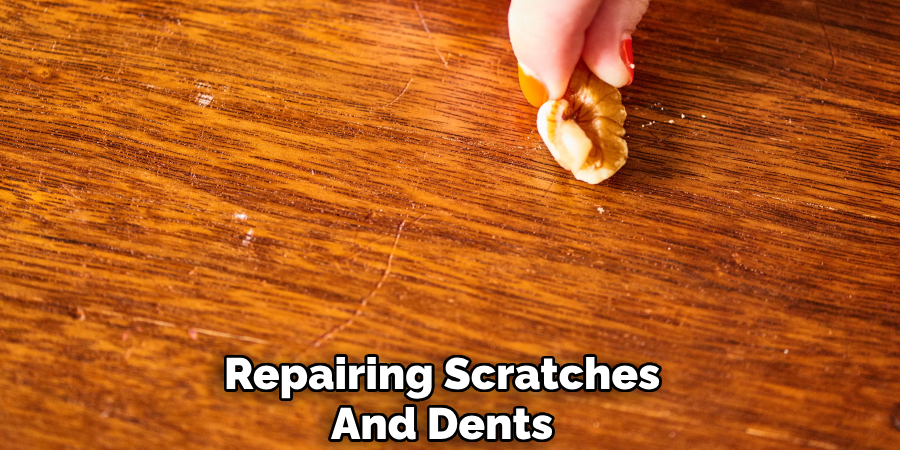
Repairing Scratches and Dents
Over time, wooden furniture can develop scratches, dents, and other imperfections. However, with a few simple techniques, you can restore its surface to look like new.
Fill Cracks and Holes
For filling cracks and holes, use a high-quality wood filler. Apply it with a putty knife, pressing firmly to ensure the filler reaches all gaps. Once the filler has dried completely, smooth the area using fine-grit sandpaper. This will help blend the repaired spot seamlessly with the rest of the surface.
Fix Loose Joints or Legs
Disassemble the affected parts if possible to repair loose joints or wobbly legs. Apply a small amount of wood glue to the connection points, then securely clamp the pieces together while the glue dries. Be sure to remove any excess adhesive promptly to avoid visible residue. Tightening these components will improve both stability and functionality.
Steam Out Small Dents (Optional)
Steaming can be an effective method for removing shallow dents in the wood grain. Dampen a clean cloth and lay it over the dented area. Then, press a warm iron on top for a few seconds at a time, checking progress regularly. The heat and moisture help to raise the compressed fibers, minimizing the appearance of the dent.
Staining and Finishing
Apply Wood Conditioner
Before staining, especially with softwoods like pine, applying a wood conditioner is crucial to ensure an even finish. This step prevents blotchiness by allowing the stain to penetrate the wood grain uniformly. Follow the manufacturer’s instructions for application and drying times.
Choose and Apply Stain
Select a stain that aligns with your project’s desired color and style. Using a brush or cloth, apply the stain in sections, working with the wood grain to ensure a smooth application. Wipe off any excess stain immediately with a clean cloth to avoid uneven absorption. Allow the stained surface to dry completely before applying additional coats, if needed, to achieve the desired depth of color.
Apply Protective Finish
Apply a protective finish to preserve the stained wood and enhance its durability. Choose polyurethane for a long-lasting, durable coat; oil for a warmer, natural appearance; or wax for a softer, matte finish. Apply 2–3 coats of the chosen finish, ensuring light sanding with ultra-fine grit sandpaper (320 or higher) between each coat to remove inconsistencies and refine the surface.
Drying Time
Be patient and allow each coat to dry completely before applying the next to ensure a smooth, professional result. For the final touch, consider buffing the fully dried finish with a soft cloth to achieve a polished sheen, giving your restored woodwork a flawless appearance.
Maintenance Tips for a Long-Lasting Finish
Proper care can significantly extend the life of your woodwork’s finish. Start by using placemats and coasters to protect the surface from stains, moisture rings, and heat marks caused by cups, pots, or dishes. Clean regularly with a soft, damp cloth to remove dust and debris, but avoid using harsh chemicals that can damage the finish. If your woodwork has a wax or oil finish, consider reapplying it every few months to maintain its luster and protection.
For minor scratches or imperfections, touch them up using wood stain pens or wax sticks that match the color of your wood. These proactive measures will help preserve the beauty of your woodwork and keep it looking like new for years to come.
DIY Wooden Dining Table
Creating a DIY wooden dining table is a rewarding project that combines craftsmanship with practicality. Start by choosing durable wood like oak, pine, or maple, ensuring it suits your desired aesthetic and budget. Measure and cut the wood to your preferred table dimensions, sanding the edges for a smooth finish.

Assemble the tabletop using strong adhesives and screws, adding sturdy legs for support. Finish the table by staining or painting it to match your décor, and seal it with a protective coating for longevity. With effort and attention to detail, you can craft a unique centerpiece for your dining space.
Conclusion
Restoring a wooden dining table is a rewarding DIY project that allows you to bring new life to a cherished piece of furniture. By following a step-by-step process and using the right tools, you can achieve impressive results while learning how to restore wooden dining table surfaces effectively.
Whether it’s sanding, refinishing, or applying a protective coating, each step contributes to creating a stunning centerpiece for your dining space. Additionally, regular care and maintenance will ensure your table remains beautiful and durable for years to come, making it a lasting part of your home.
About the Author
Adrian Green, a lifelong woodworking enthusiast, shares his passion for the craft through The Woodenify Blog. With a foundation built on years of hands-on experience in his father’s woodworking shop, Adrian is dedicated to helping others learn and grow in the world of DIY woodworking. His approach to woodworking combines creativity, practicality, and a deep appreciation for the art of building with your own hands. Through his blog, he inspires individuals of all skill levels to embark on their own woodworking journeys, creating beautiful, functional pieces of furniture and décor.
Professional Focus
- Specializes in DIY woodworking projects, from furniture to home décor.
- Provides step-by-step guides and practical tutorials for woodworkers of all skill levels.
- Dedicated to helping readers build confidence and skill through easy-to-follow instructions and tips.
- Passionate about fostering a community of makers who can share, learn, and grow together.
Education History
- University of Craft and Design – Bachelor of Fine Arts (BFA) in Woodworking and Furniture Design
- Woodworking Apprenticeships – Extensive hands-on training with skilled craftsmen to refine carpentry and furniture making techniques.
- Online Courses & Masterclasses – Continued education in advanced woodworking techniques, design principles, and specialized tools
Expertise:
- DIY woodworking, carpentry, furniture making, and home décor projects.
- Creating accessible tutorials and guides for beginner to advanced woodworkers.
- Sharing the joys and satisfaction of woodworking, from raw materials to finished products.