Are you looking to add a personal touch to your home decor? Making wooden letters diy is a fun and easy way to add some character and style to any room.

How to make wooden letters is a fun and rewarding craft project that combines creativity with basic woodworking skills. Whether you’re personalizing home decor, designing unique gifts, or crafting custom signs, wooden letters add a charming, rustic touch to any setting. Additionally, making your wooden letters allows you to choose the font, size, and finish that best suits your style.
This process involves simple materials, tools, and a bit of patience, making it accessible even for beginners. With the proper guidance and techniques, you can turn a plain piece of wood into beautifully crafted letters that reflect your style and creativity.
What Are the Benefits of Making Wooden Letters?
Besides being a fun craft project, making wooden letters has several benefits.
- Customization: One of the most significant advantages of making wooden letters is the ability to customize them according to your preferences and needs. You can choose from various fonts, sizes, and finishes to create unique and personalized pieces that fit perfectly in your home or as gifts for others.
- Cost-Effective: Making wooden letters is also a cost-effective way to decorate your home or give thoughtful gifts without breaking the bank. With just a few basic materials and tools, you can create beautiful pieces that would otherwise cost much more if purchased from a store.
- DIY Satisfaction: A special satisfaction comes with creating something handmade. The sense of accomplishment and pride that comes from seeing your finished wooden letters displayed in your home or gifted to someone else is gratifying.
- Versatility: Wooden letters can be used in a variety of settings and for different purposes, making them incredibly versatile. You can use them to spell out names, create monograms, decorate shelves or walls, and more – endless possibilities!
What Will You Need?
Here are the materials and tools you’ll need to get started with making your wooden letters:
- Wood: You can use any type of wood for this project, such as pine, plywood, or MDF. Make sure the wood is smooth and free of knots or imperfections.
- Jigsaw: This tool will cut out the letters from the wood.
- Sandpaper: To smooth out any rough edges after cutting the letters.
- Drill: A drill will be needed to make holes for hanging or adding embellishments.
- Paint or Stain: Choose your preferred finish for your wooden letters.
- Paintbrushes: For applying paint or stain to the wood.
- Pencil and Ruler: These will come in handy for measuring and drawing the letters on the wood.
Once you have gathered all the necessary materials and tools, you’re ready to begin making your wooden letters.
8 Easy Steps on How to Make Wooden Letters
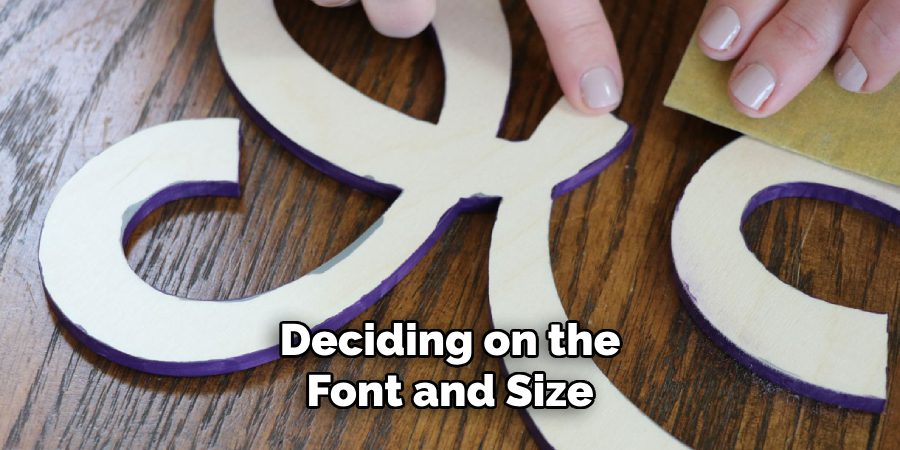
Step 1: Choose and Prepare Your Design
Begin by deciding on the font and size of the letters you want to create. You can either draw the letters freehand or print out
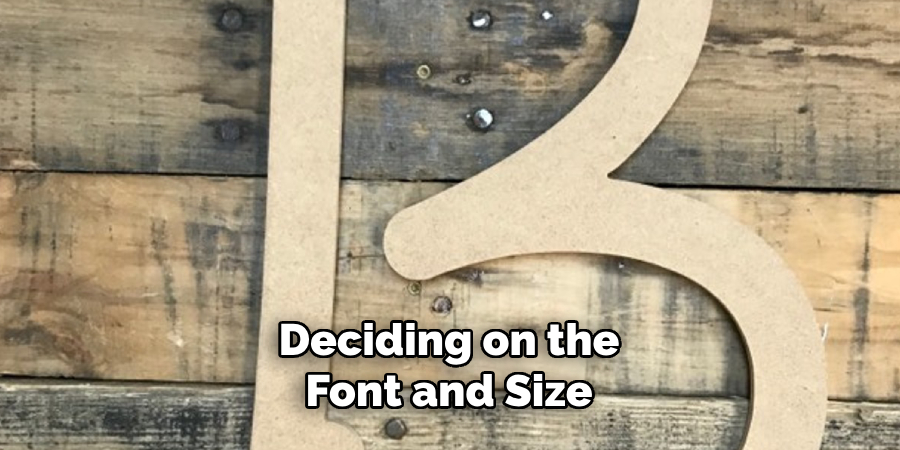
templates to trace onto the wood. Ensure the size fits the wood you have chosen, and use your pencil and ruler to outline the letters on the surface of the wood carefully. Accurate tracing will serve as the foundation for a clean and professional result.
Step 2: Cut Out the Letters
Using the outline you have traced onto the wood, carefully cut out your letters. For this step, a jigsaw or scroll saw works best, as these tools allow for precision and the ability to maneuver around curves and intricate details. Before you start cutting, clamp the wood securely to your work surface to prevent slipping, ensuring both safety and accuracy.
Take your time and follow the lines as closely as possible, as this will affect the final appearance of your letters. If you are new to using these tools, consider practicing on scrap wood first to get a feel for the process. Once all your letters are cut, you can sand the edges with sandpaper or a sanding block to smooth any rough edges, enhancing the overall finished look. Always wear safety goggles and follow proper safety procedures while handling power tools.
Step 3: Paint or Stain the Letters
Once your wooden letters are cut and sanded, it’s time to add color or finish to them. Choose whether you want to paint or stain the letters, depending on the look you’re aiming for. If painting, use a primer first for better adhesion and an even finish. Then, apply your chosen paint color using a small brush for precision, especially around the edges. For a stained look, apply wood stain using a clean
cloth or brush, following the wood grain to enhance its natural texture. Allow the paint or stain to dry completely, following the manufacturer’s recommendations for drying times. If you desire a glossy or protective finish, follow up with a clear sealant or varnish once the paint or stain is dry. This step not only enhances the visual appeal but also helps to preserve the wood.
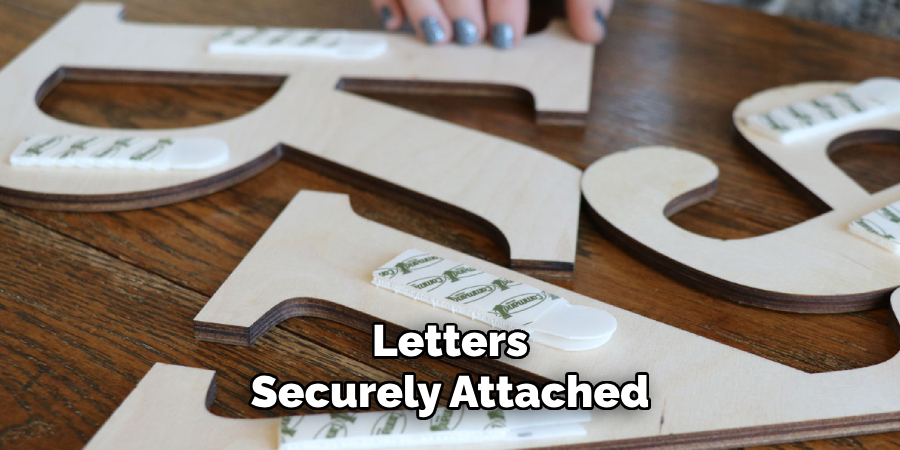
Step 4: Attach the Letters
After the paint or stain has fully dried, it’s time to attach your wooden letters to the desired surface. Decide on the layout and position of each letter beforehand, using a ruler or level to ensure proper alignment. Depending on your project, you can use wood glue, double-sided adhesive tape, or nails for attachment. Wood glue is often the best choice for a sturdy and long-lasting hold
. Apply a small amount of glue to the back of each letter, press it firmly onto the surface, and hold it in place for a few seconds. Allow sufficient time for the adhesive to set completely. For temporary or removable designs, consider using adhesive strips or hooks. Once secured, double-check that all letters are properly aligned and spaced according to your design.
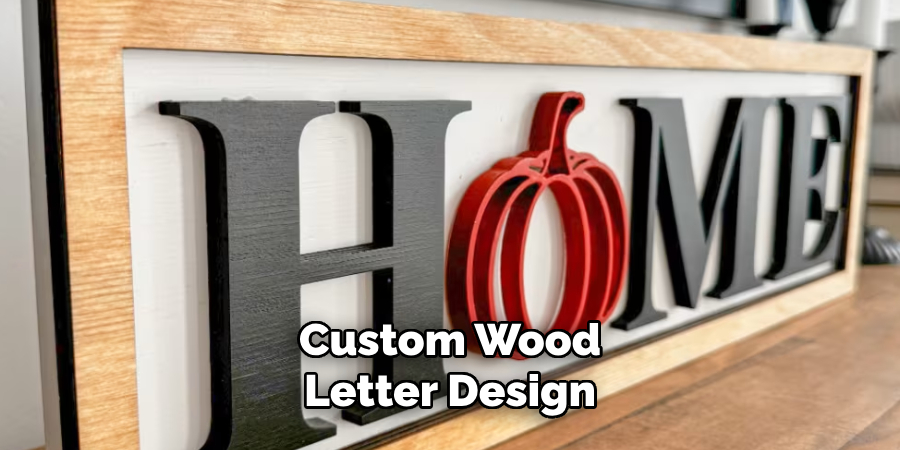
Step 5: Add Final Touches
With the letters securely attached, you can now add any final touches to complete your project. Consider embellishing your design with decorative elements such as floral accents, ribbons, or small ornaments to give it a personalized touch. If you used paint, you
should lightly sand the edges of the letters for a distressed or vintage look. Take a moment to inspect the entire piece, making any necessary adjustments to ensure everything is aligned and securely fixed. Once you’re satisfied with the result, allow the project to cure if any adhesive or additional paint was applied fully. Your custom wood letter design is now complete and ready to display!
Step 6: Display Your Creation
Now that your custom wood letter design is complete, it’s time to display it proudly. Choose a location that complements the style and purpose of your project, such as a mantel, wall, or tabletop. Use appropriate mounting hardware, especially for wall displays, to ensure your piece is secure. Consider placing it on a sturdy surface for freestanding designs to be safely admired. Take pride in your handcrafted creation and enjoy the unique charm it adds to your space!
Step 7: Share Your Creation
Consider sharing your work with others once your custom wood letter design is beautifully displayed. Take high-quality photos to capture the details and craftsmanship of your project. Share your creation on social media, craft forums, or with friends and family
to inspire others and showcase your talent. You can also use this to describe your process, share tips, or even offer to create similar pieces for others. Sharing your work spreads creativity and celebrates the effort and passion you poured into your project.
Step 8: Maintain and Care for Your Wood Letter Design
To ensure your custom wood letter design remains in excellent condition, it’s essential to practice proper maintenance and care. Dust your piece regularly with a soft, dry cloth to keep it looking clean and vibrant. If your design has a painted or stained finish, avoid using harsh cleaners that could damage the surface. For outdoor displays, consider applying a protective sealant to shield it from weather elements such as rain and sun.
By following these steps, you can create beautiful and professional-looking wooden letters that add a unique and personal touch to any space.
5 Things You Should Avoid
- Using the Wrong Tools: Avoid using inappropriate or dull tools, which can lead to uneven cuts and inaccurate designs. Always ensure you have the correct and properly maintained equipment for the job.
- Skimping on Quality Wood: Low-quality wood can be brittle or imperfect, which may compromise the final product. Opt for wood that is sturdy and suited for carving or crafting.
- Skipping the Sanding Process: Failing to sand can leave the wooden letters rough or full of splinters, diminishing their aesthetic appeal and safety. Always take the time to properly prepare the surface before finishing.
- Neglecting Measurements: Poor or imprecise measurements can lead to disproportionate letters. Always use a ruler or stencil to ensure accuracy in size and proportion.
- Rushing the Finishing Touches: Whether it’s painting, staining, or sealing, rushing this step can result in uneven coverage or a sloppy appearance. Take your time to carefully and evenly apply the finishing touches for a polished result.
Conclusion
How to make wooden letters can be a rewarding and enjoyable project when done with care and attention to detail.
You can achieve a high-quality and visually appealing result by prioritizing proper preparation, selecting quality materials, and taking the time to follow each step meticulously. Avoid common pitfalls, such as neglecting measurements or rushing the finishing process, to ensure your wooden letters are functional and beautiful.
Making wooden letters can become a valuable and satisfying skill with patience and practice.
About the Author
Adrian Green, a lifelong woodworking enthusiast, shares his passion for the craft through The Woodenify Blog. With a foundation built on years of hands-on experience in his father’s woodworking shop, Adrian is dedicated to helping others learn and grow in the world of DIY woodworking. His approach to woodworking combines creativity, practicality, and a deep appreciation for the art of building with your own hands. Through his blog, he inspires individuals of all skill levels to embark on their own woodworking journeys, creating beautiful, functional pieces of furniture and décor.
Professional Focus
- Specializes in DIY woodworking projects, from furniture to home décor.
- Provides step-by-step guides and practical tutorials for woodworkers of all skill levels.
- Dedicated to helping readers build confidence and skill through easy-to-follow instructions and tips.
- Passionate about fostering a community of makers who can share, learn, and grow together.
Education History
- University of Craft and Design – Bachelor of Fine Arts (BFA) in Woodworking and Furniture Design
- Woodworking Apprenticeships – Extensive hands-on training with skilled craftsmen to refine carpentry and furniture making techniques.
- Online Courses & Masterclasses – Continued education in advanced woodworking techniques, design principles, and specialized tools
Expertise:
- DIY woodworking, carpentry, furniture making, and home décor projects.
- Creating accessible tutorials and guides for beginner to advanced woodworkers.
- Sharing the joys and satisfaction of woodworking, from raw materials to finished products.